Lesson 2: Creating a Course Site
Outcomes
By the end of this lesson, you should be able to:
- complete the steps required to set up a new course site in OWL
- replace the default content on the OVERVIEW page of your new course site with your own content
Topics
Requirements
- An active Western Identity and login credentials
- Be listed as the primary Instructor, Grade Admin, or Course Coordinator of a course site
Creating a course site
In this lesson, we will create a course site and get you started with the first steps of using it. We recommend completing Lesson 1, which introduced you to OWL, including how to log in and an overview of OWL's interface.
Note: The following process can be used for creating project sites as well. The creation process for projects sites includes the additional of entering a site title instead of selecting a term and rosters. For the differences between course sites and project sites, please see that topic in Lesson 1.
Create your course site [5 minutes]
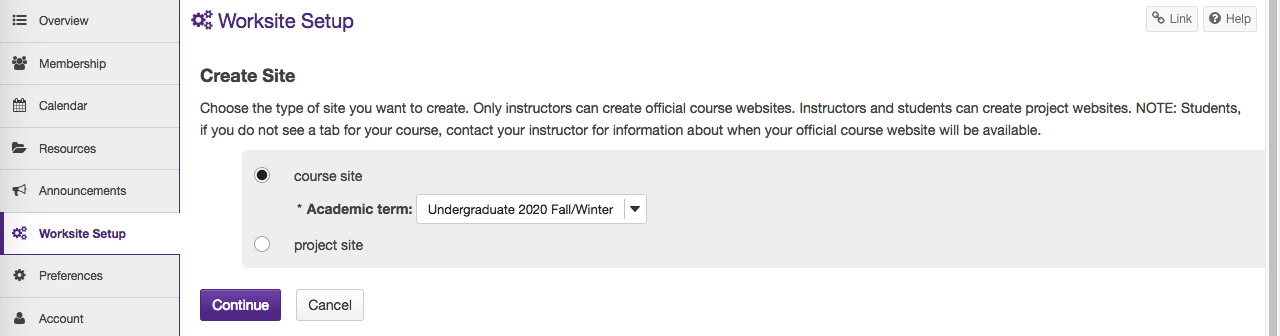
When you're logged into OWL, go to the Home site and click WORKSITE SETUP from the Tools menu on the left side. To create a course site, we'll click the "New" tab at the top.

Select the "course site" option on the next page. A drop-down menu containing academic terms by profession will appear if you are the official instructor (or course coordinator or grade admin) of a course. The most recent term will be listed at the top. If you do not see any terms or do not see the term that you are looking for, please contact your department to ensure you are listed as the primary instructor or course coordinator or grade admin of the course. Select the correct term that you wish to create your course for and click the "Continue" button.
On the next screen, you will see a list of sections. These are the rosters that you are enrolled in as one of those three previously-stated roles: instructor, course coordinator, or grade admin. To create your course site for one of the sections, select the checkbox to the left of the section's name. If you do not see the roster for a particular course section, please check with your department, as you may not be listed as the primary instructor, course coordinator, or grade admin yet.
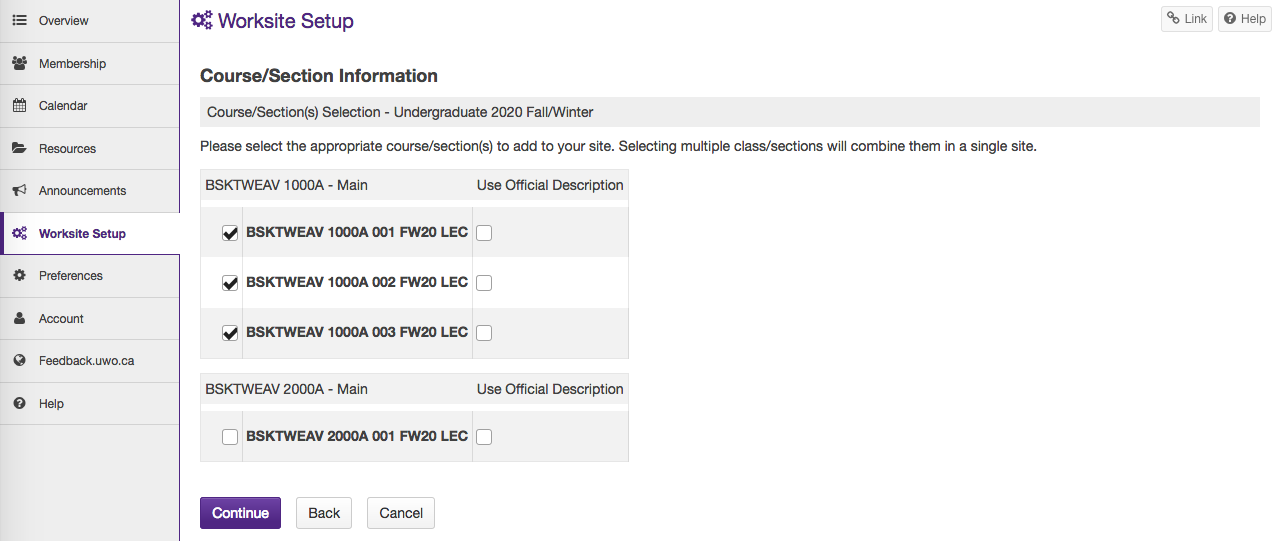
If you wish to create multiple course sites, one for each of your courses or sections, you will repeat the process in today's lesson for each site. If you would like to create a course site containing multiple rosters, you can select multiple sections on this page now and they will be combined into a single course site. You can always add and remove rosters at a later time, but you must select at least one roster at this point. Click the "Continue" button at the bottom to proceed to the next page.
The next page allows you to add a description for your course and adjust the site's contact information. For now, we'll leave this information as default, as we can make changes to it later. Click the "Continue" button at the bottom.
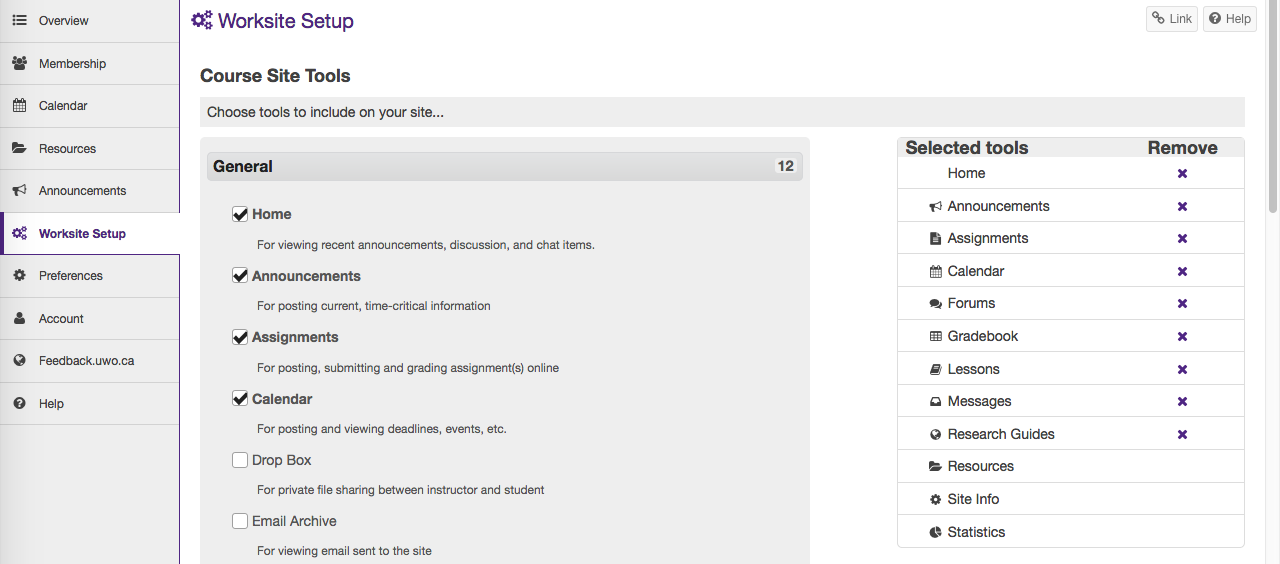
The next page lists the tools that are available to you in OWL. You'll notice that some tools are already selected, such as
- HOME
- ANNOUNCEMENTS
- CALENDAR
- RESEARCH GUIDES
and some tools are required like
- RESOURCES
- SITE INFO
- STATISTICS
For the lessons in this series, we will add
- ASSIGNMENTS
- FORUMS
- GRADEBOOK
- LESSONS
- MESSAGES
by selecting the checkboxes next to these tools. You do not have to select all of the tools at this time as you can add and remove tools later or throughout the term. Click the "Continue" button at the bottom to proceed to the next page.
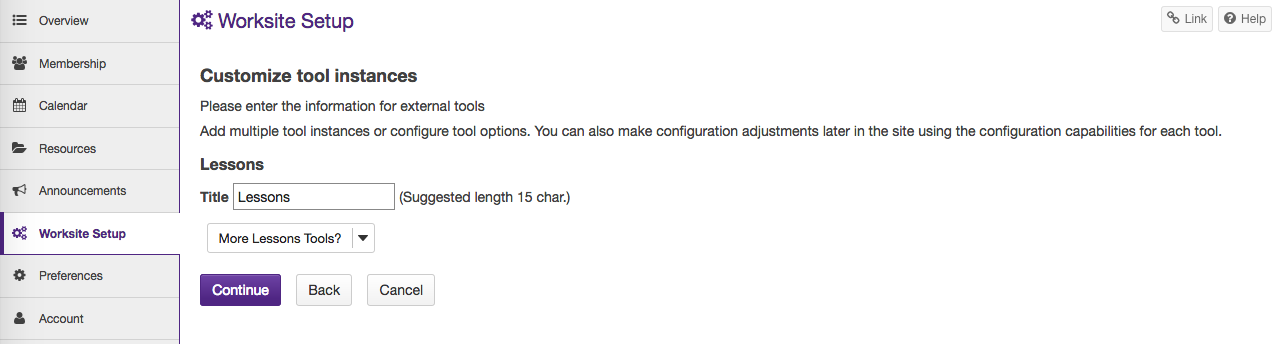
Some tools require a little extra information, like LESSONS, which you can customize the title. We'll leave the default for now. Click the "Continue" button to continue.
The next page allows you to manage the access to your site. By default, your course site is available only to participants who are official members of the roster that you chose in the first step and to any additional participants that you add later. This is the desired setting for most course sites. You could change this option to make the site available for anyone to join, but for course sites, you typically leave it on the default option of the roster.
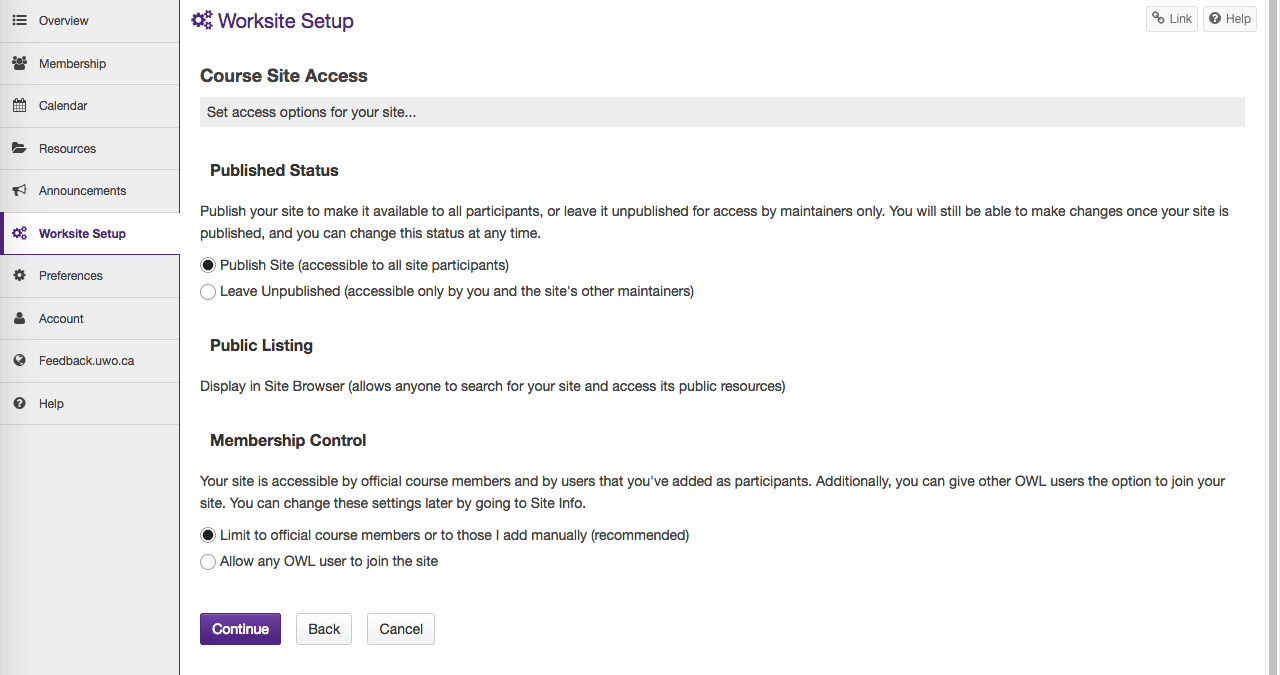
We can also set the site to be unpublished at this time. Unpublished sites are only available to the site maintainers such as the instructor role. Students will not have access to unpublished sites, which allows you time to build the course site and prepare the materials before students access it. We'll change this to unpublished at this time and we will publish the site later when it is ready. Click the "Continue" button at the bottom of the page.
This last page summarizes the options that we have chosen. If you would like to change any of the settings, you can either go back to a previous page or you can adjust them later in the site's settings, which we will cover in a later lesson.
Click the "Create Site" button to create the site. The site will take a few moments to create. When it is created, a banner will appear at the top of page and you can click on the site title to go to that site.
Welcome to your new OWL course site!
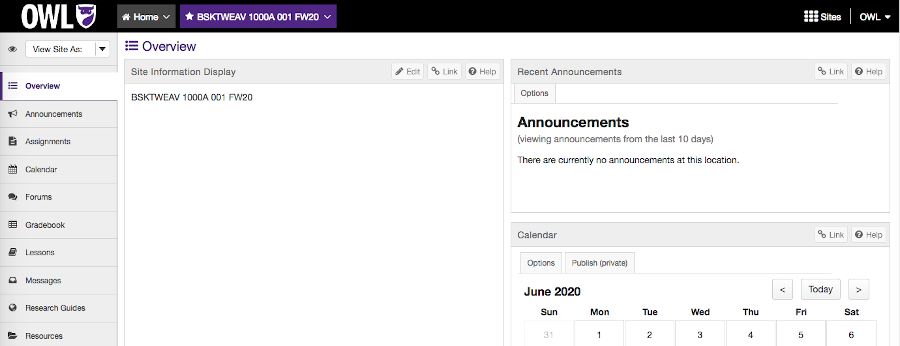
As mentioned in Lesson 1, you can click the star icon next to the site's title to pin this site to the top of your OWL page. Tools appear along the left side of the page in the Tools Menu and content appears in the main content area.
Step-by-step information of this process can be found on OWL Help's Worksite Setup page.
First steps with your new course site
Edit the Overview page [2 minutes]
The first thing to do in your new course site is update the OVERVIEW page.
To edit the OVERVIEW page, click the "Edit" button next to "Site Information Display". Change the wording of "Site Information Display" to "Welcome", for example. Next you can type some information into the Rich Text Editor here, which is found throughout OWL. We recommend a short description of your course, the learning outcomes for the course, and some basic contact information.
Here is sample text that you can use:
Sample Overview Page Text
Welcome to CourseName 1000!
To get started, visit the Course Content tab from the left menu.
For course mark breakdown, required texts, and assessment information, visit the Syllabus from the left menu.
Important dates are found on the Calendar.
Instructor Contact Information
Your Name
your-username@uwo.ca
Office Hours: Day and time or by appointment
I endeavour to reply to messages within 24 hours between Monday and Friday and within 48 hours on Saturday and Sunday. If your question is course-related, post it to our discussion forums.
Course Description
In this course, you'll learn ...
Learning Outcomes
By the end of this course, you will be able to:
- List your course-level learning outcomes
We'll come back to make further changes here in a later lesson. Click the "Update Options" button at bottom to save these changes.
Now your OVERVIEW page should look something like this:

The next lesson describes how to configure your course site's settings.