Worksite Setup
On This Page
Worksite Setup allows you to access your sites, manage any sites that you maintain, and create new sites. If you have a role that allows it, you can use this tool to make changes to information about a site, to the tools available in the site, and to the access permissions of the site.
Create a Site
-
Select Worksite Setup from the Tool Menu in the left sidebar of your OWL Homepage. 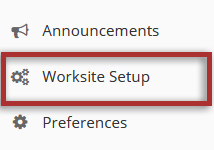
-
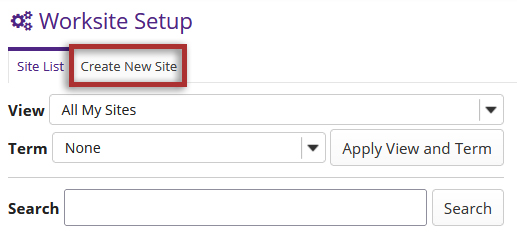
Click Create New Site tab on the top of the page.
-
Select course site.
After selecting this site type, click the Continue button.
-
Select an Academic Term and click the Continue button.
When creating a course site for an official Western course, select the appropriate Academic Term containing the course.
Instructors must be officially enrolled in a course roster in the Office of the Registrar in order to select an academic term and create the course in
OWL . Please consult with your department if the academic term that you are looking for is not listed.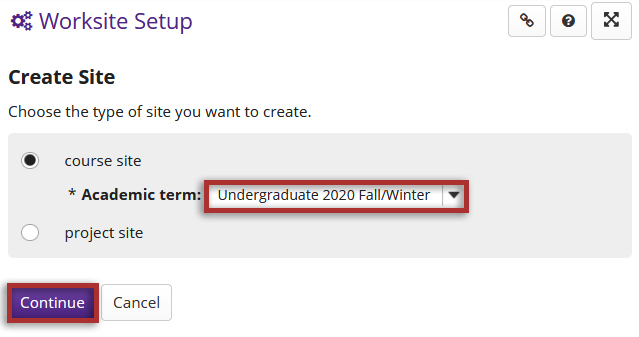
-
Select the course section.
Select the checkbox beside the course section you want to create.
Please consult with your department if the course section that you are looking for is not listed. You may not be listed as the approved instructor of the section for the current term yet.
Note: OWL will automatically detect if a site already exists; if this is the case, it will alert you with a message. If you would still like to proceed with a new site, click the 'Select Anyway' link.
Multiple Sections & Cross-listed Sites
Selecting multiple course sections will combine multiple rosters into one site. Combining multiple sections or course rosters can be helpful if you are teaching a course with multiple labs, tutorials, or a cross-listed course and intend to teach them from the same shared course site.

-
Click the Continue button.

-
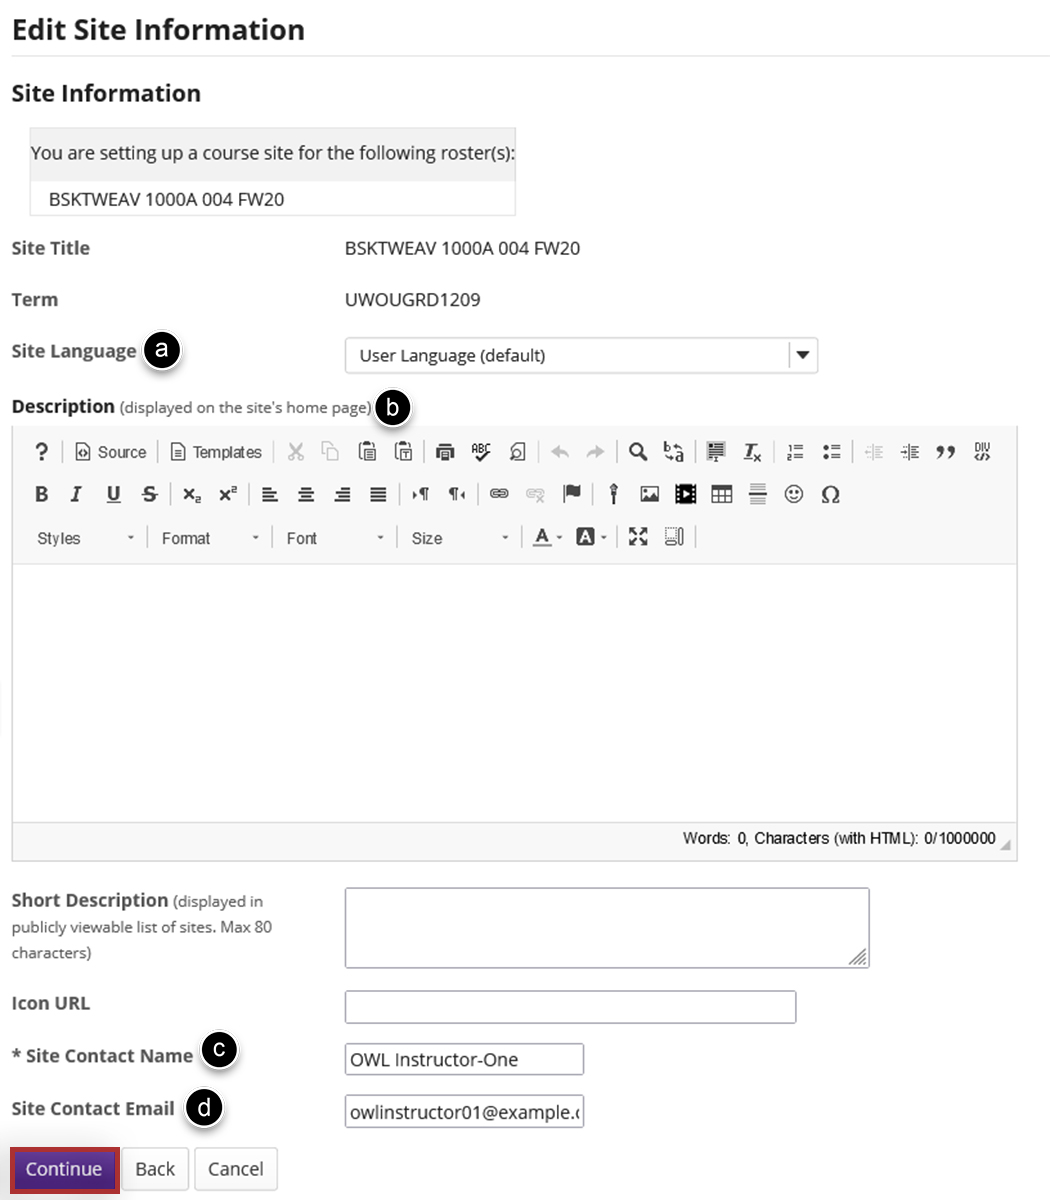
Enter site information and click Continue.
-
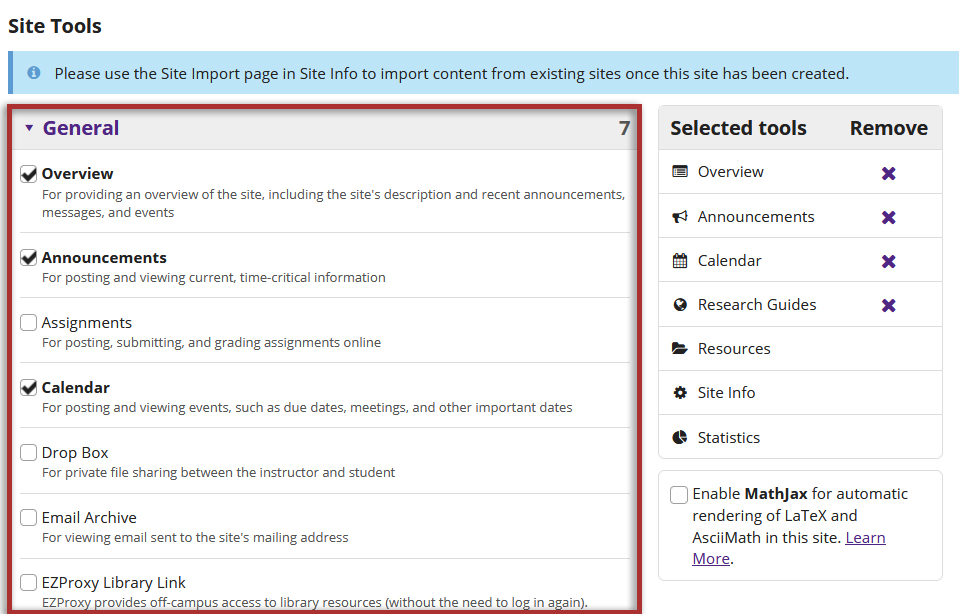
Select tools to include in your site.
Some tools will prompt you for additional information or further customization on the next page.
Note: You can adjust the Tools List for your site later through Site Info.
For more information about the available tools, please see OWL Tools.
-
Click the Continue button.

-
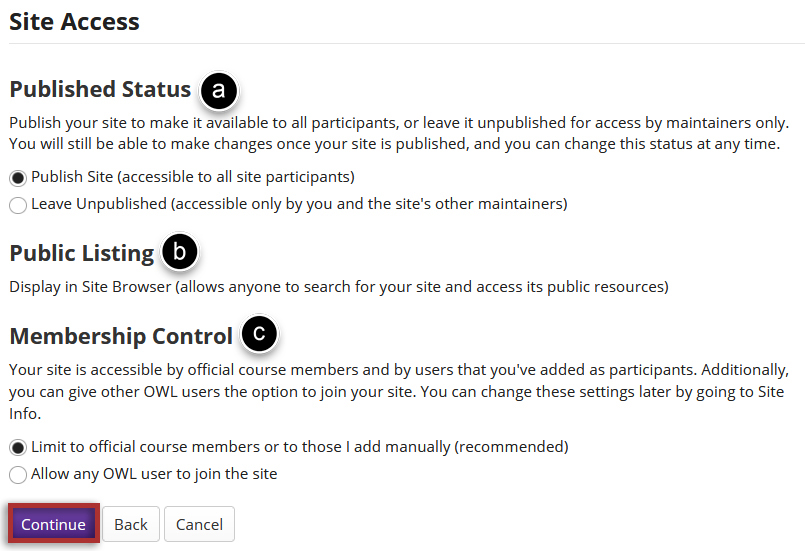
Set site access and click Continue.
-
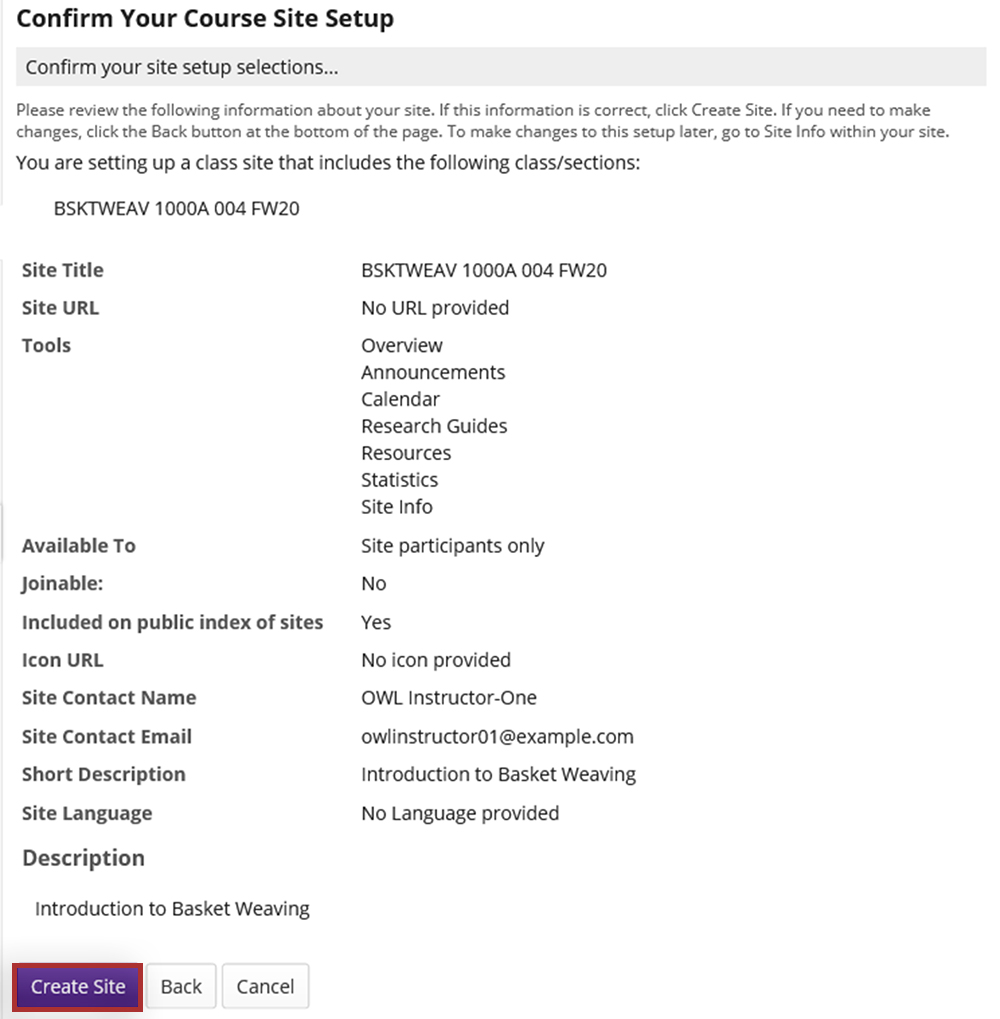
Review and confirm site setup.
If you need to make revisions to your site setup, click the Back button to visit the previous pages.
Click the Create Site button to finish creating your site.
Edit a Site
Many of the functions of the Worksite Setup tool mirror those of the Site Info tool; Worksite Setup is available through Home, whereas Site Info is available in each site.
-
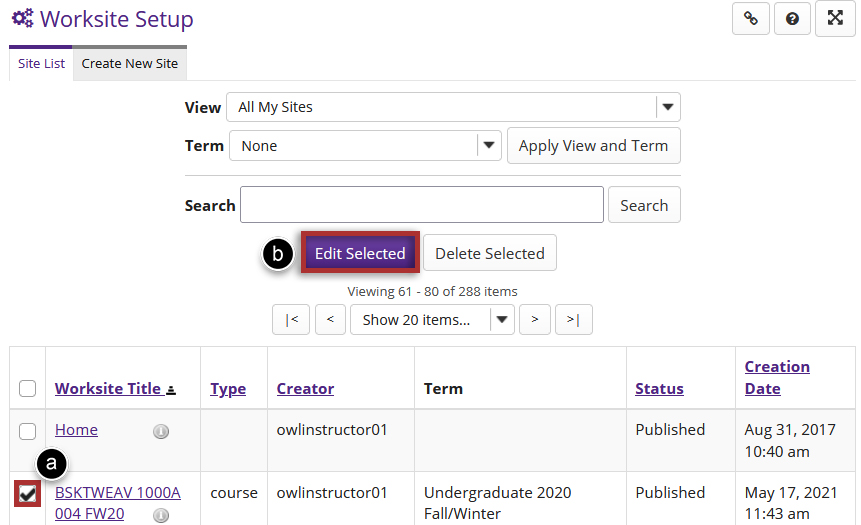
To edit a site:
Note: You may only select one site at a time to edit.
-
Adjust the site settings and information.
This page has the same function and options as a site's Site Info tool. For more information about the different options, please see Site Info.

Delete a Site
A project site in OWL can be deleted by the site's maintainer. Course sites in OWL can only be deleted by system administrators. Please contact us to request a course site be deleted.
Note: deleting a site removes the content and activity from OWL for all participants of the site. Please check with any other maintainers in the site before removing it.
-
Go to Worksite Setup in your Home site
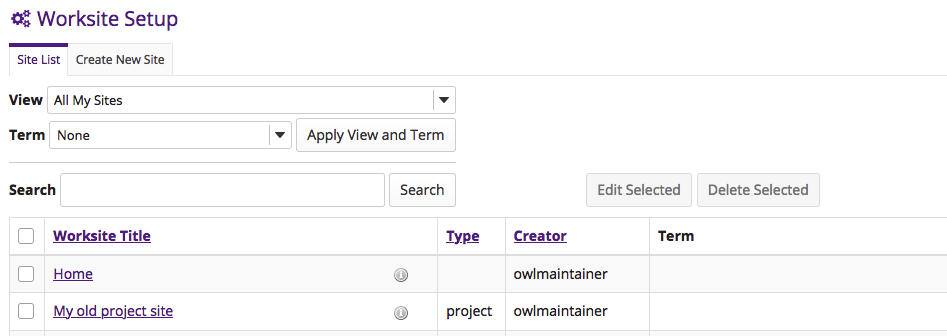
-
Select the project site that you wish to delete
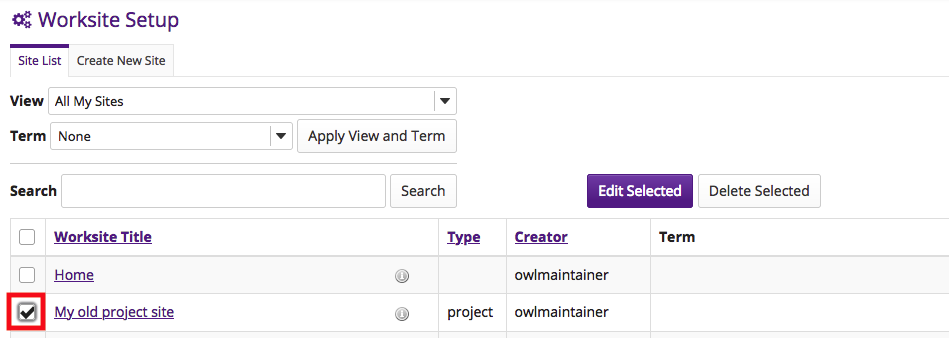
-
Click the Delete Selected button
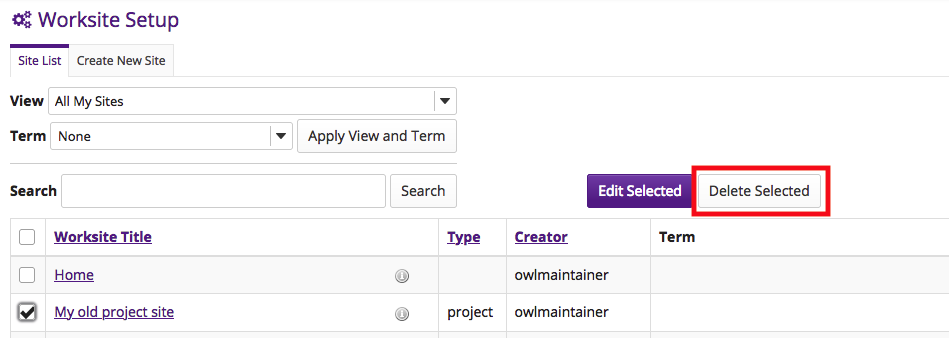
-
Confirm the site that you are deleting by clicking the Mark for deletion button

The site will be removed for you and any other participants of the site.
Restore a Site
If you delete a site and later decide you want it back, you have 30 days to restore the site.
-
From Worksite Setup in your Home site, select Softly Deleted Sites from the View menu

-
Click the Apply View and Term button to see a list of the sites you've deleted in the last 30 days
-
Select the project site that you wish to restore

-
Click the Restore Selected button to restore the site

-
Change the View menu back to the All My Sites option to see your sites
