Lesson 4: Uploading and Organizing Content Files
Outcomes
By the end of this lesson, you should be able to:
- upload files to your OWL course site
- organize your files into folders in Resources
- control students' access to your files in Resources
- use your uploaded files elsewhere in your course site
Topics
- Uploading content
- Best practices for organizing content
- Hiding content from students
- Using content in the site
Requirements
- An active Western Identity and login credentials
- Be in a maintain role, such as the Instructor role, in a course site in OWL (created in Lesson 2)
Uploading content
In this lesson, we will add content to the site that we created in the Lesson 2. We recommend completing Lesson 2, if you haven't already, because we will be continuing to use the course site that we created in that lesson.
Uploading content to Resources
Content such as files are stored in OWL in the RESOURCES tool. You can access RESOURCES by clicking it from the Tools Menu on the left side of your course site. Please note that your Home site also has a RESOURCES tool, but content stored there is separate from each RESOURCES tool in your other sites.
RESOURCES is like a file manager and lists files and folders in a table view. You can create folders within folders and create a hierarchical structure. As you build your course and add more content, such as files, it is easy for RESOURCES to become messy if you do not organize as you go. Therefore, it is recommended that you organize your files as you add new ones.
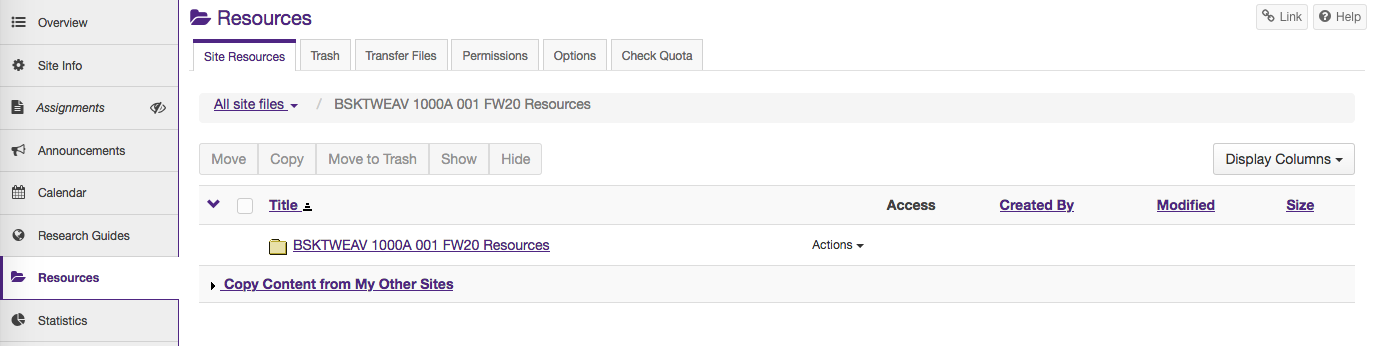
We will start by uploading a couple of images. To upload new files, click on "Actions" beside the first folder in RESOURCES, which contains your site's title. This is the root folder of RESOURCES in this site. In the "Actions" menu, click "Upload Files".
On the "Upload Files" page, you can simply drag files into the box with the dotted border or click on that box to open a file picker, which will allow you to select files from your computer. You can upload one file or many files during this step. You can even drag-and-drop a whole folder of files from your computer onto this upload box to upload all of the files in the folder at once.
Please note: there is a file limit of approximately 2 GB that can be uploaded at a time.
For this example, we will upload two image files. Once you have selected the files you wish to upload, select the appropriate Copyright Status option from the drop-down menu that reflects the copyright status of the files you are uploading. Click the "more info" link for additional assistance and details about each option.
At this time, we can also control the availability of these files and whether an email notification will be sent to members of the site to indicate that the file has been uploaded. Since the site is unpublished, no notification will be sent, so for now we will leave this notification as the default option of "None - No notification".
Click the "Continue" button to upload the files. The files that we've uploaded will appear in the main level of RESOURCES.
Best practices for organizing content
Organizing content
As described earlier, RESOURCES can get messy quickly, so let's add some folders to help us organize the files. Click the "Actions" menu next to the root folder of RESOURCES, like you did before, and then click the "Create folders" link in the Actions menu. Type the name of a folder into the "Folder Name" field. For this example, we will create a folder called "Images". Click the "Create Folders Now" button to create the folder. The folder will also be added to the root of RESOURCES.
If we would like to move our image files into the "Images" folder, click the checkboxes next to the image files and then click the "Move" button at the top of the table. After you do that, a clipboard icon will appear next to the "Images" folder indicating that we can move the images into that folder. Click the clipboard icon to move the images to that location. The image files are now indented under the "Images" folder to indicate that the images are in that folder.
You can also upload images directly into a particular folder by clicking the "Actions" menu beside the respective folder instead of using the root folder to upload files. Let's try that now. We'll begin by creating three new folders in the root of RESOURCES. Click the "Actions" menu next to the root folder and click "Create Folders" like we did earlier. Type in "Week 1" into the "Folder Name" field. Click the "Add Another Folder" link to create multiple folders at the same time. Type "Week 2" into the new "Folder Name" field. Click the "Add Another Folder" link once more and type "Week 3" into the third "Folder Name" field. Click the "Create Folders Now" button to create these three folders. Creating weekly folders is one way to organize your content.
Now that we've created our folder, we will upload some content directly into one of these new folders. Click the "Actions" menu next to the "Week 1" folder and click the "Upload Files" link. Like we did before, we will select the files that we want to upload for week one, set a Copyright Status, and click the "Continue" button to upload these files. You will notice that the new files were added to the "Week 1" folder, as intended, rather than to the root folder as we did the first time. This process will save you steps of having to move the files later.
Hiding content from students
Hiding content from students
You may allow students to access the RESOURCES tool directly or you may want to hide the RESOURCES tool and instead link to the content from elsewhere in your site or you may want to allow students to see some of the content in RESOURCES and hide other parts. All three of these cases are options in OWL.
By default, the RESOURCES tool is available to students. We can see what this looks like by using the "View Site As" menu to view the course site from the perspective of the Student role. While still in RESOURCES, click the "View Site As" menu in the top left corner above the Tools Menu and select the "Student" option. You will notice that RESOURCES has changed a bit and some of the instructor-specific actions are now gone. This is what students would see, which allows them to access the files that you've uploaded and the folders that you've created in RESOURCES. You can use the "View Site As" menu from any tool in your site to get a sense of what the student will see. You'll notice that the bar across the top of OWL has gone red to indicate that you are viewing another role. Click the "Exit Student View" link in the top left to return to the instructor view.
The second case for RESOURCES involves hiding the RESOURCES tool, which was described in Lesson 3 involving configuring the site's setting. However, please note that hiding the RESOURCES tool will not prevent students from accessing the files it contains, as manipulating the file path address to any file that you have linked to in your course site may allow students to access other files in RESOURCES.
That's where the third case comes in. The third case will allow students to see some of RESOURCES and allow you to hide other parts. Let's do this now. Say for example we wanted the students to be able to access the weekly folders that we just created but not the "Images" folder - so we will hide the "Images" folder. To do this, click the "Actions" menu next to the "Images" folder and click "Edit Details".
The "Edit Details" page allows us to control the availability and access of folders and files in RESOURCES. We can make this folder available always, or after a certain date, or until a certain date. We can hide this folder but allow access to its contents or hide this folder and its contents.
For this example, we want to hide the "Images" folder but still be able to show the images elsewhere in the site. To do this, click the second option: "Hide this folder but allow access to its contents". The folder will be hidden in RESOURCES but we'll be able to use and display the images elsewhere in our course site. Click the "Update" button at the bottom of the page to save this change.
You'll notice that the text of the "Images" folder is lighter now to indicate that it is hidden. We can also test this from the student perspective by clicking the "View Site As" drop-down and selecting the "Student" role again. You'll notice that the "Images" folder is no longer here because it is hidden for students, but they can still access the weekly folders, which are still available to them. Click the "Exit Student View" link in the top left to return to instructor view.
For other files in RESOURCES that you do not want students to be able to access, use the "Hide this folder and its contents" option on the "Edit Details" page, for added security if you don't need to link to those files.
Using content in the site
Let's use that hidden image elsewhere in the site. Click on the OVERVIEW tool on the left to go back to the main page of the site. As we did in Lesson 2, let's edit the "Welcome" page by clicking the "Edit" button at the top next to "Welcome".
In the description area, we will use the Rich Text Editor to add our uploaded image to this page. First, click in the content area and put your cursor at the beginning of the text. This will be the position where our image is added to the page. Click on the image icon in the Rich Text Editor's tool bar.
A browser window will open displaying items that we can include on the page. In RESOURCES, click on the "Images" folder that we created and select the image that we uploaded. Click the green "OK" button in the bottom right.
It is best practices to add alternate text to images for accessibility, so type a brief description of the image in the "Alternate Text" field. Now click the green "OK" button.
The image should now appear in the Rich Text Editor. Click the "Update Options" button at the bottom to save the changes.
We've now added an image from RESOURCES to our OVERVIEW page. Use a similar process throughout OWL, wherever the Rich Text Editor appears.
There is more options and functionality of RESOURCES but now you know the basics of uploading organizing and using content. For more information about RESOURCES, please see the OWL Help pages about Resources.