Manage Content
How do I release subpages on a specific date?
This setting only applies to subpages. In order to utilize the date specific release controls set-up your Lessons page to have time-specific content organized in their own subpages. For example: separate your content based on the week it pertains to in your lesson plan, labeling each subpage accordingly.
-
Click the Edit button to the right of the subpage.

-
Enable the Hide page until the following date checkbox.

-
Click the calendar icon to input the date the subpage and its contents will become available to students.

-
Click the Update Item button.

How do I require completion of a Lessons item?
Most of the items that can be added to a Lessons page can be made "required". That is, students must open a resources or complete an task. Further, the Lessons tool allows instructors to require students to complete one item in the list before allowing access to another item in the list.
Items that can require a prerequisite before release
Items that can be required as a prerequisite
To make an item a requirement:
-
Click the Edit button to the right of the item.

-
Enable "Require that the student submit this assignment".
Click the Update Item button.

-
Required items are indicated with an asterisk to the left of the item.

To conditionally release based on prerequisites:
-
Click the Edit button to the right of the item.

-
Enable "Don't Release Item Until All Prerequisites are Completed".
Click the Update Item button.
This item can now only be accessed once the Required Items before it have been completed.
Note: Items that are conditionally released display [Has prerequisites] in red text.
Note: This function only works once you have enabled the Require Item option on another item in the same Lessons page.

How do I reorder items on a Lessons page?
Instructors can reorder the placement of items on a Lessons Page.
-
Click the Reorder tab.

-
In the Reorder page, drag and drop the items into the desired order.
Click the red X beside an item to delete it or drag it over the the "Delete Bin" on the right side of the page.

-
Click the Save button.
After saving, you will return to the Lessons page with the items displayed in the new order.

How do I delete items on a Lessons page?
Instructors can delete items added to a Lessons page using the Delete icon, the Edit option, or the Reorder option.
To delete an item using the Delete icon:
-
Click on the trash can (Delete) icon for the item you want to delete.

-
Click the Delete button in the confirmation pop-up to complete deletion.

To delete an item using the Edit option:
-
Click the Edit icon next to the item you wish to delete.

-
Click the Delete button at the bottom of the Edit window.
Warning: Using this method will immediately delete the item without confirmation.

To delete an item using the Reorder option:
-
Click the Reorder tab.

-
This displays the reorder list of items added to the Lessons page.
Click the red X beside an item to delete it or Drag it over the the delete bin on the right side of the page.

-
Click the Save button at the bottom of the page.

How can I apply a Layout template to a Lessons section or page?
Instructors can automatically apply a Layout template to a single section or the entire Lessons page. Once added, instructors can later modify the sections from the template with their particular content. Layouts makes it easier to create attractive pages without a lot of work.
Adding Layouts does not affect the existing Lessons page and template. However, it will apply any existing custom css in the Lessons page to the layout elements accordingly and wherever applicable. In doing so, the custom css will interfere with how the selected layout is supposed to look like without the custom css. This can be adjusted manually by playing around with the sections (like joining adjacent section, dividing content into two columns, etc).
Every time a Layout is added, it is added in a linear order (i.e. after the last added section in the Lessons page), and so it will not delete any existing content or sections in the Lessons page.
To add a section layout:
-
Click on the Add Layout tab on the top of the Lessons page.
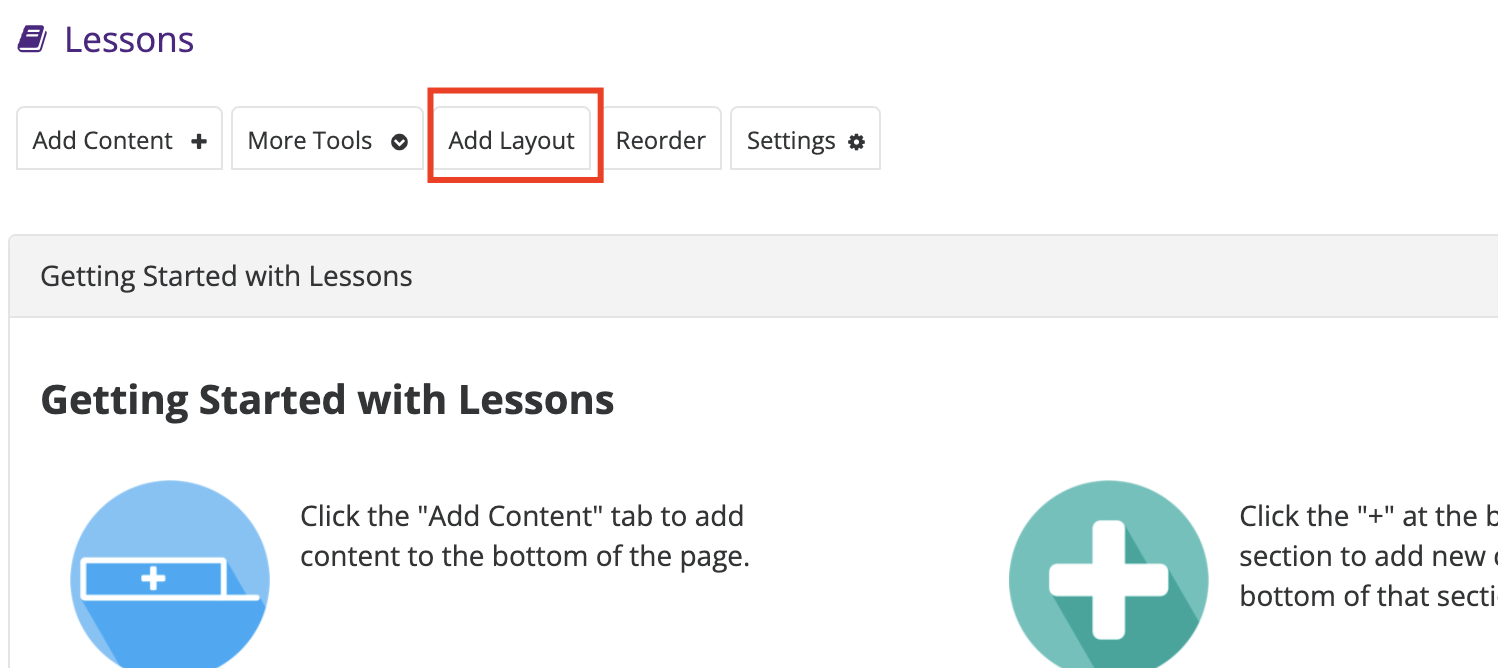
-
Click on the Section Layouts tab.
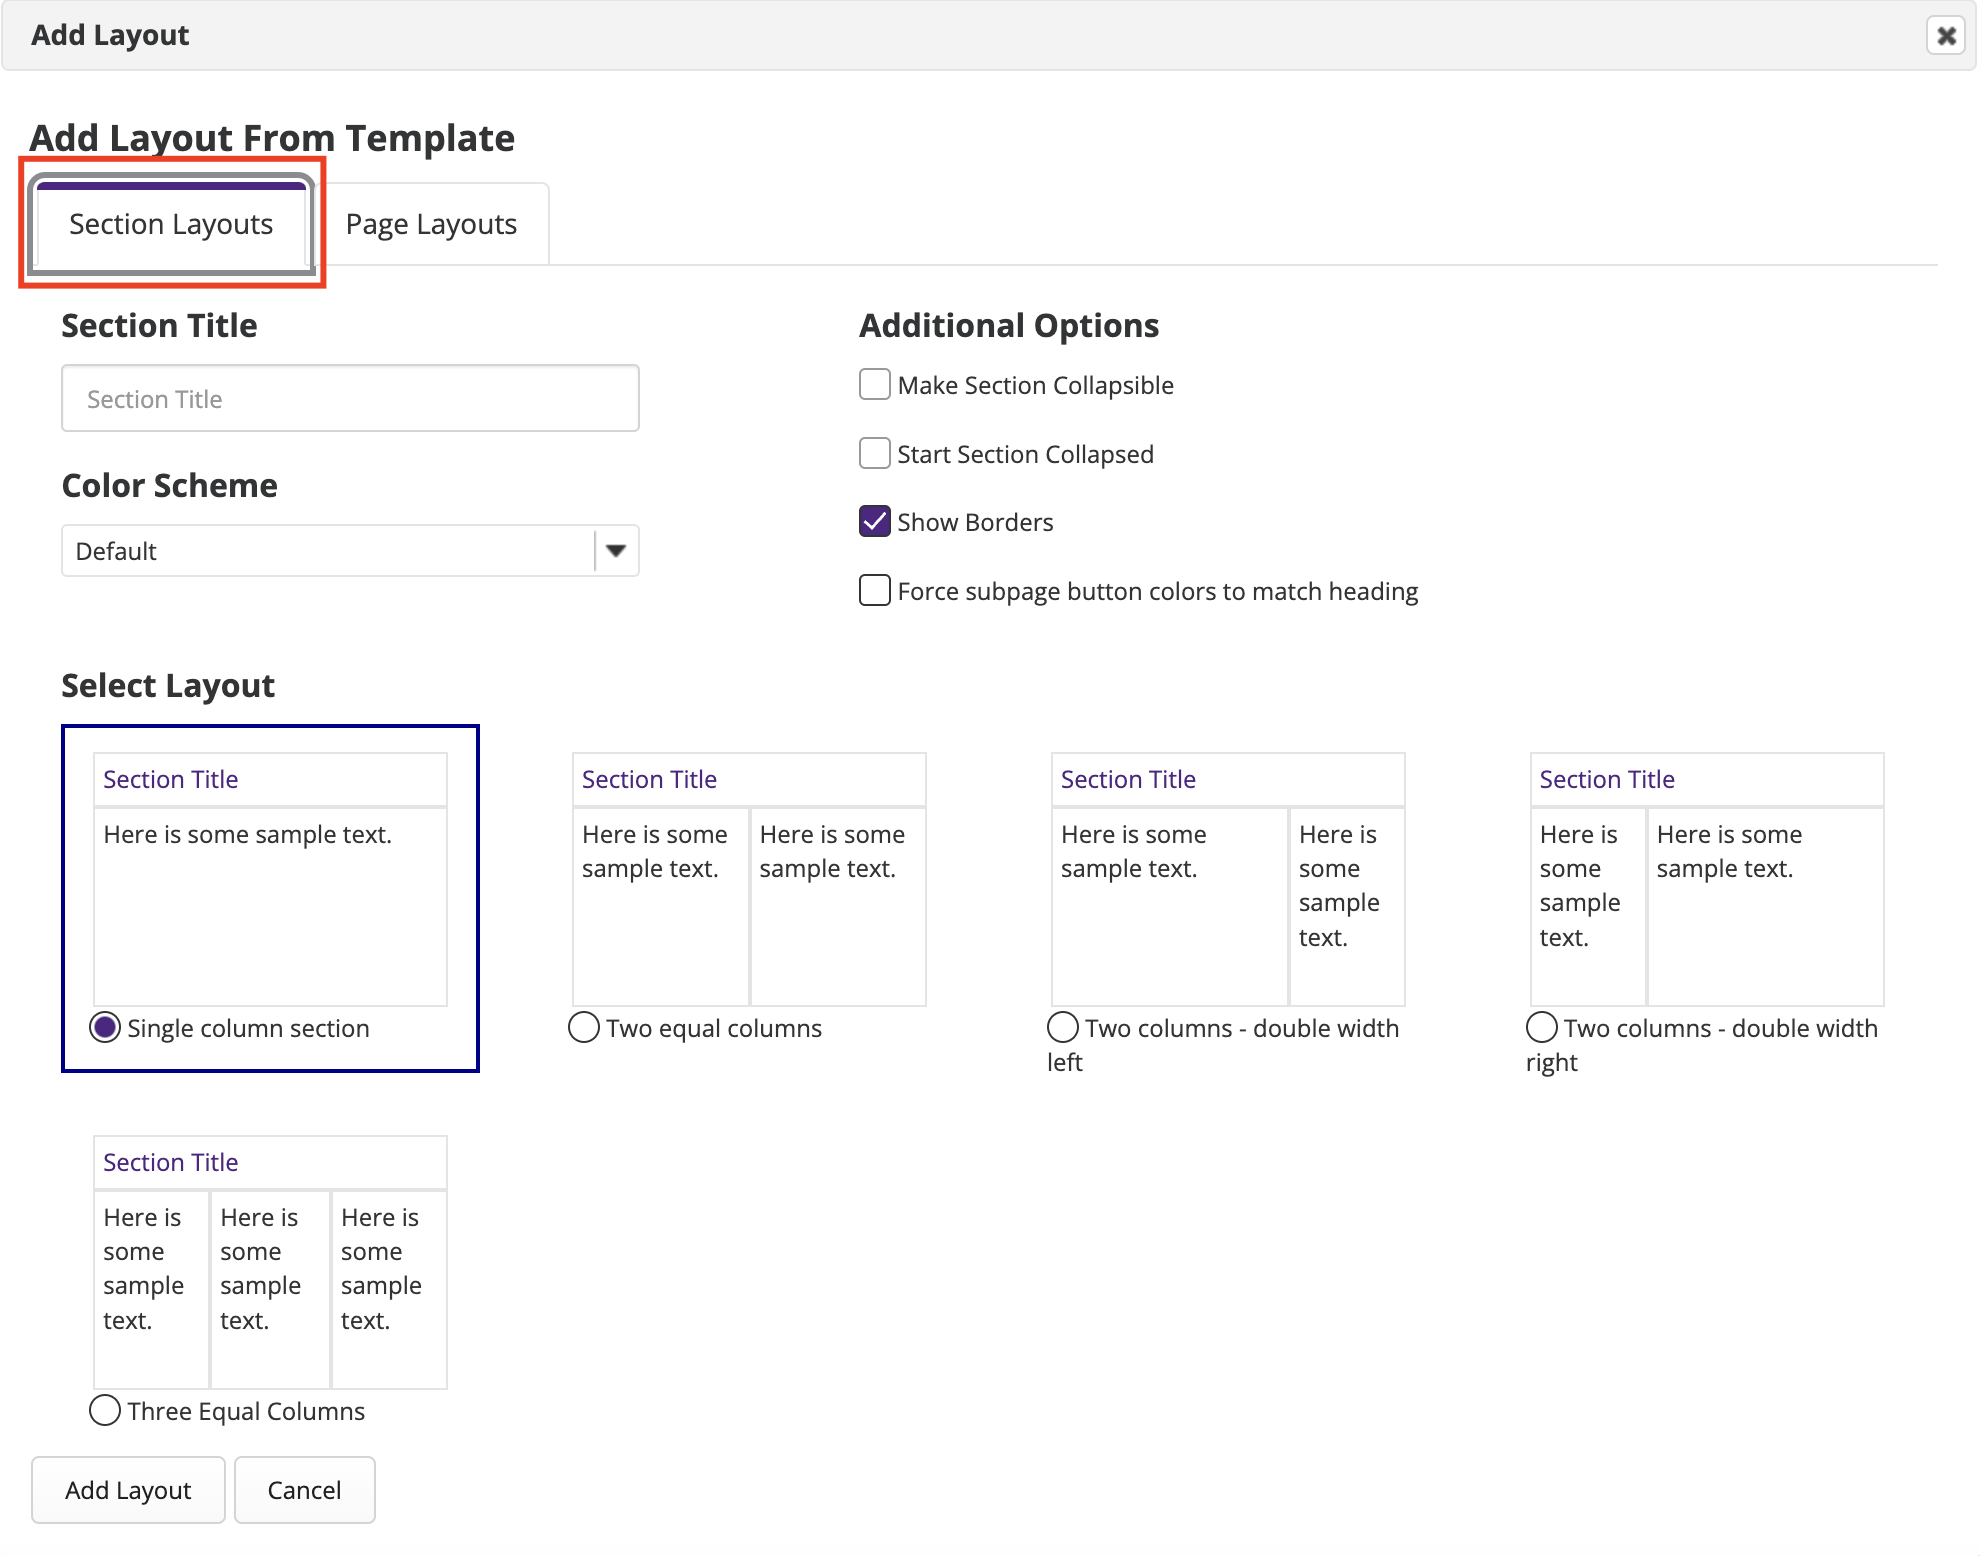
-
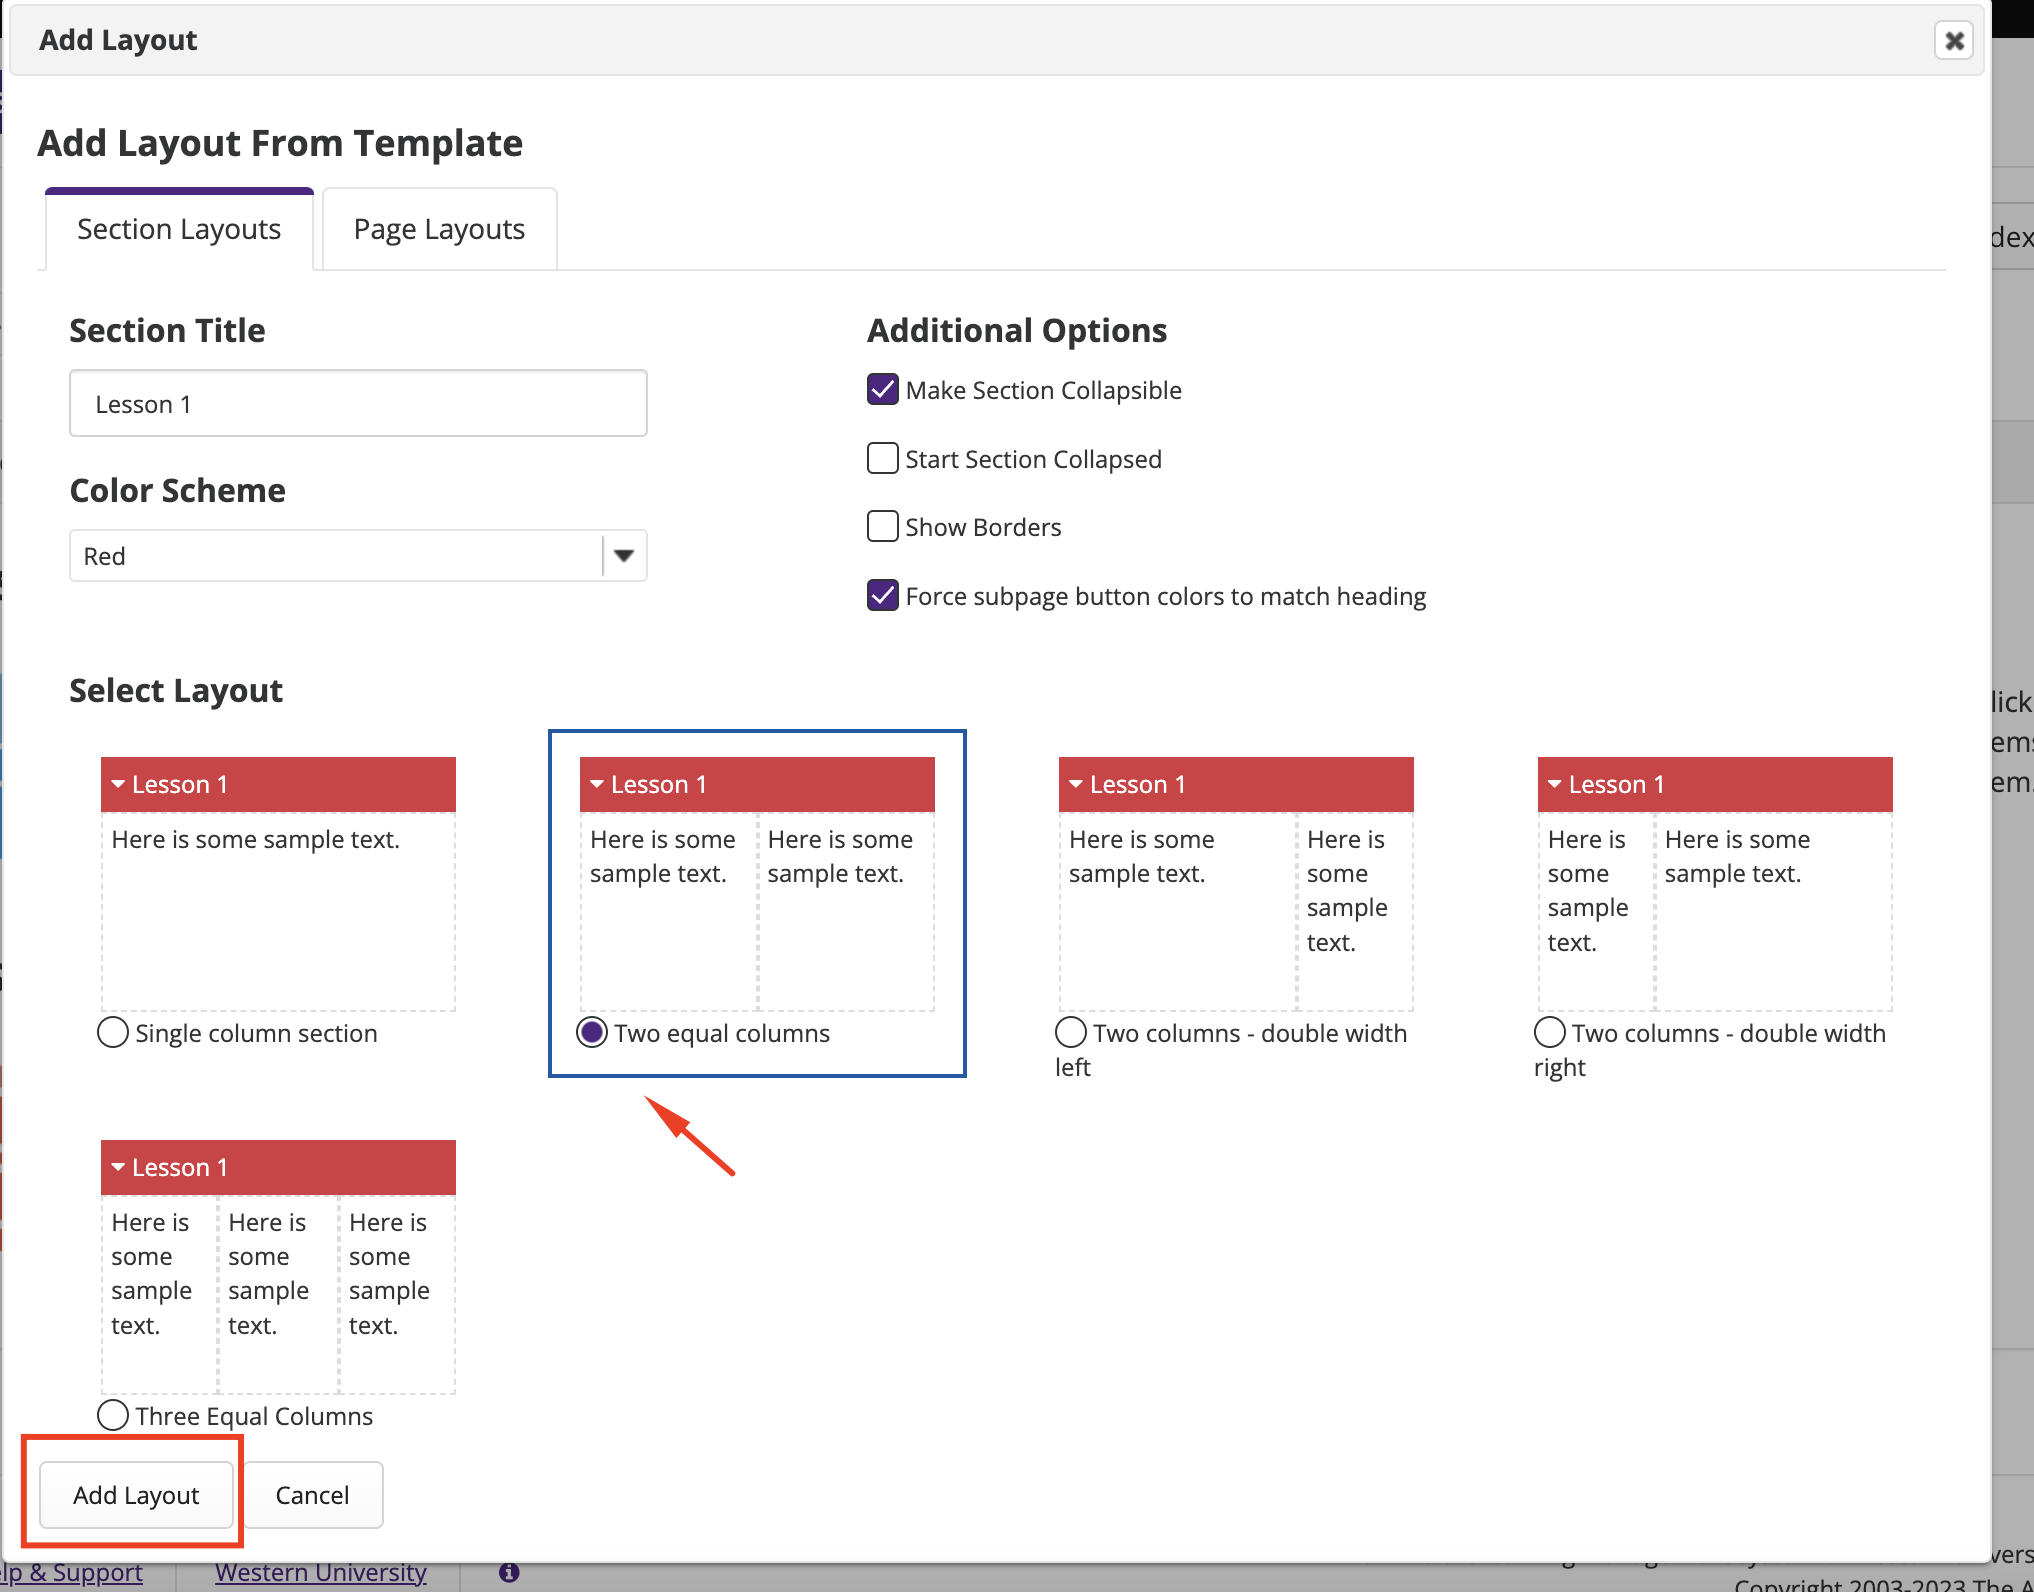
Fill in the different elements you would like to add to the layout:
-
Section Title
-
Color Scheme
-
Additional Options
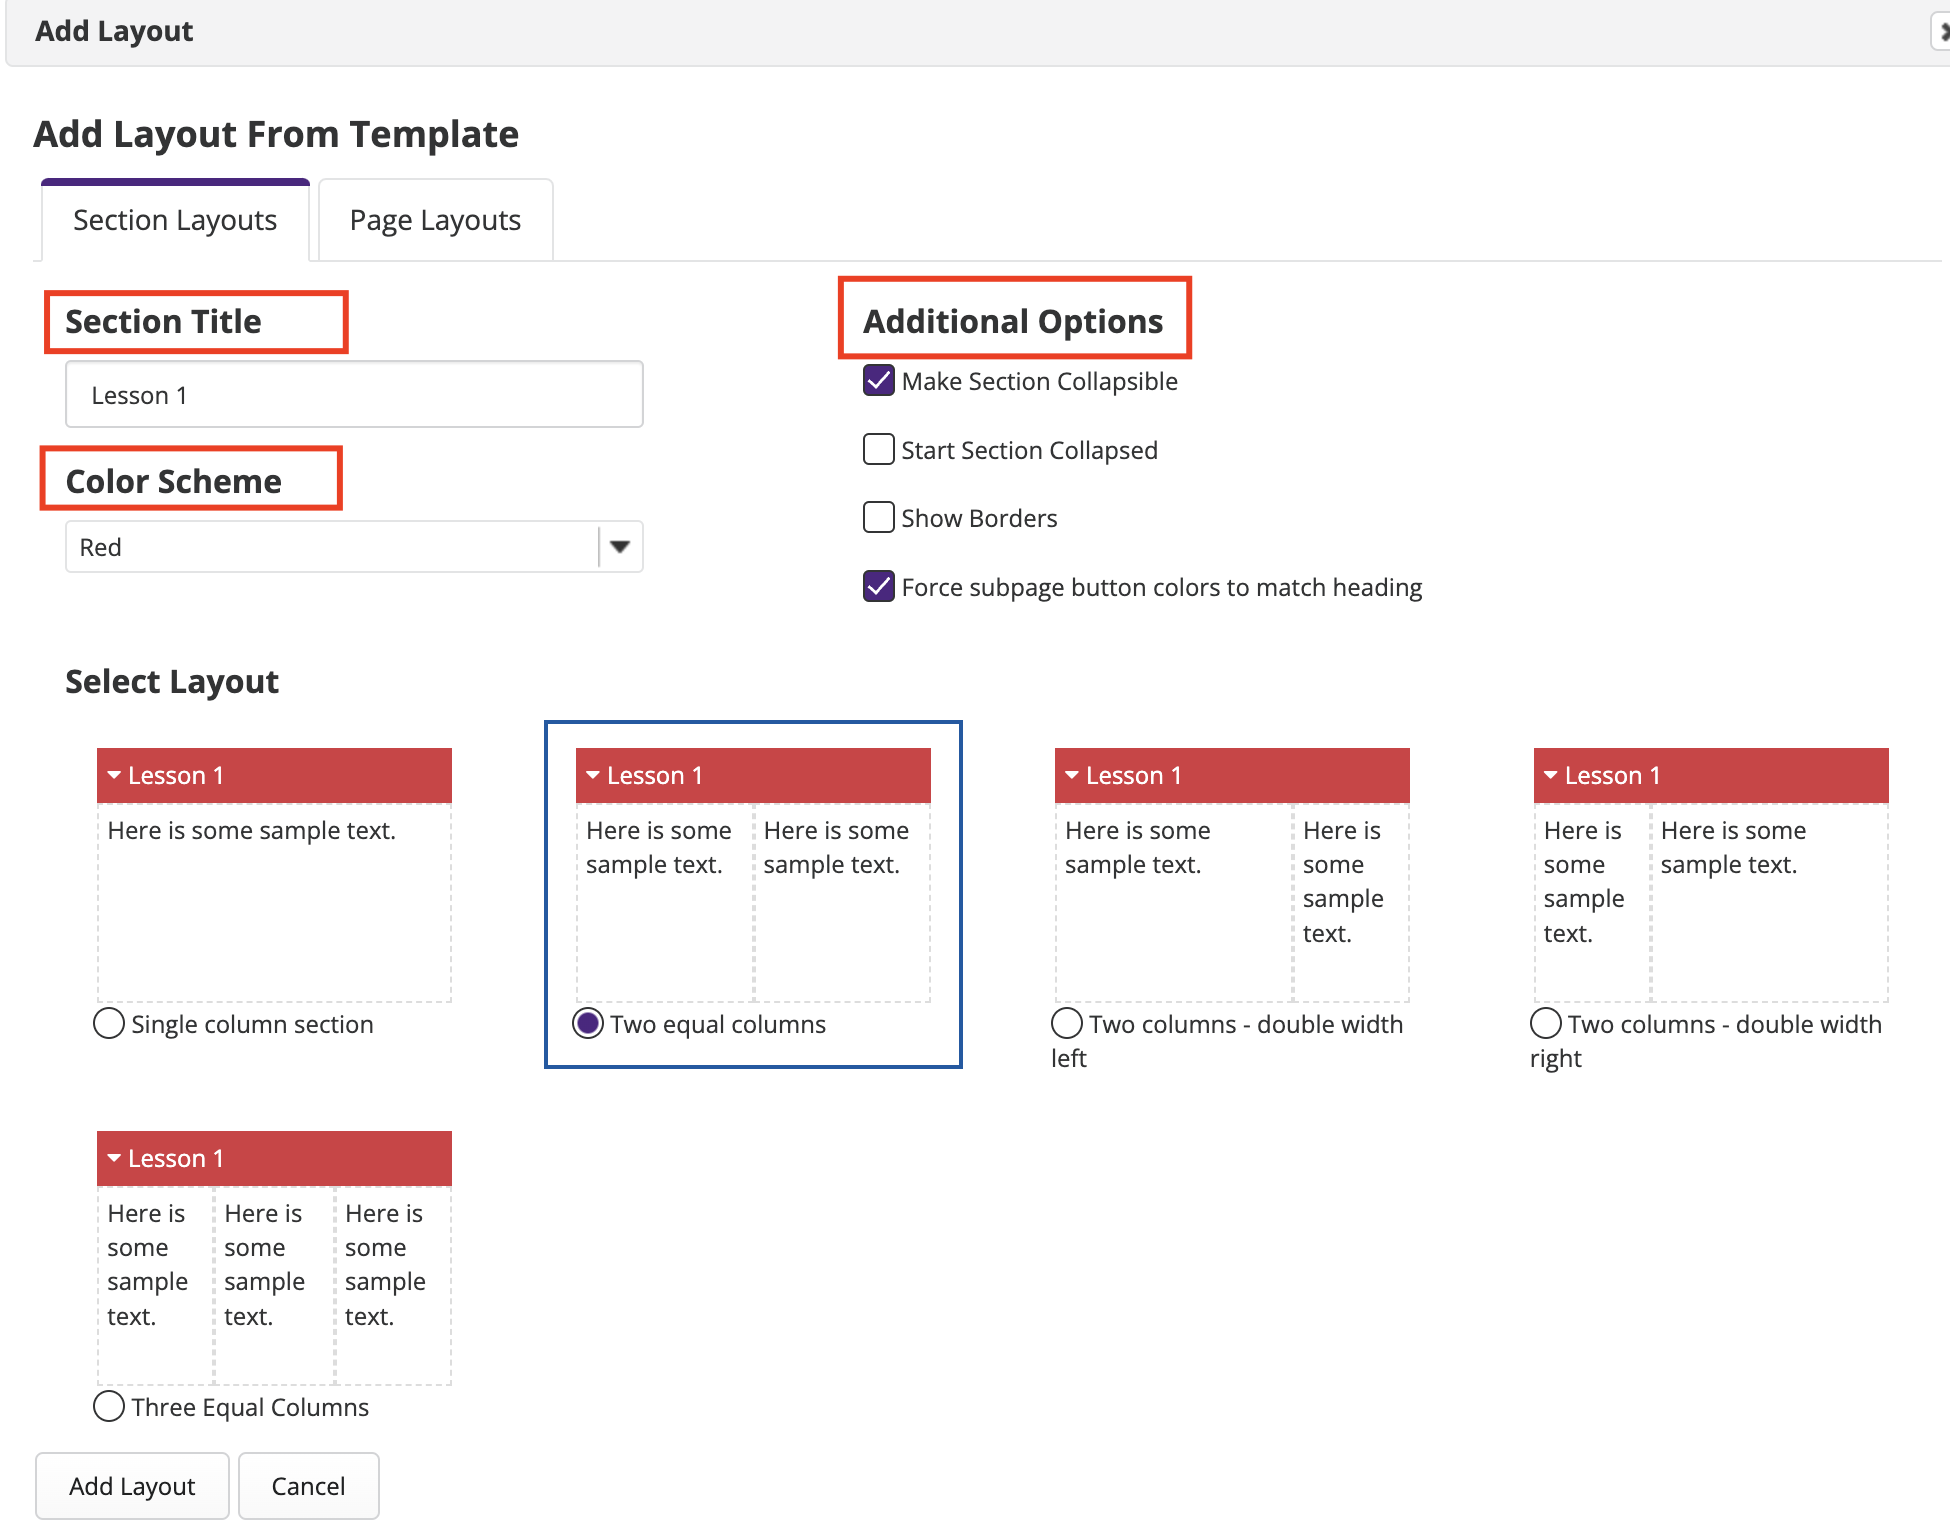
You will notice the preview changes as you update the section elements.
-
-
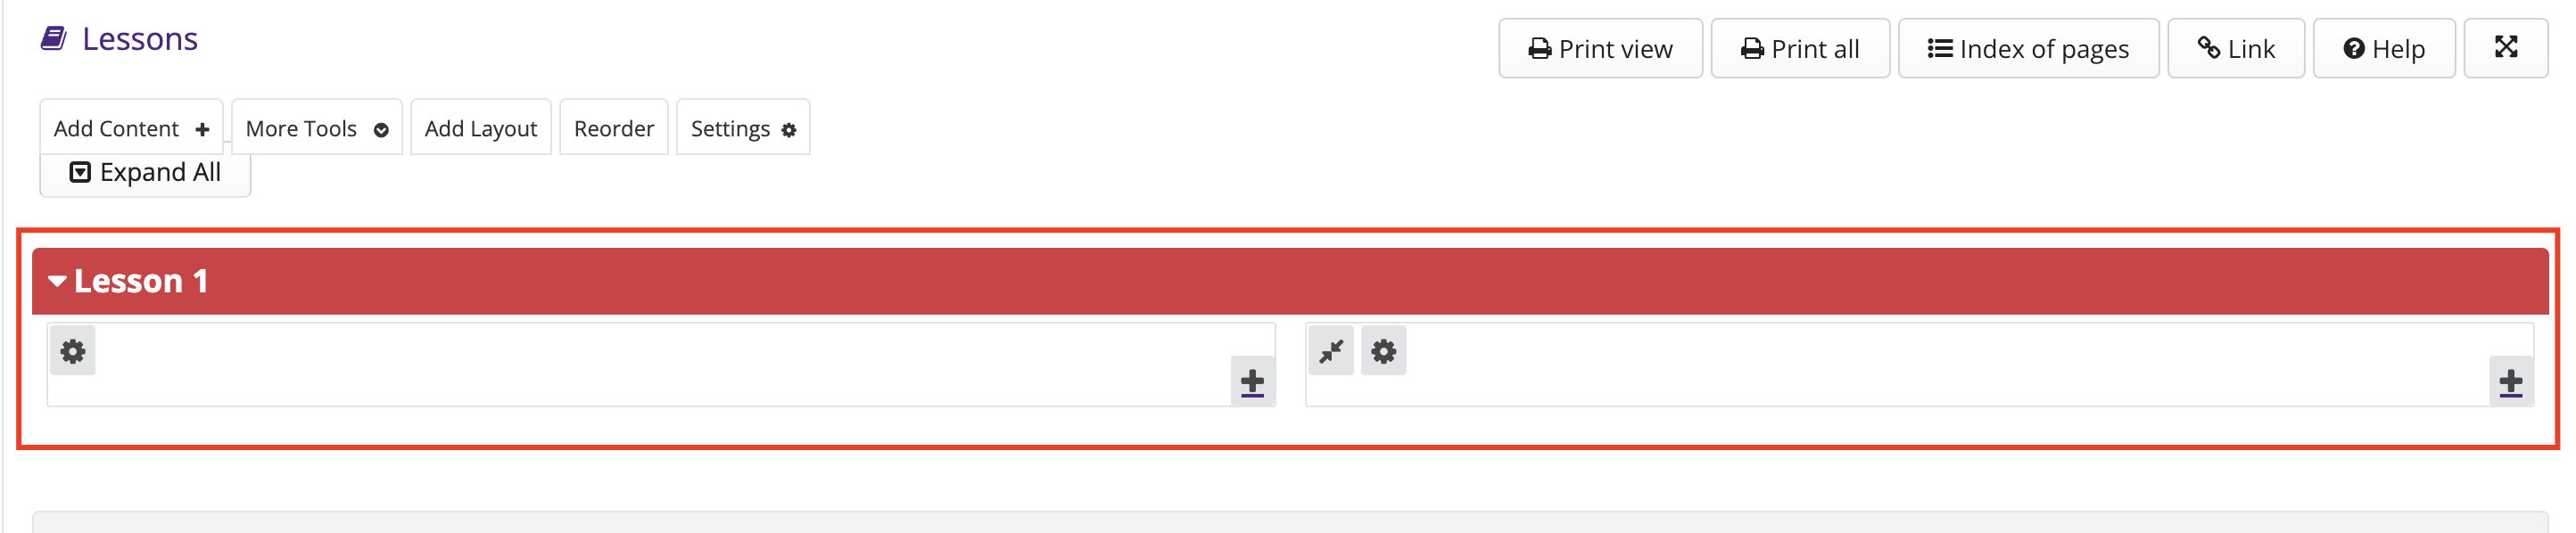
Select the desired layout, number of columns, and column width. When done, click on the Add Layout button.
-
Check the applied layout.
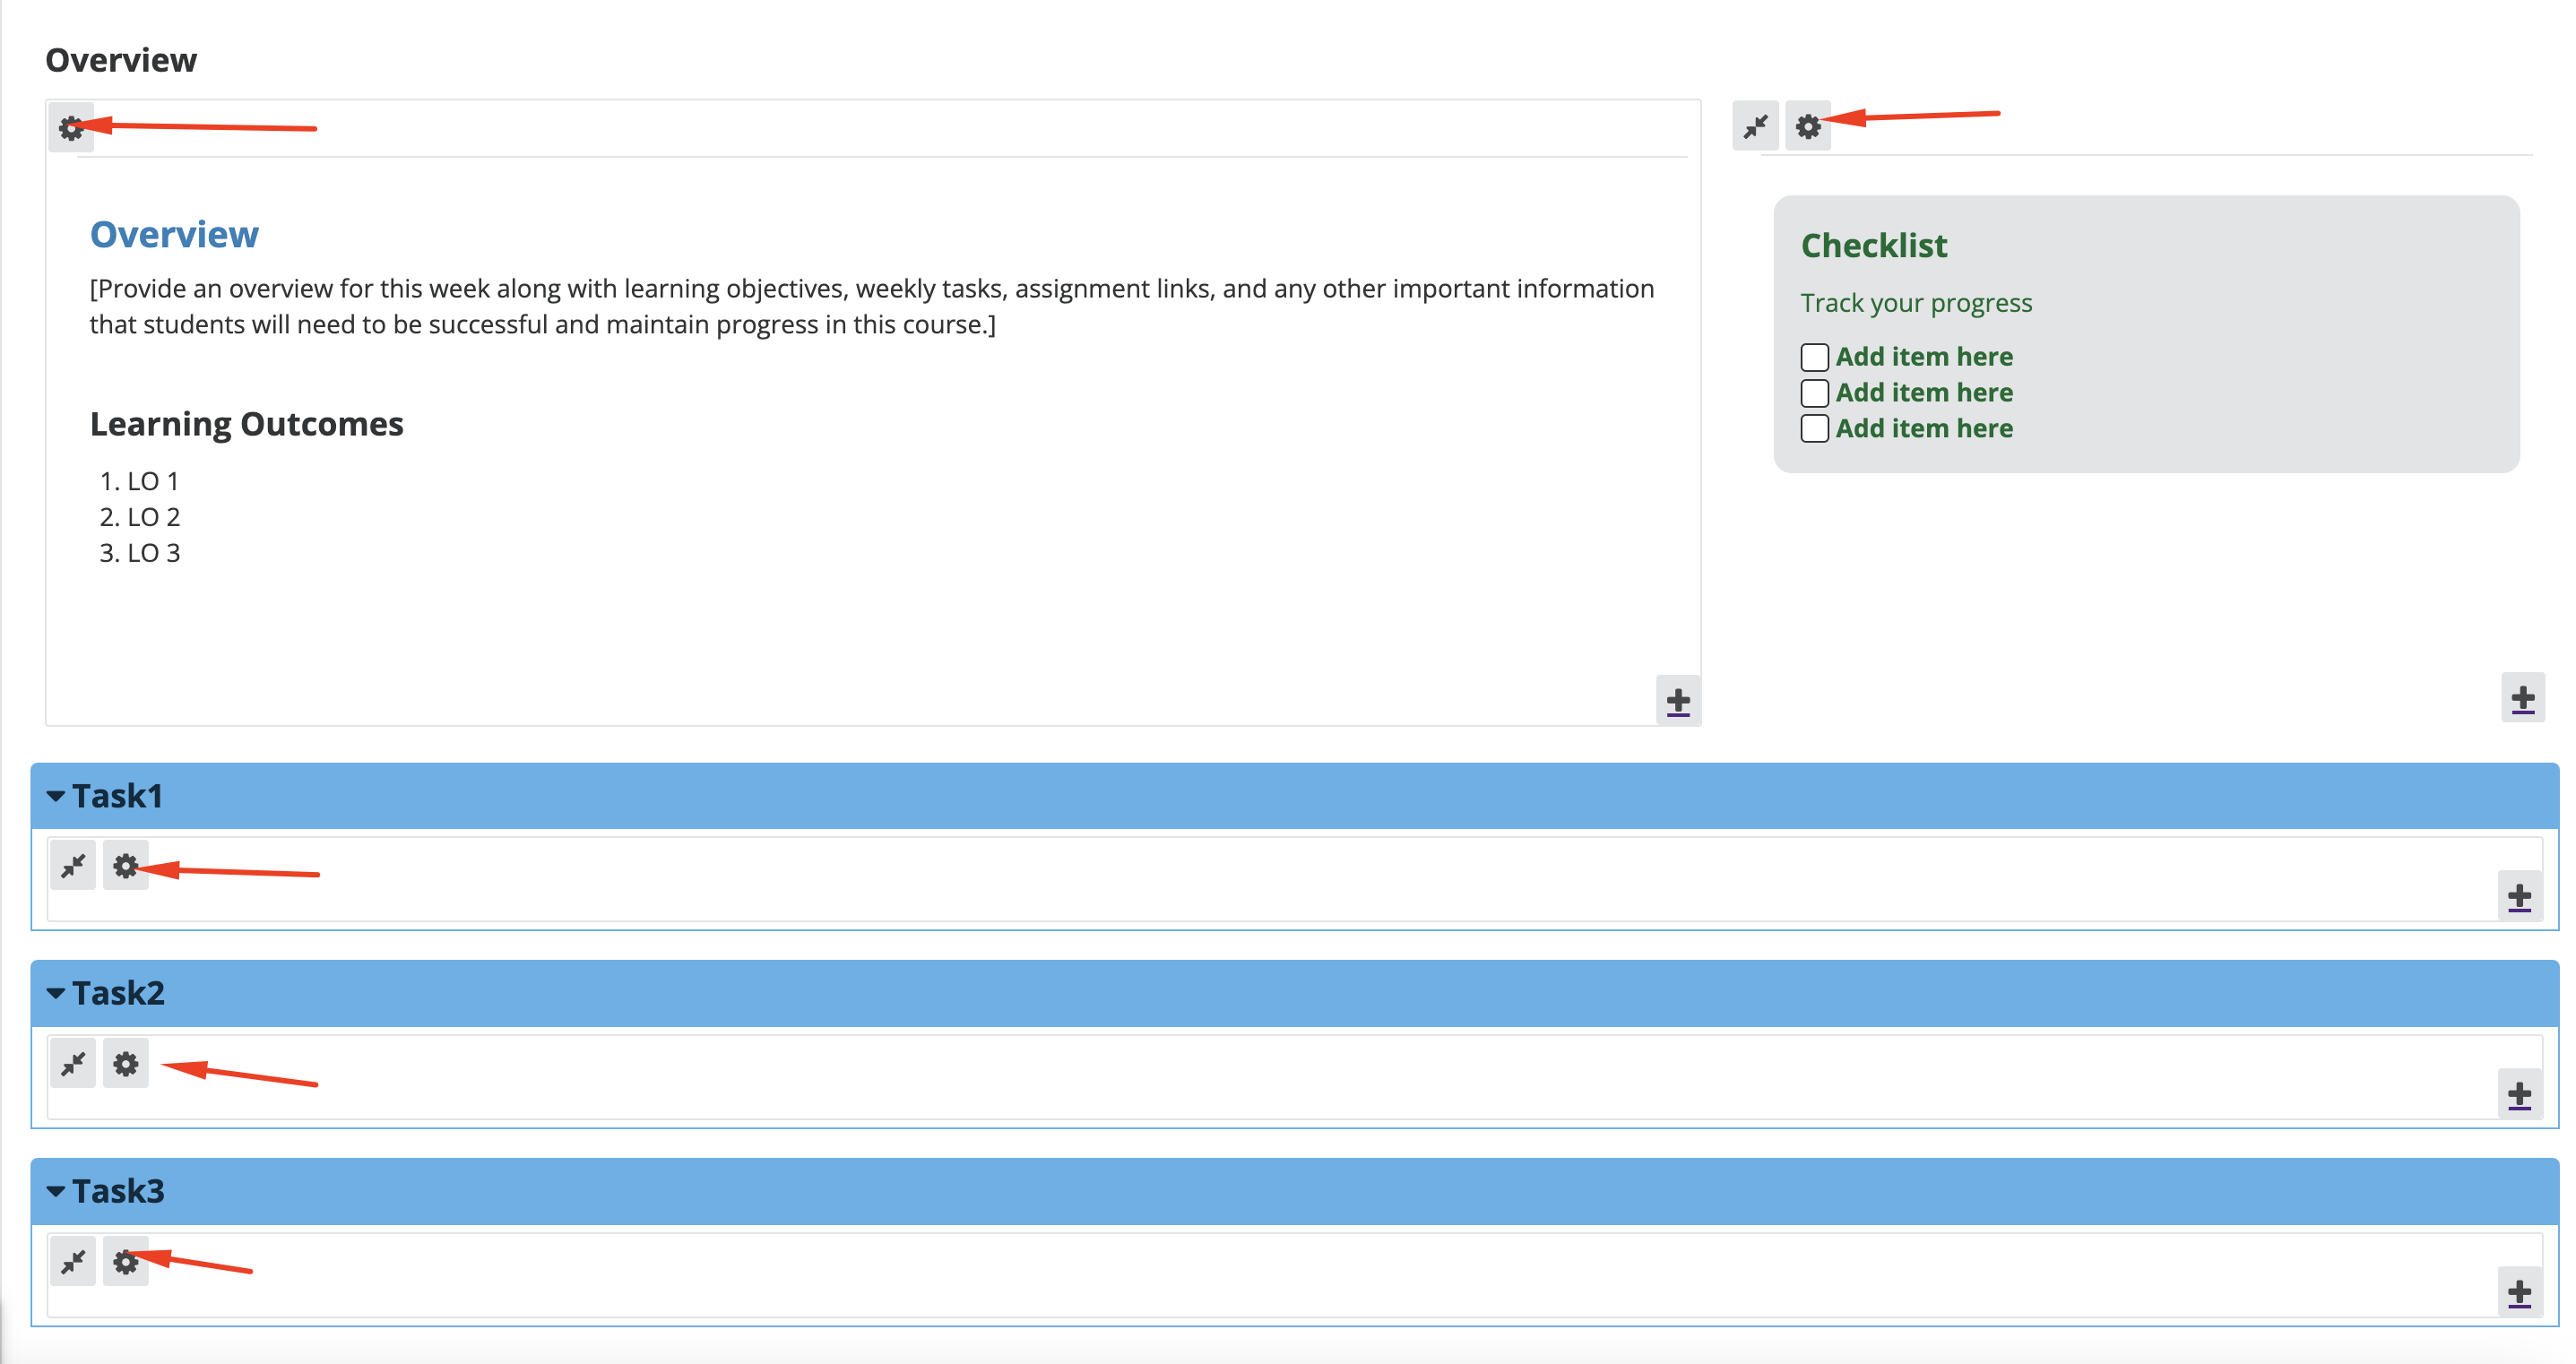
To modify an existing section layout:
-
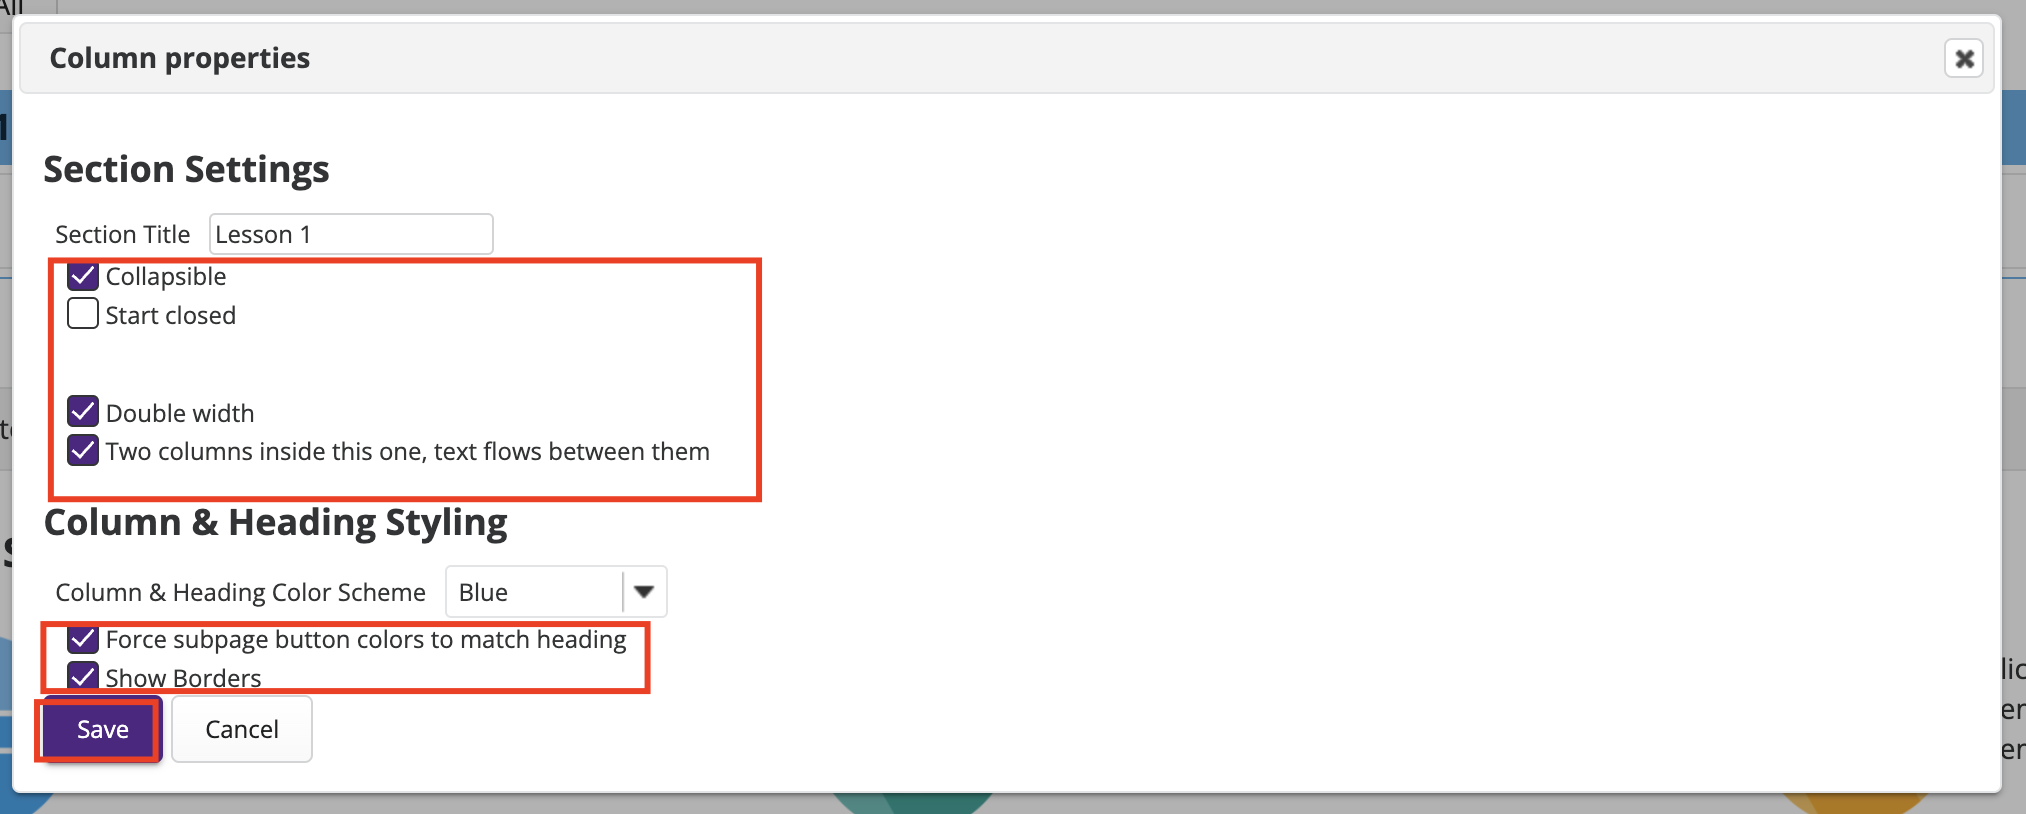
Click on the settings (gear) icon of the first column in the section.

-
Apply the desired changes. When done, click the Save button.
-
Check the applied changes to the layout.

To delete an existing section layout or column(s) within a layout:
-
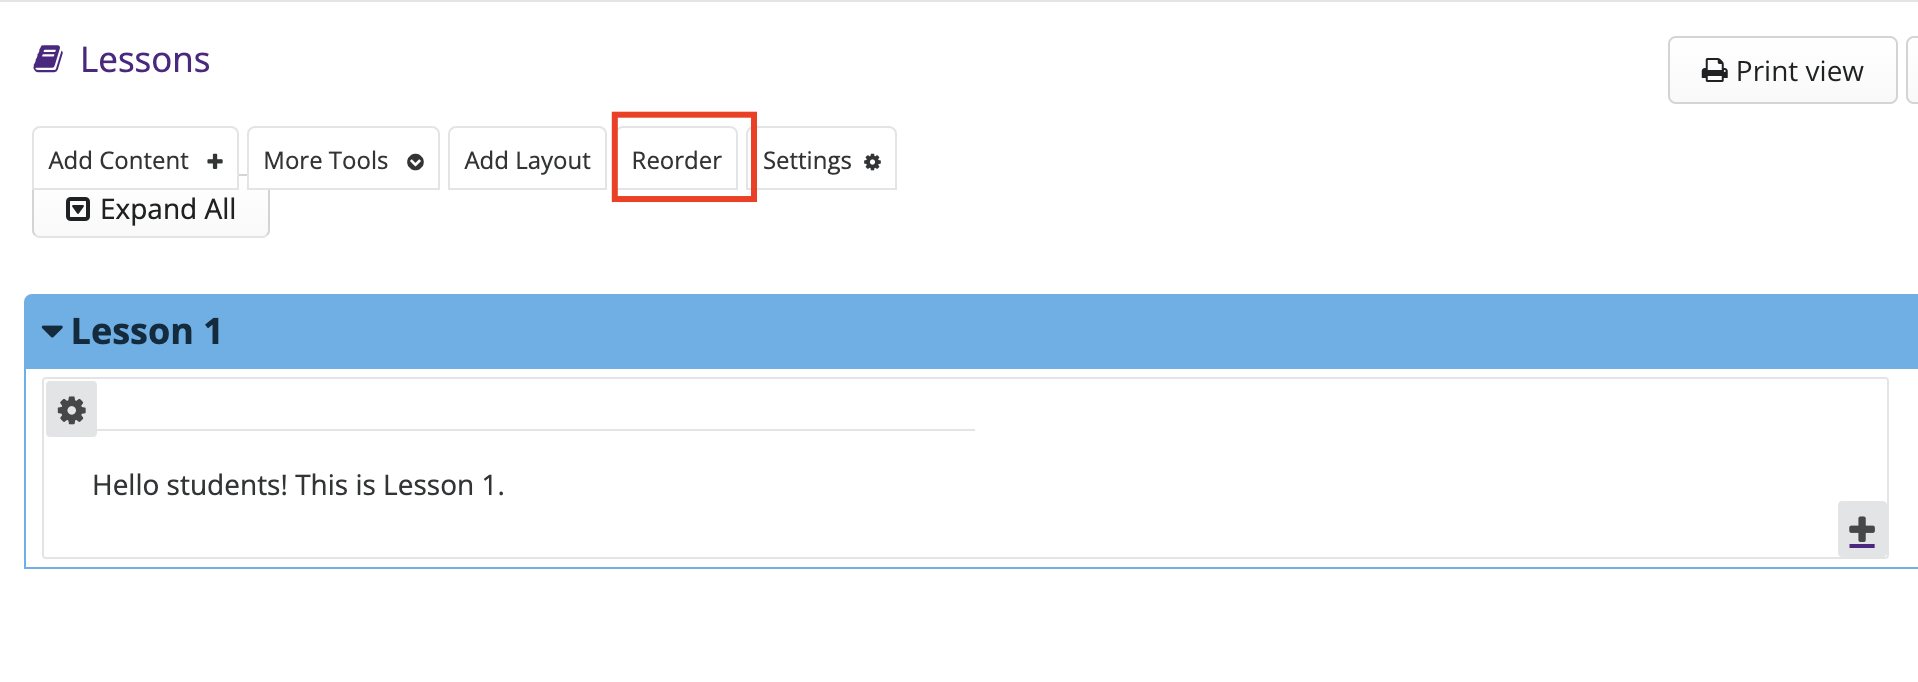
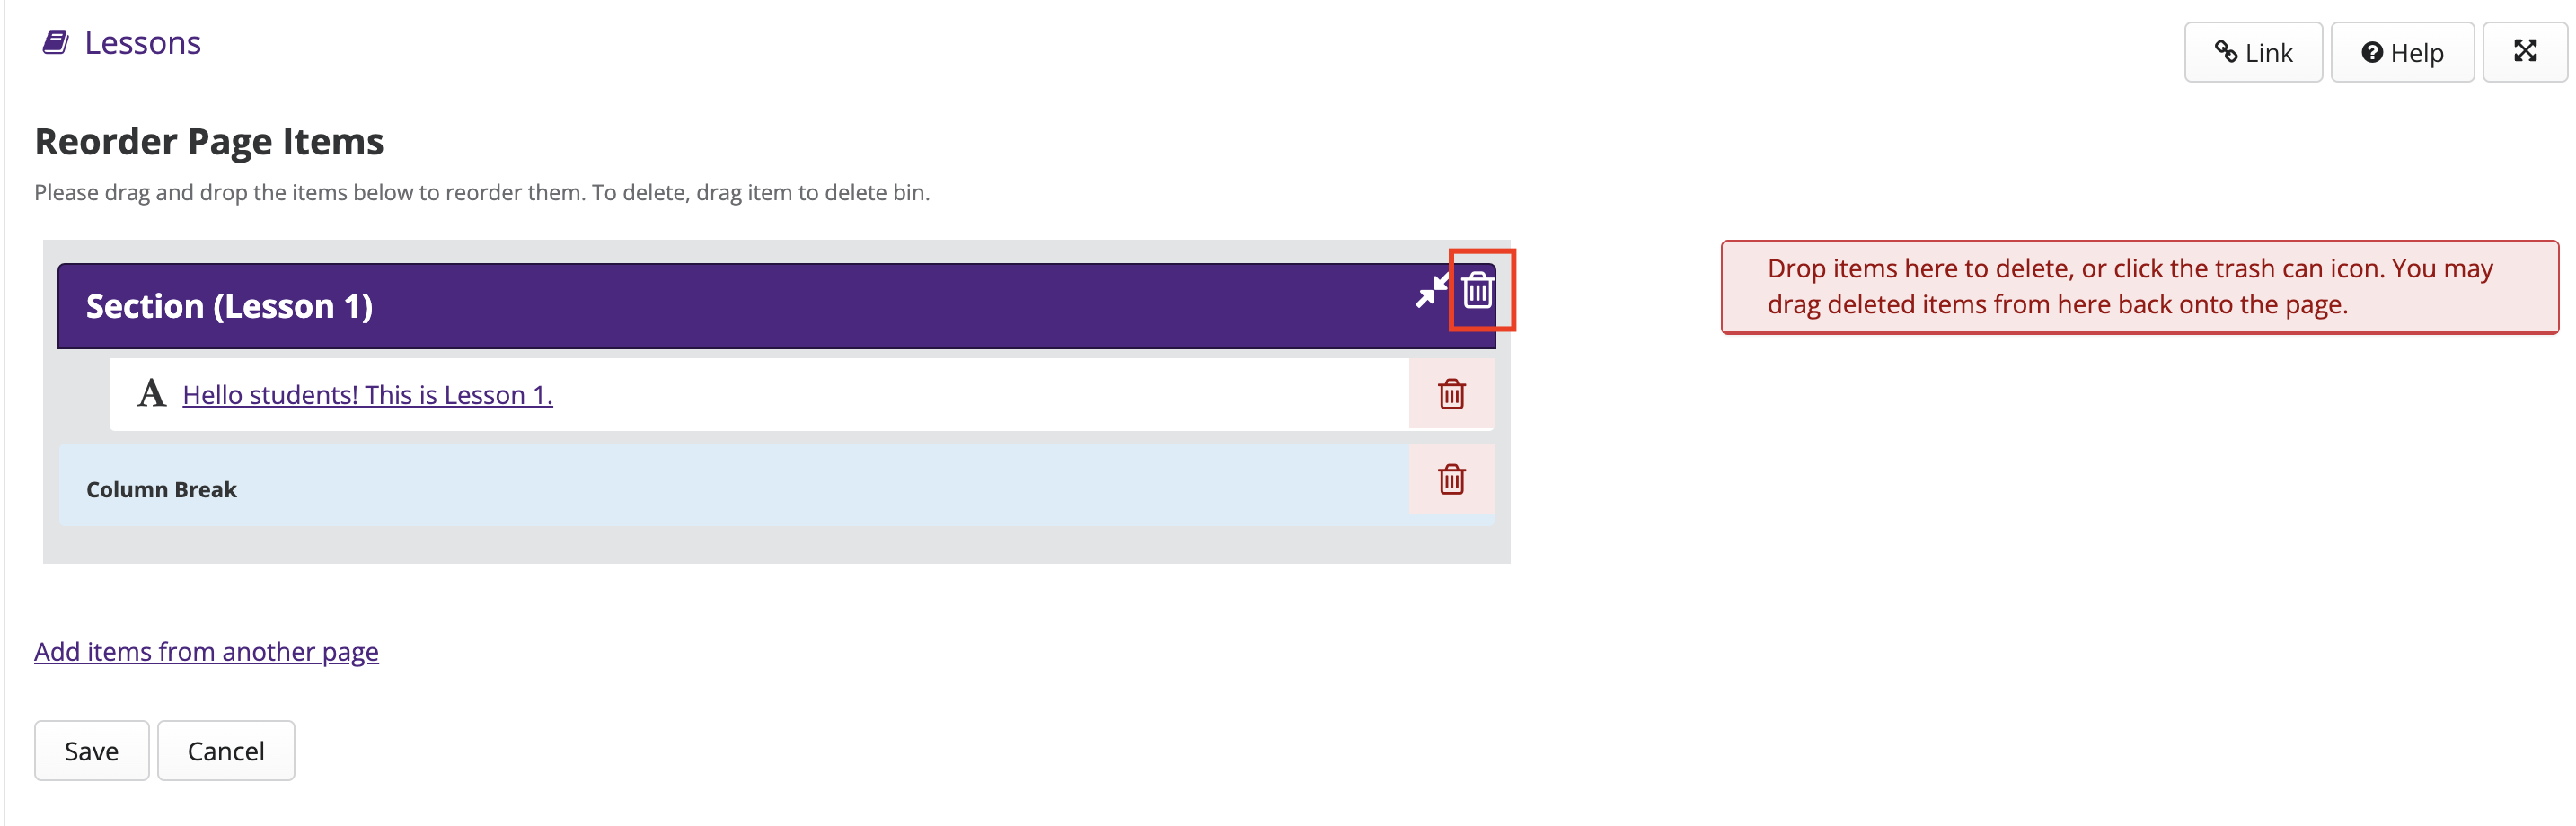
Click on the Reorder tab on the top of the lessons page.
-
Click on the trash can icon next to the section(s)/column(s) you want to delete.
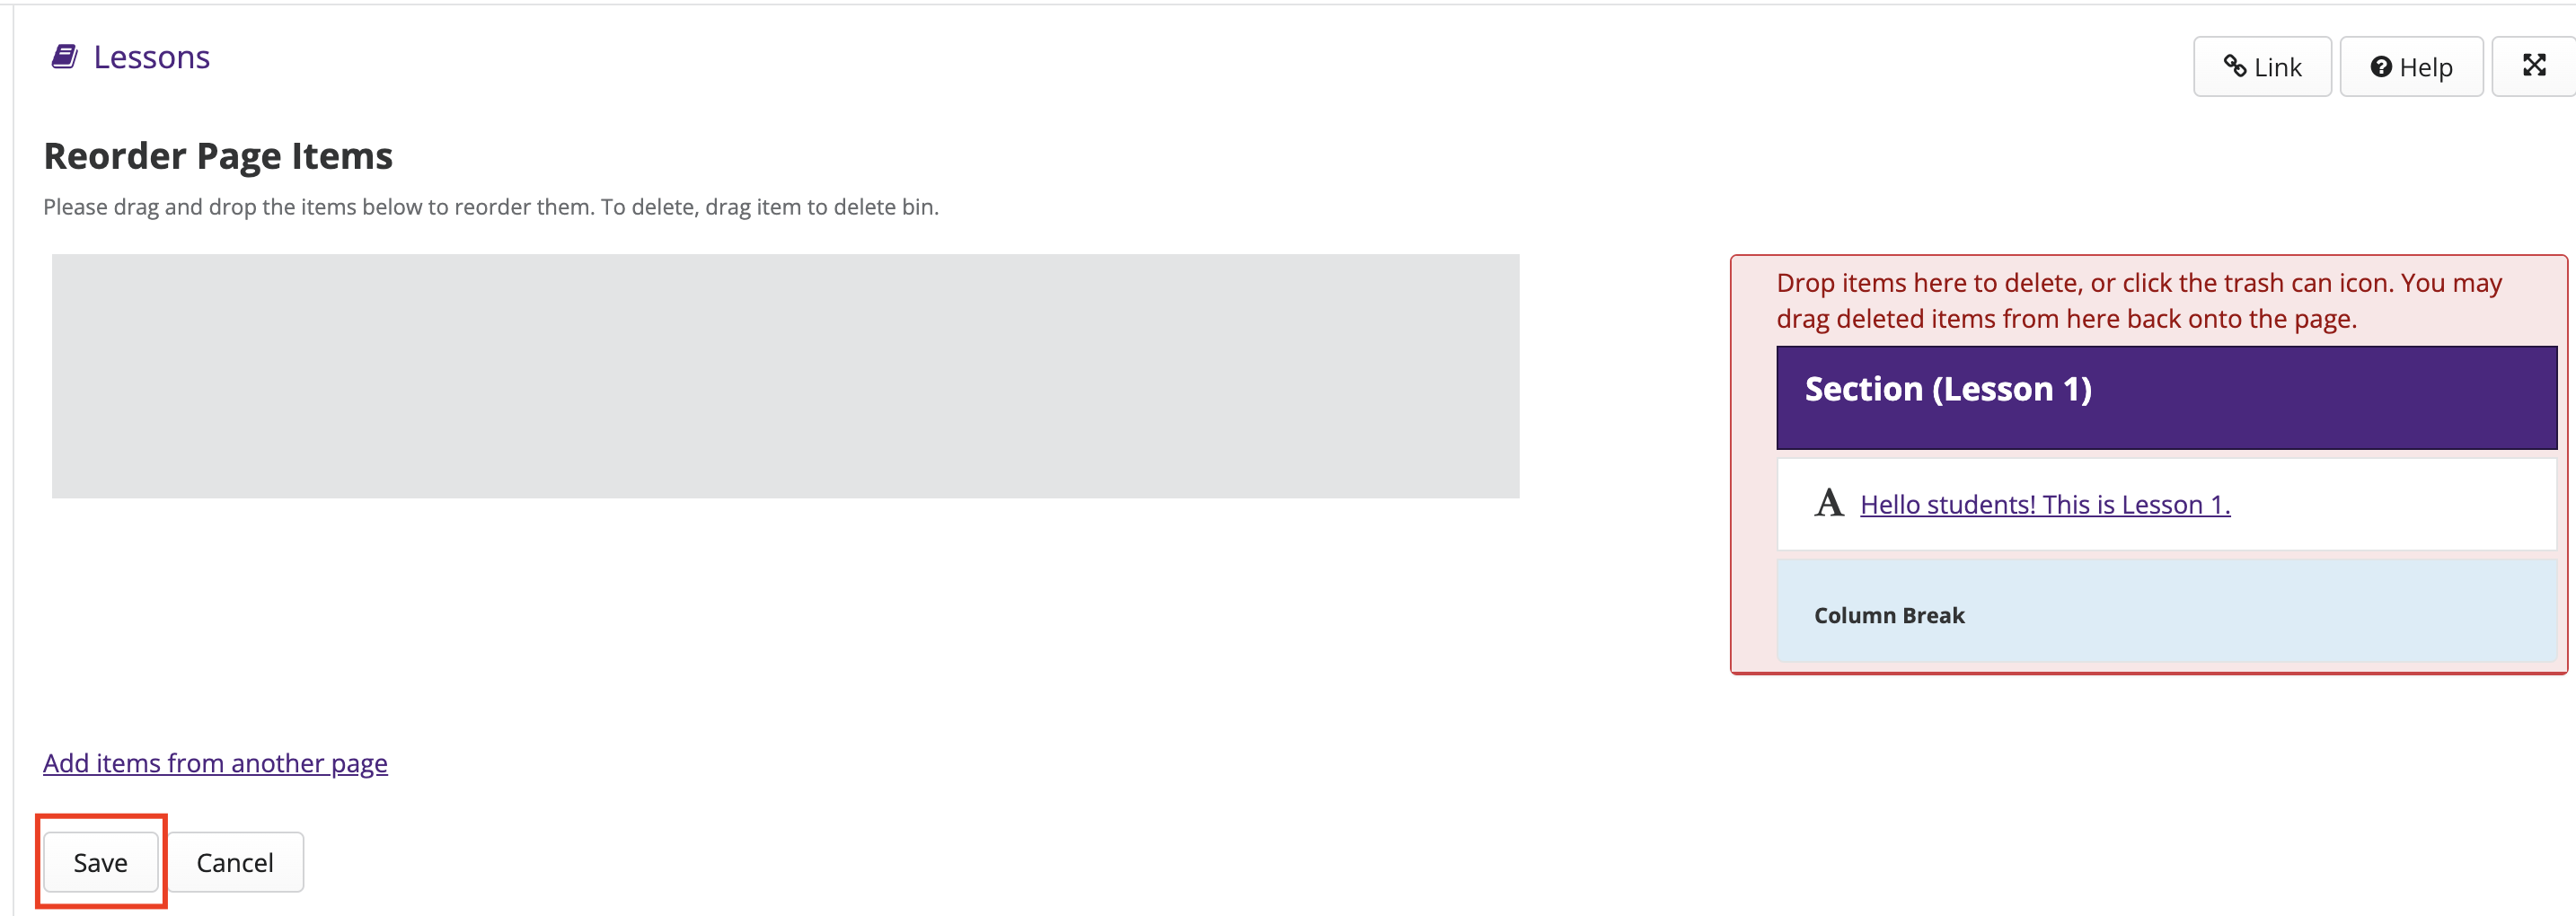
Note that any section or column you delete will be dropped into the Red box as shown below. You can recover deleted items by dragging and dropping back the items into the Grey box one item at a time.

-
Once done, click the Save button. Once saved, the deleted items cannot be recovered.
To add a page layout:
-
Click on the Add Layout tab on the top of the Lessons page.
-
Click on the Page Layouts tab.
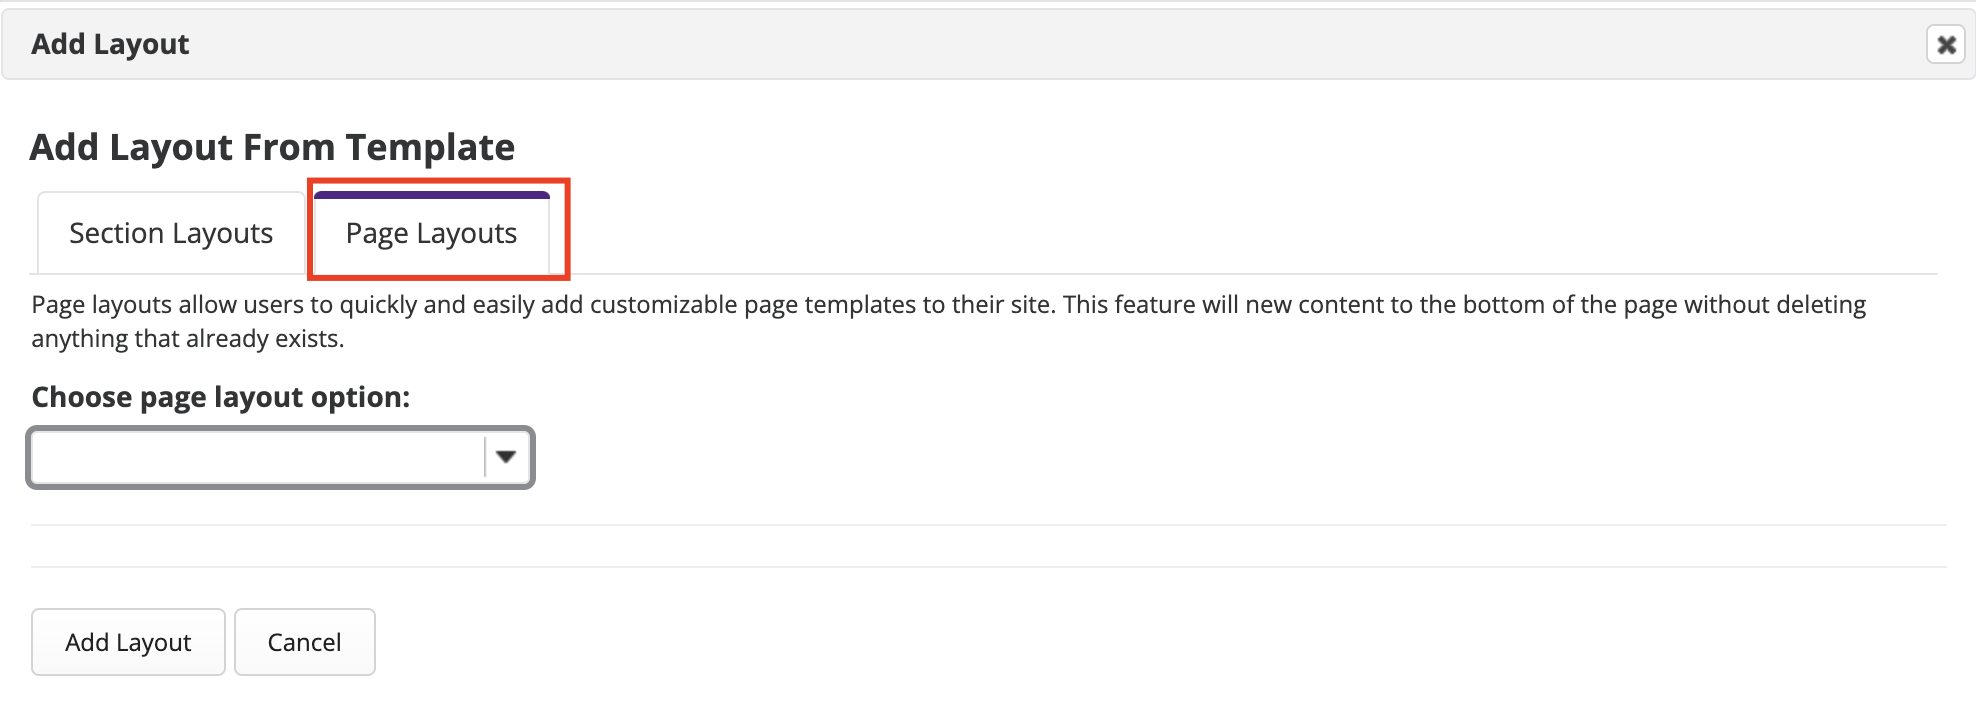
-
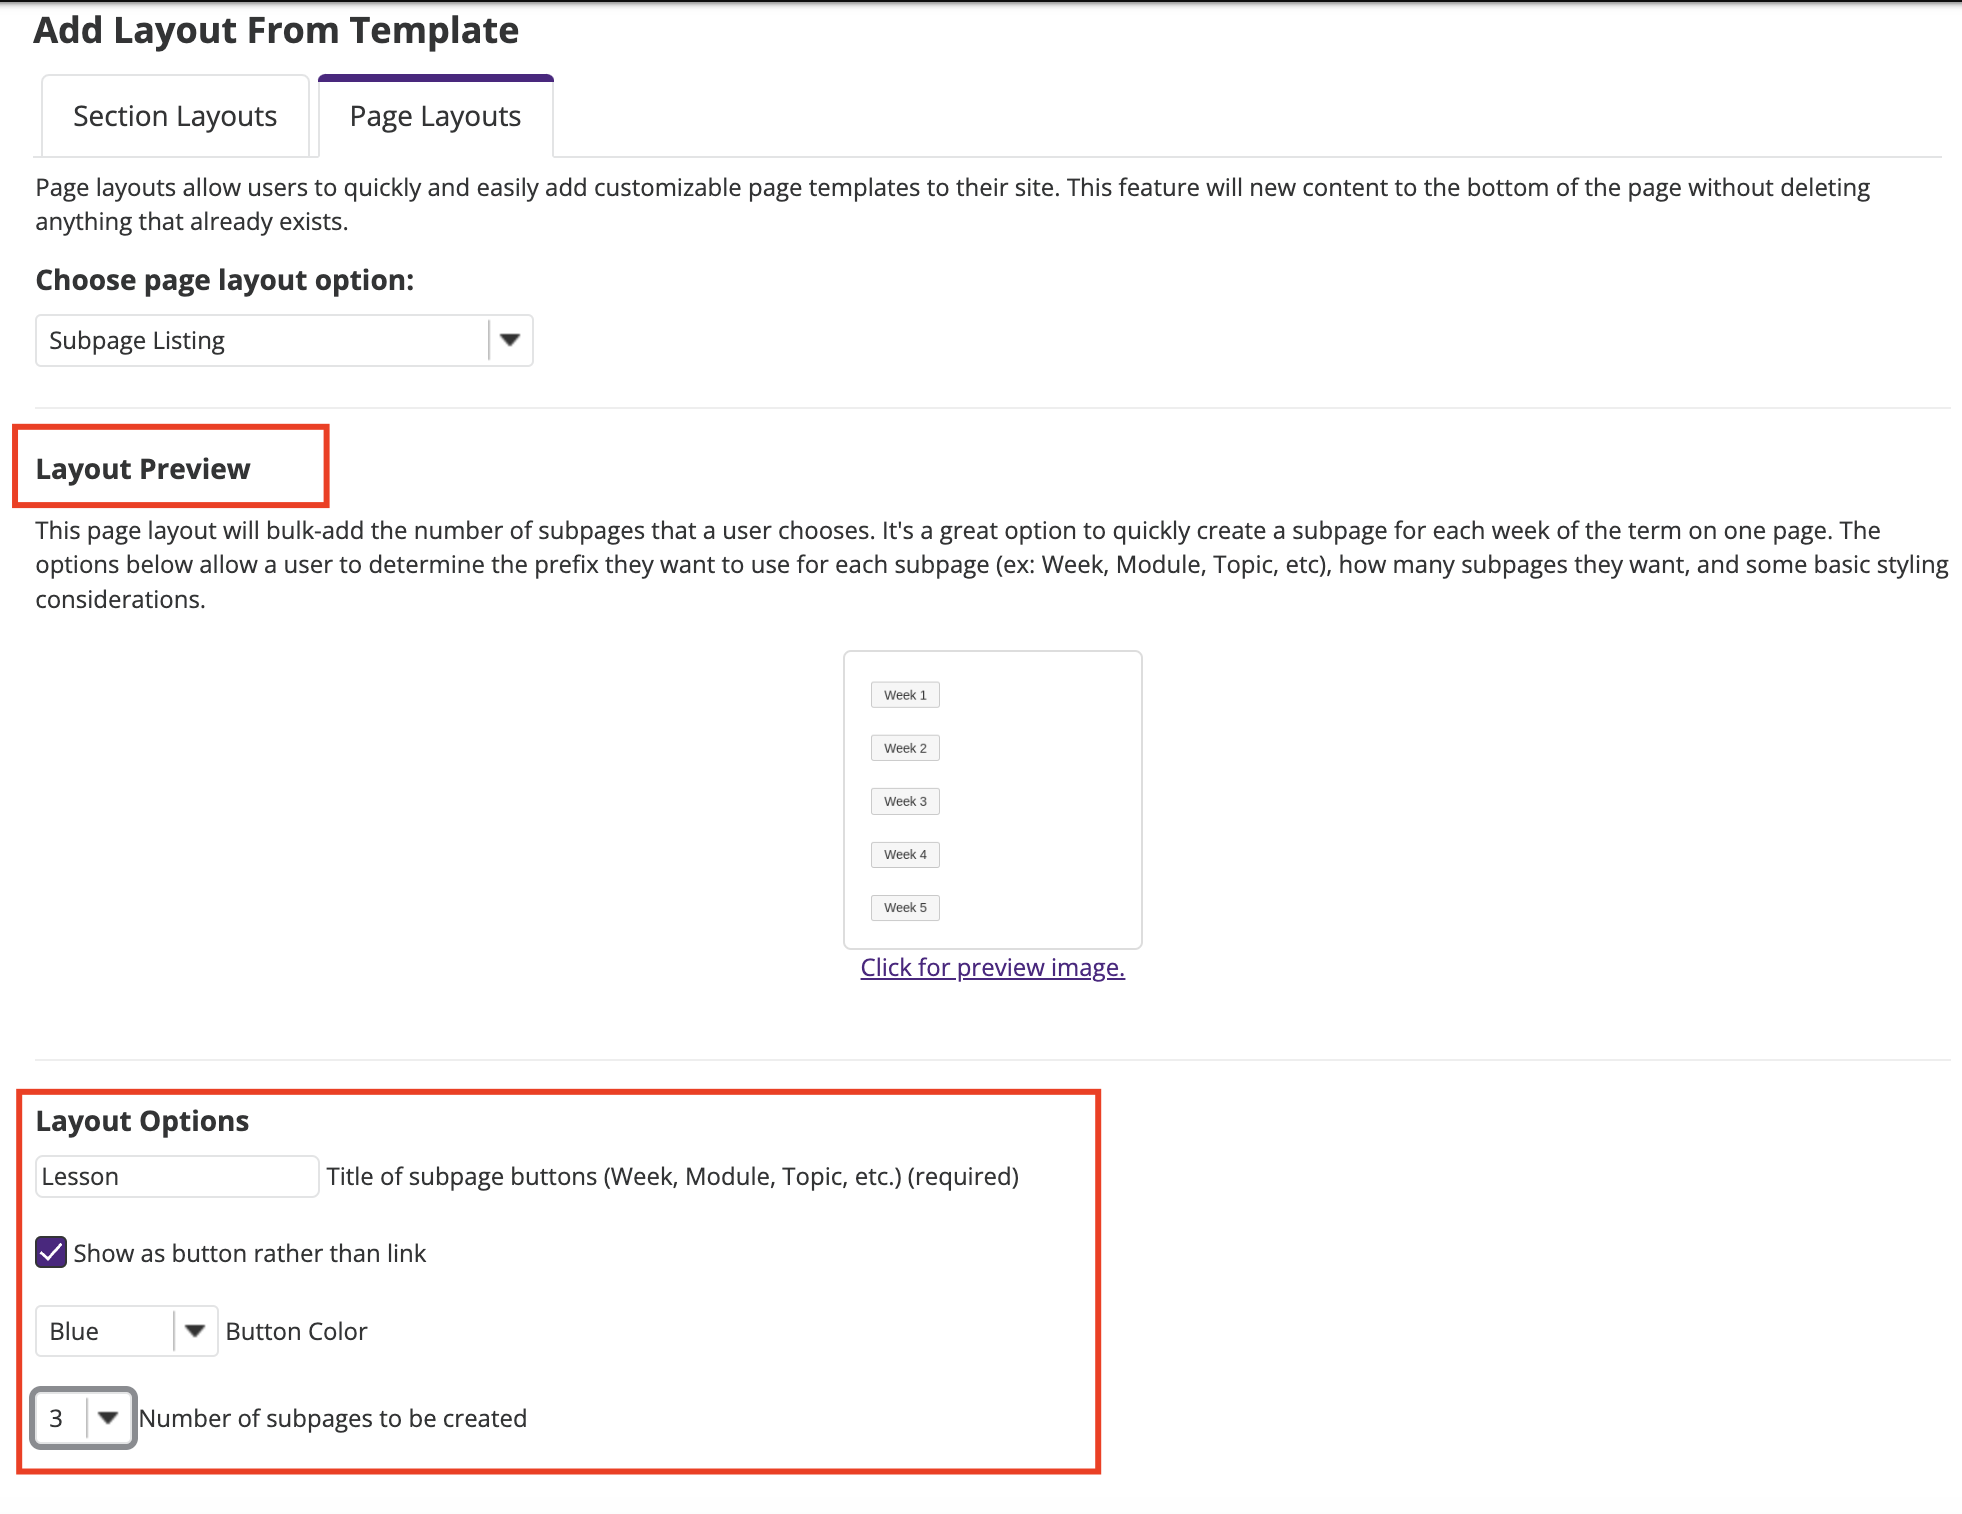
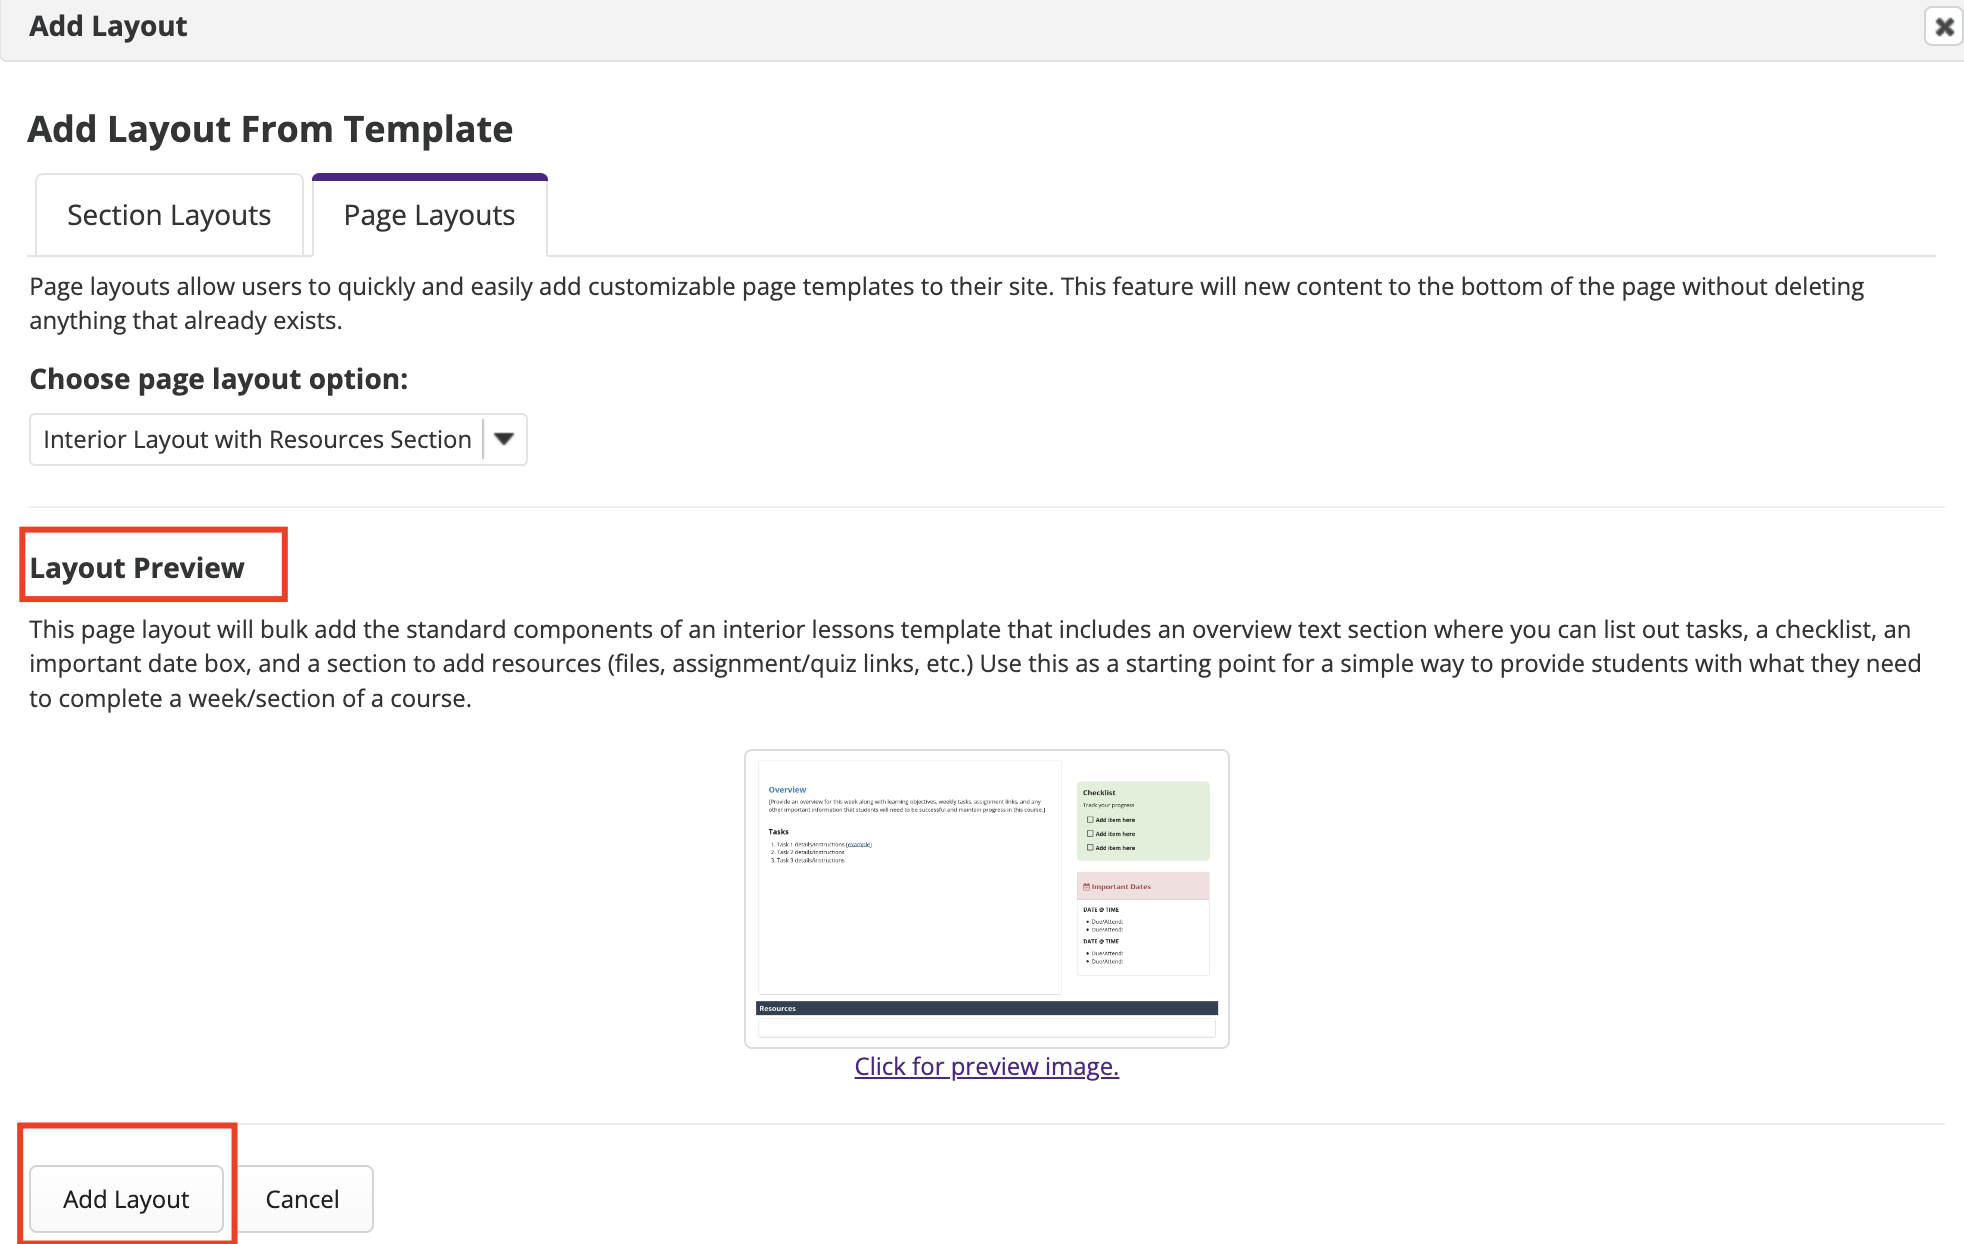
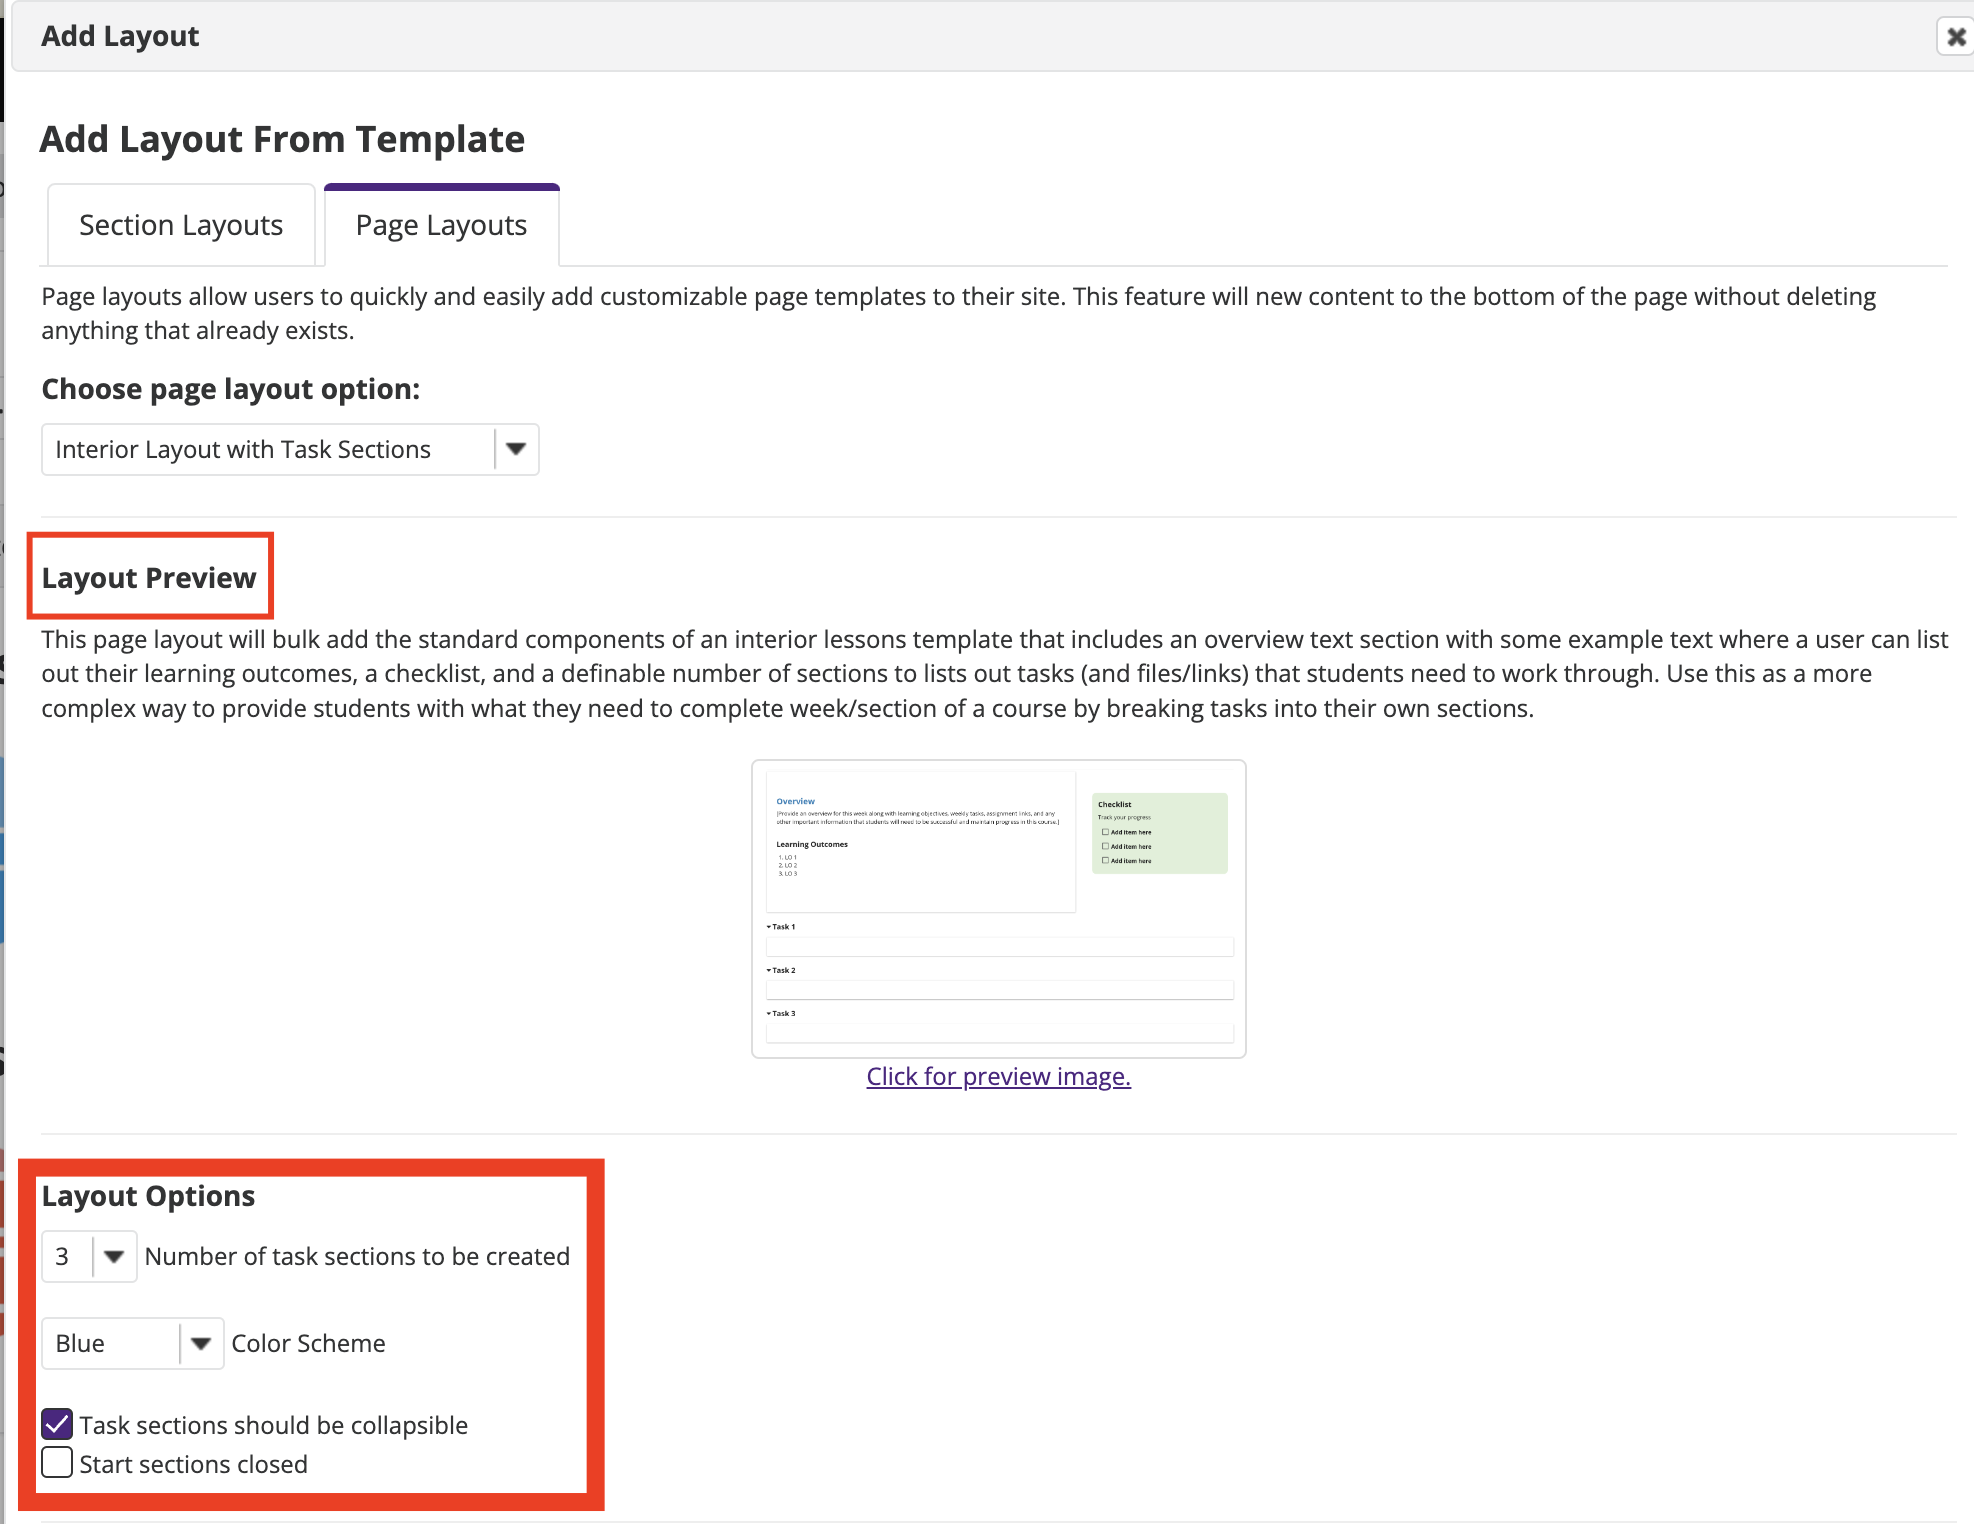
Select the desired page layout option from the drop-down as shown below:
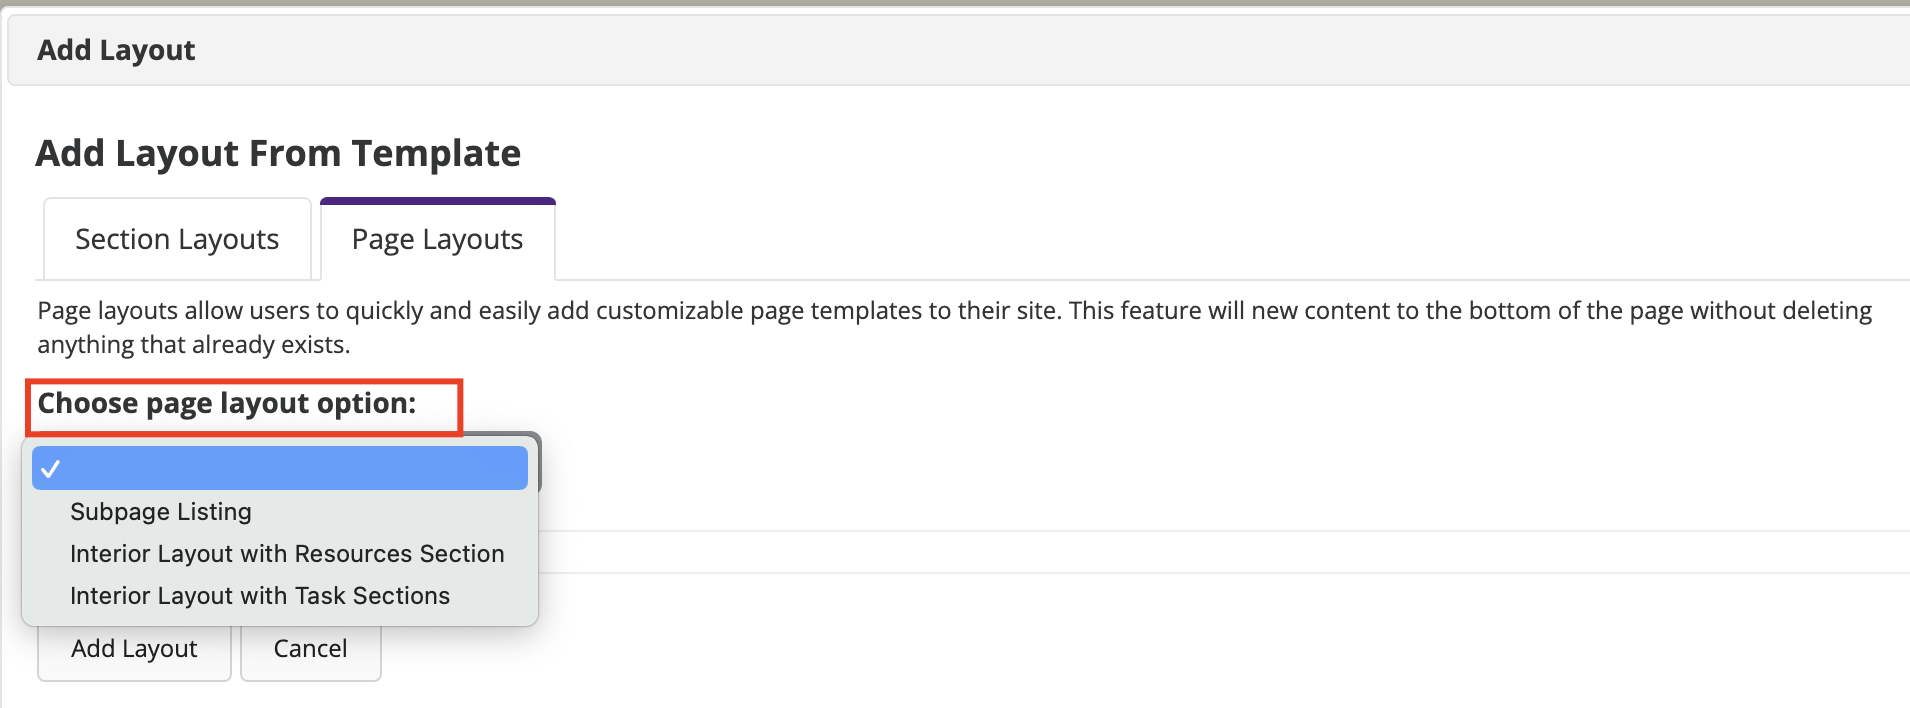
You will notice a Layout Preview section which contains a description of the included components in the selected option. Fill in the desired Layout Options if applicable as shown in the examples below.
-
Subpage Listing
-
Interior layout with Resources Section
-
Interior layout with Task Sections
You will notice the preview changes as you update the section elements.
-
-
Once done, click the Add Layout button.
-
Check the applied page layout. You can modify/edit/delete components of the layout as described previously.