Add/Manage Student Content
On This Page
Lessons can be used to allow students to create their own pages and add content if the instructor or site maintainers allow Student Pages. Students can add text, link to documents, link to web pages, embed images, embed video, embed audio, create sub-pages, add comments (if allowed) and peer review (if allowed).
Create a Student Page
-
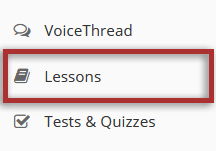
Select Lessons from the Tool Menu in the site.
Note: The lesson tool in your site might be using a custom title, such as "Week 1" or "Course Content".
-
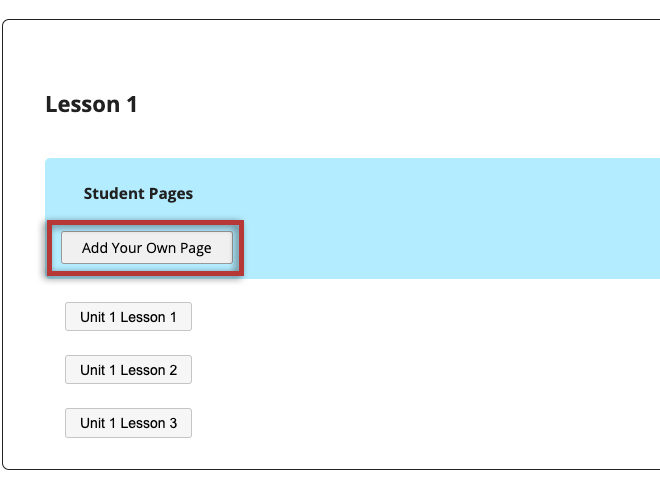
Click Add Your Own Page in the Student Pages section.
Note: Student Pages must be enabled by the site maintainer or instructor in order to create your own page.
Add Text
-
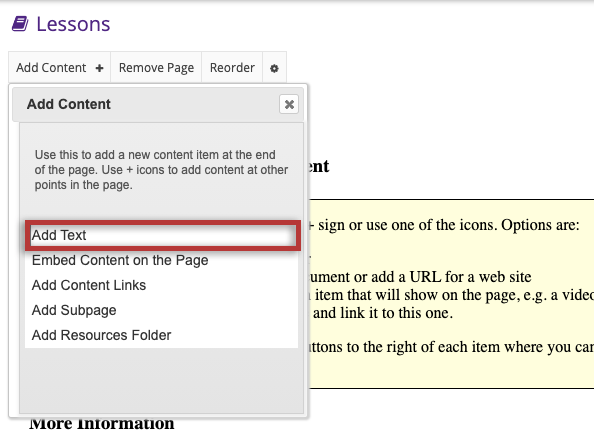
From the Add Content dropdown menu, select Add Text.
You may also add content by clicking on the + button next to any existing item on the page.
-
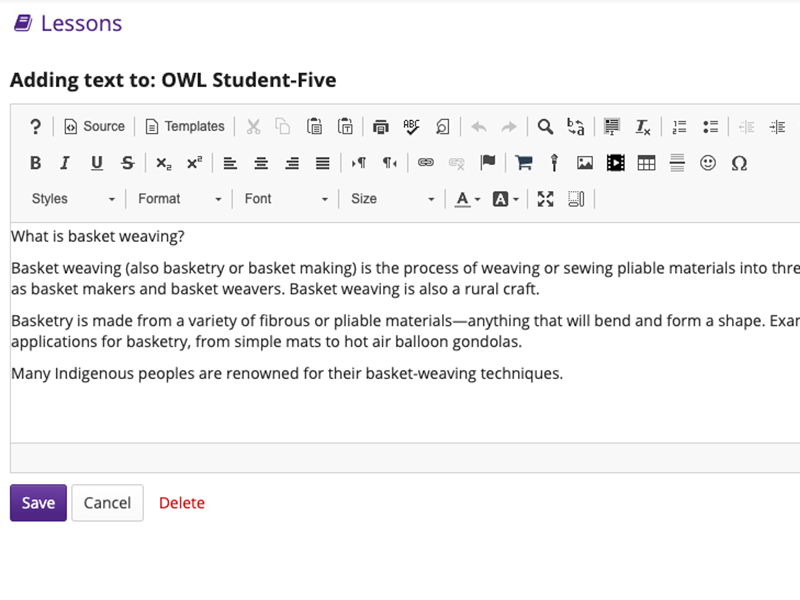
Enter your text content.
Use the Rich Text Editor tools to format the text. Weblinks, images, and other media can also be embedded within the Text Editor.
When finished, click the Save button.
Add Content Links
-
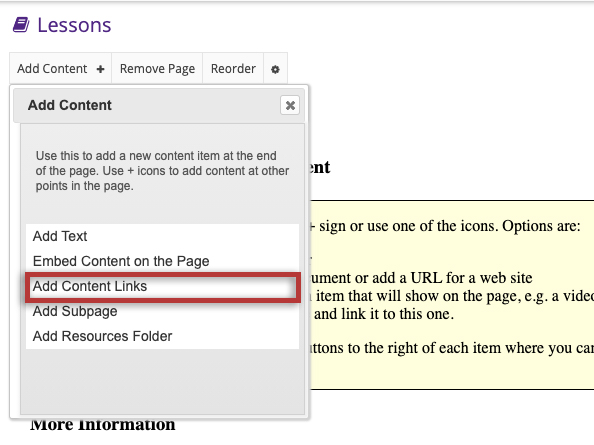
From the Add Content drop-down menu, select Add Content Link.
You may also add content by clicking on the + button next to any existing item on the page.
-
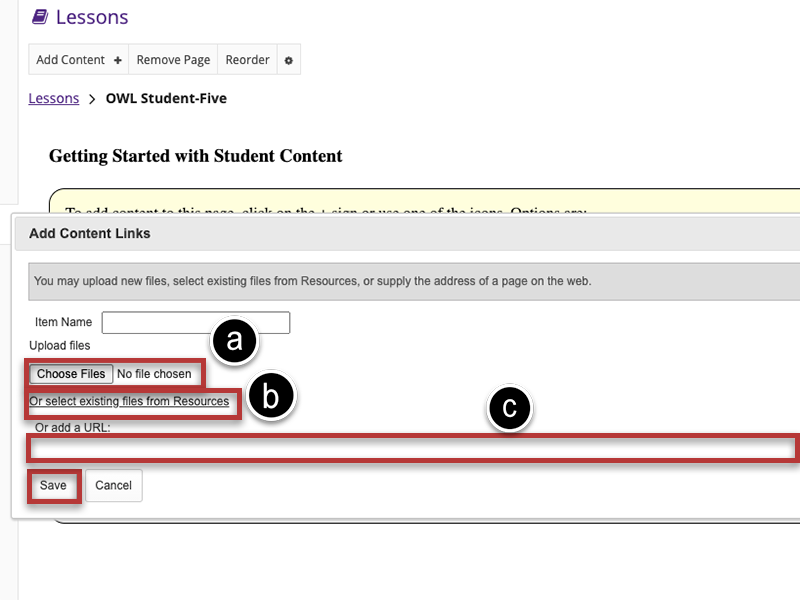
Add your content through:
Click the Save button.
-
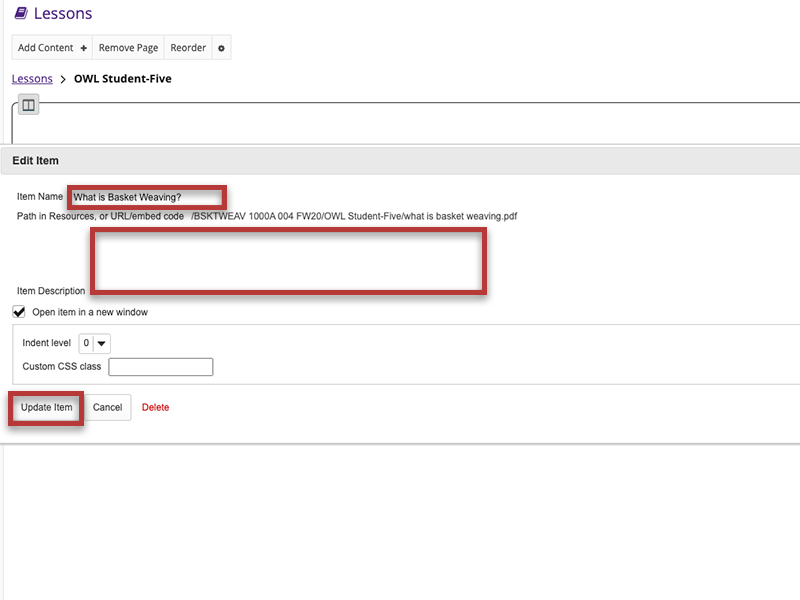
To edit the settings (optional):
Click the Edit icon.
Add/edit the Item Name, add a description, alter the release permissions, then click the Update Item button.
Embed Images
-
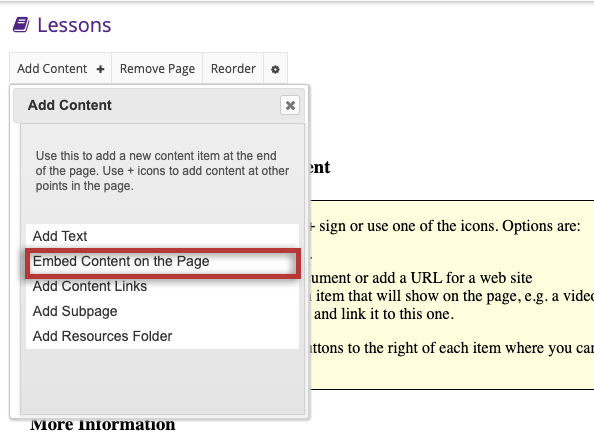
From the Add Content drop-down menu, select Embed Content on the Page.
You may also add content by clicking on the + button next to any existing item on the page.
-
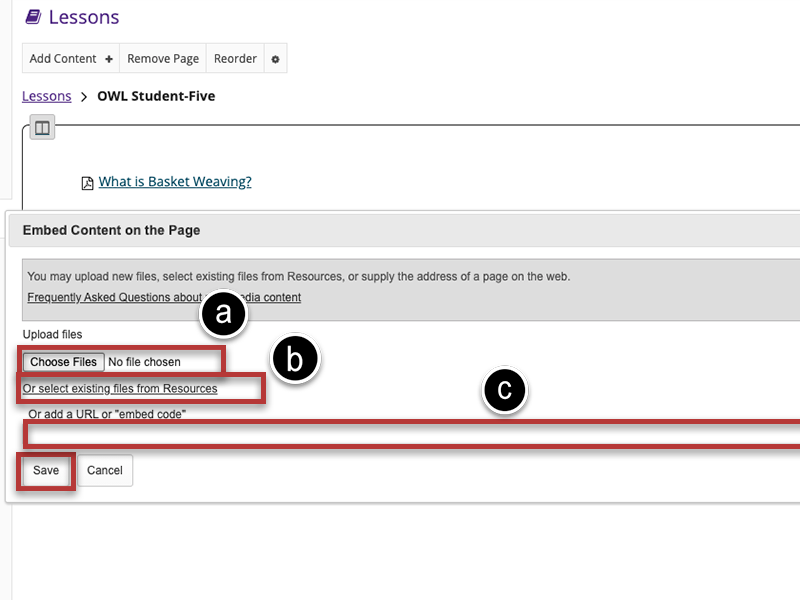
Choose a method to upload the image:
Click the Save button.
-
To edit the settings (optional):
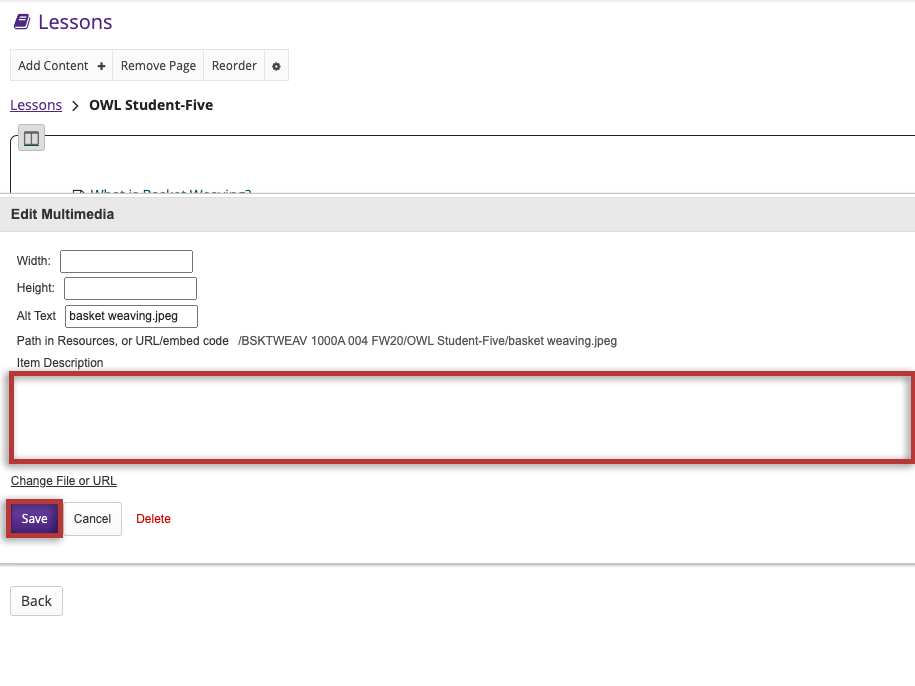
Click on the Edit icon.
Enter a description in the Item Description text box and then click the Save button.
Embed Video
From File
-
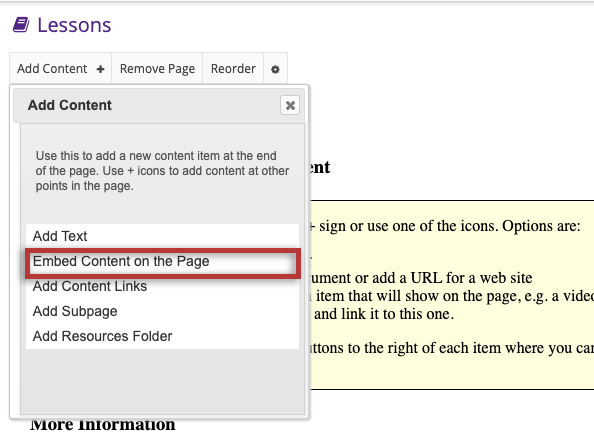
From the Add Content drop-down menu, select Embed content on page.
You may also add content by clicking on the + button next to any existing item on the page.
-
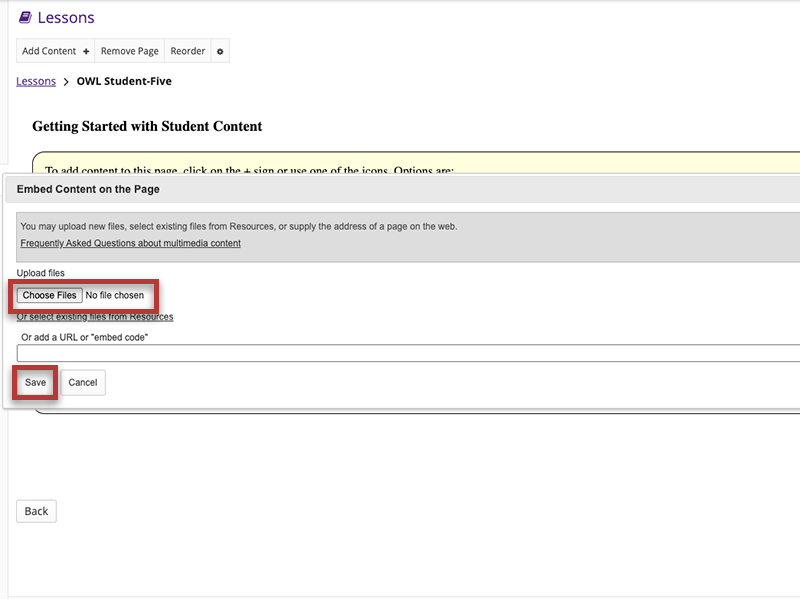
Click Choose File.
Locate and select the video file on your computer and click Open.
Click the Save button.
-
To edit the settings (optional):
Click on the Edit icon.
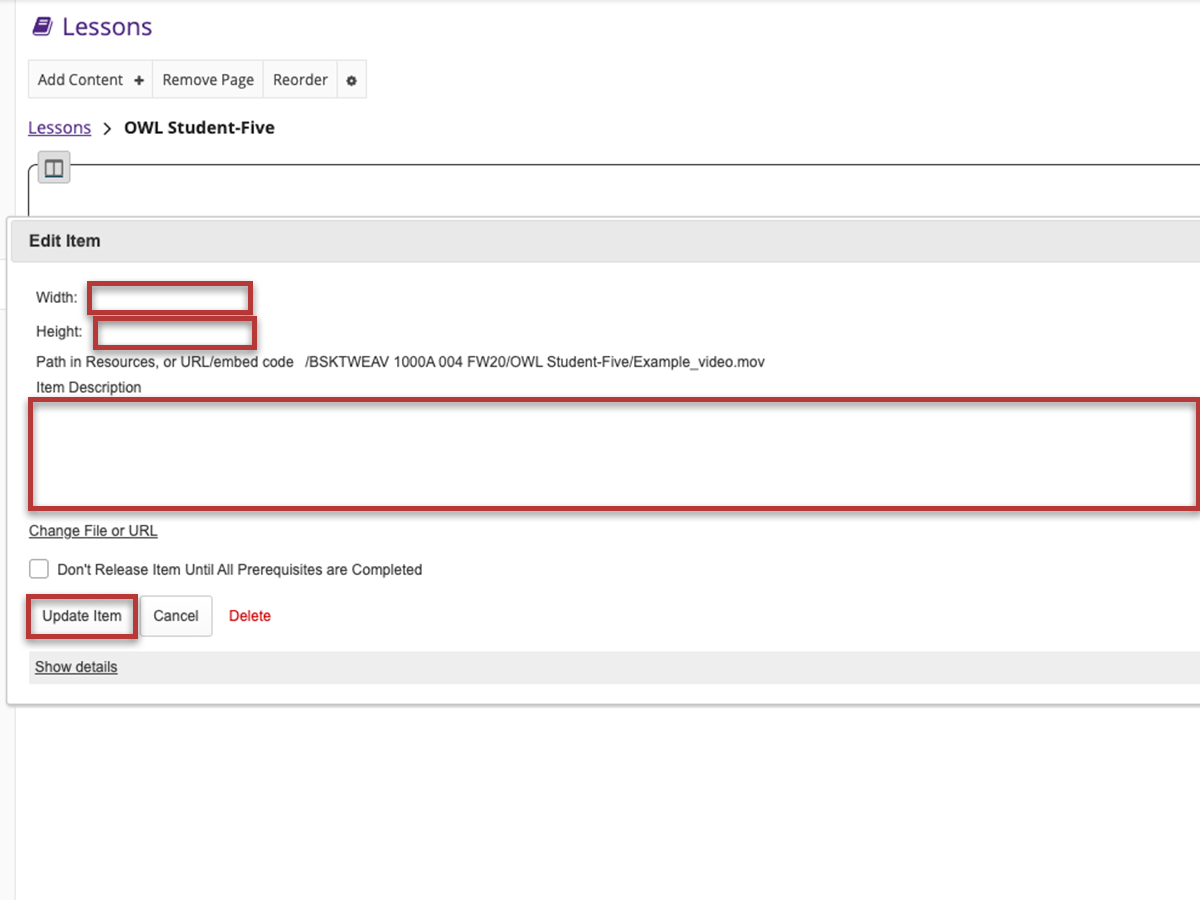
Enter the desired Width and Height for your video in number of pixels, and/or enter a description in the Item Description text box. Then, click Update Item to save your changes and return the display to the Lesson Page with the embedded video and description.
Note: The video will be uploaded to your Resources folder for that Lessons page. Uploaded videos are NOT streamed to the user. The larger the video file, the longer it will take the video to load on the Lessons page.
Video from YouTube
-
Locate and copy the YouTube video URL (not source code).
-
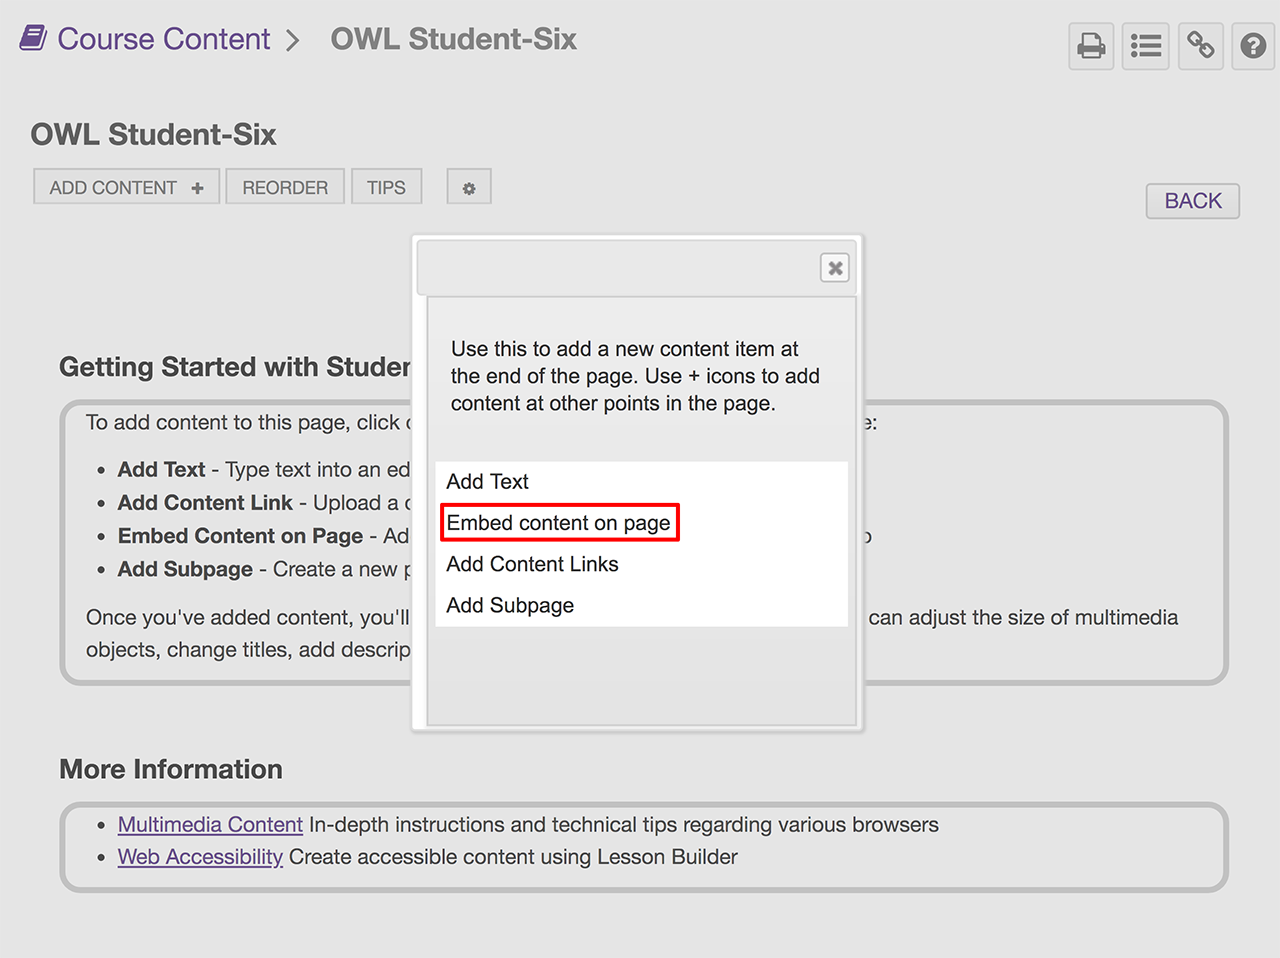
From the Add Content drop-down menu, select Embed content on page.
You may also add content by clicking on the + button next to any existing item on the page.
-
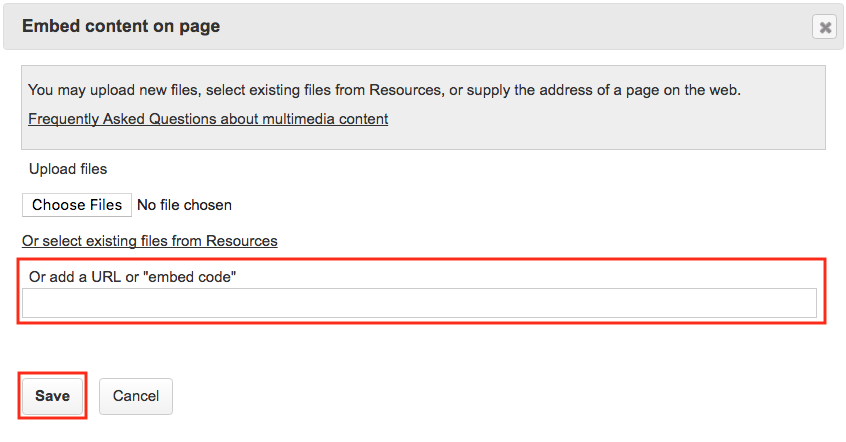
Paste the YouTube URL into the text field marked add a URL or "embed code".
Tip: Before clicking the Save button, you might need to change "http" to "https" as some browsers (e.g. Firefox) do not display "http" links.
Click the Save button.
-
To edit the settings (optional):
Click on the Edit icon.
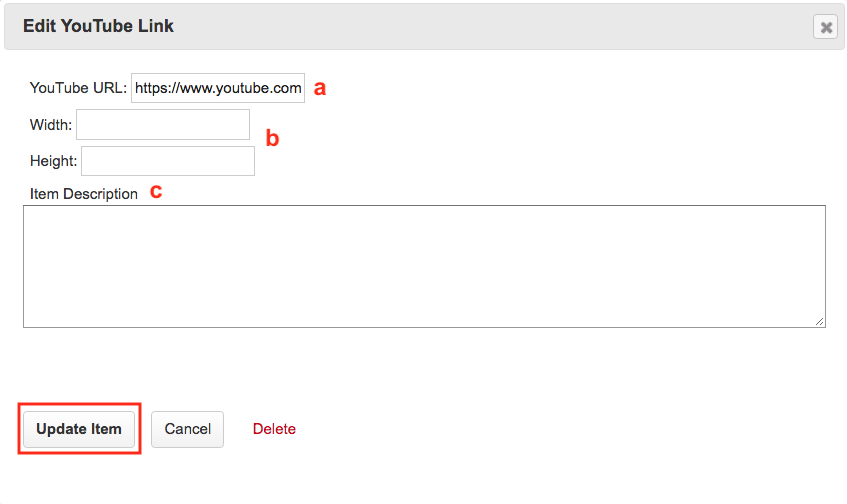
Enter the desired Width and Height for your video in number of pixels or percent of screen, and/or enter a description in the Item Description text box.
Click the Update item button to save your changes and return the display to the Lesson Page with the embedded video and description.
Embed Audio
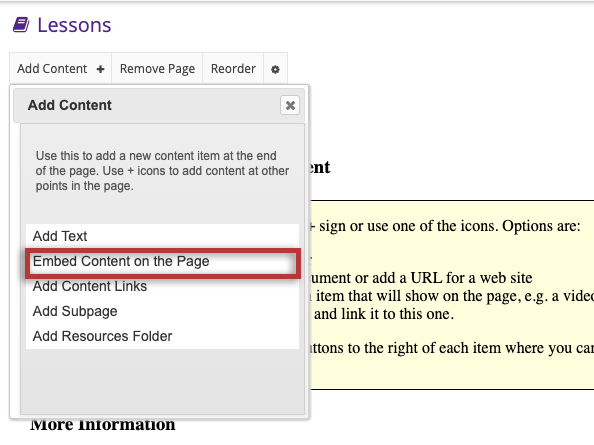
From the Add Content drop-down menu, select Embed content on page.
You may also add content by clicking on the +button next to any existing item on the page.
-
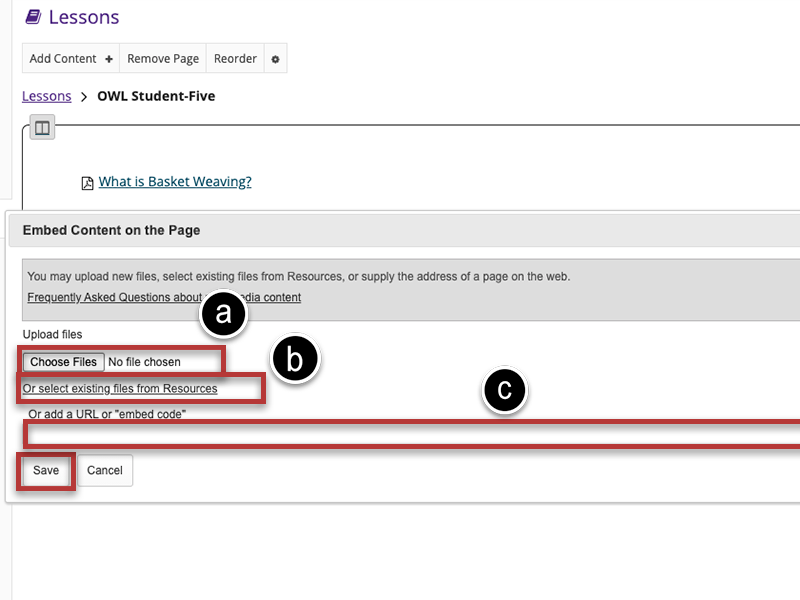
Choose an upload method:
Click the Save button.
-
To edit the settings (optional):
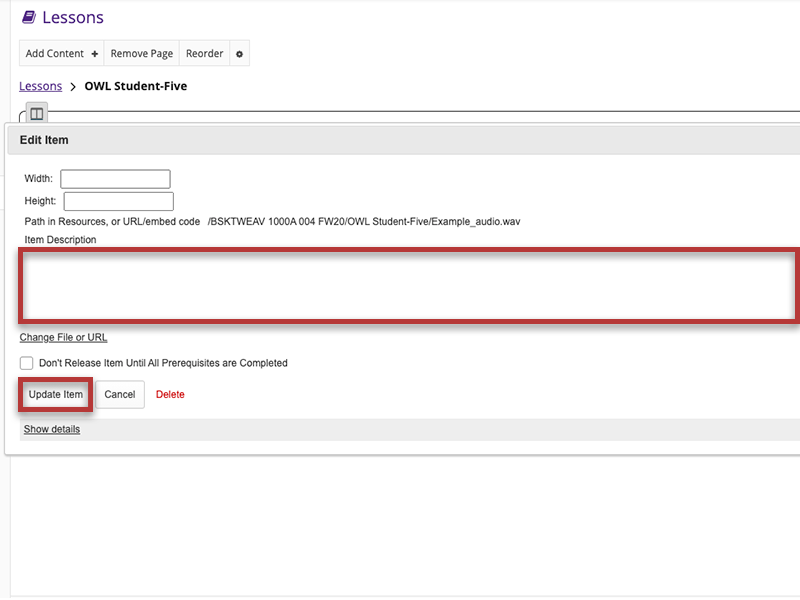
Click on the Edit icon.
Add a description of the audio file, then click the Update Item button.
This returns the display to the Lessons page with the embedded audio and its description.
-
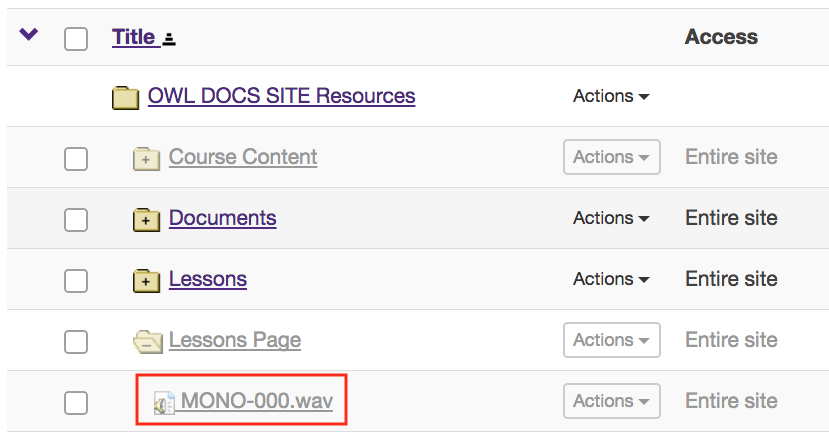
Notice the file location in Resources.
Note: The audio file is not streamed to the user. The larger the audio file, the longer it will take for the audio file to load on the Lessons page.
How do I reorder items on a Lessons page?
Reorder the placement of items on a Student Page.
-
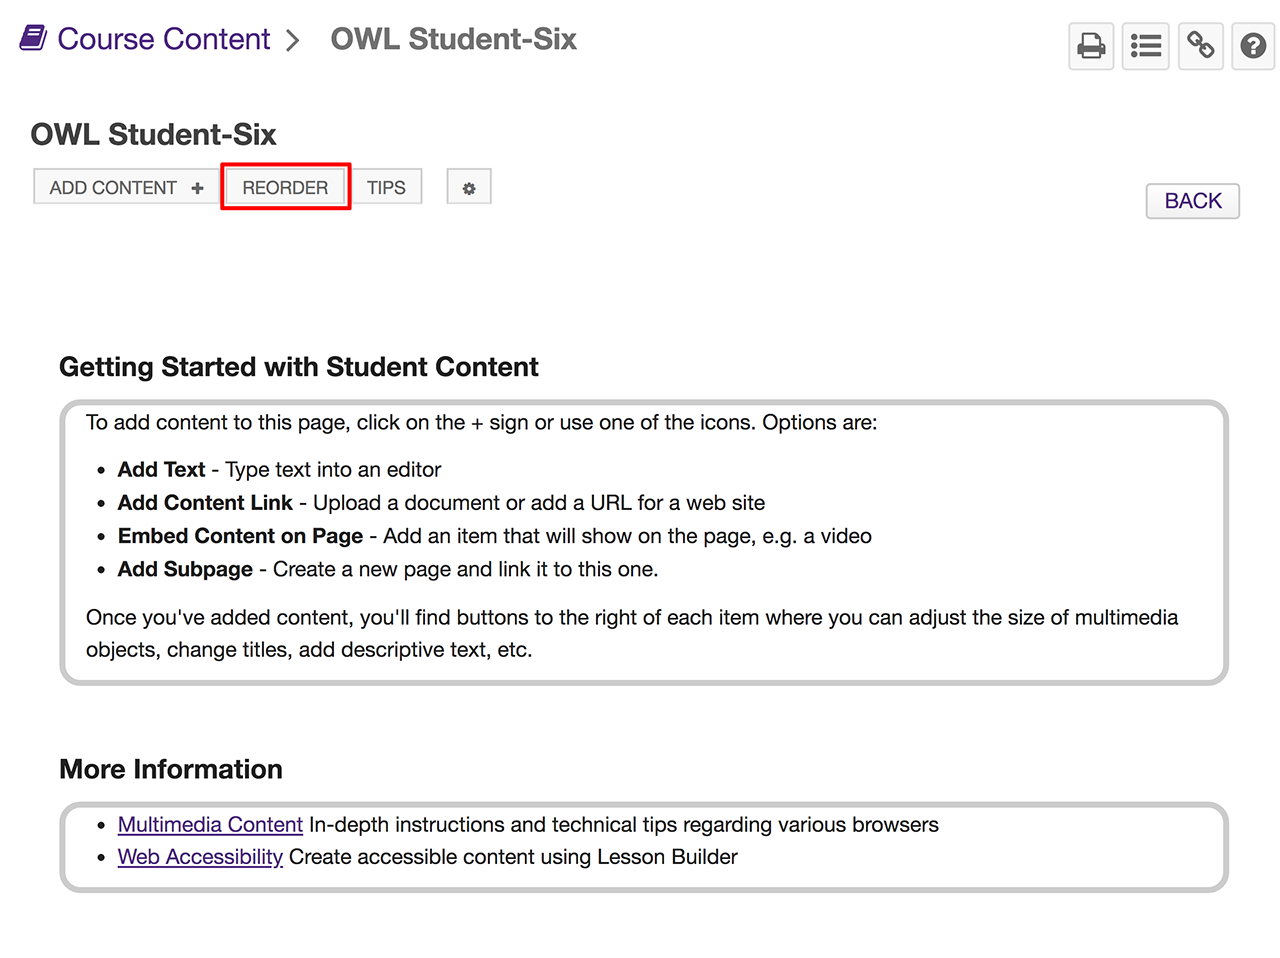
Click the Reorder button.
-
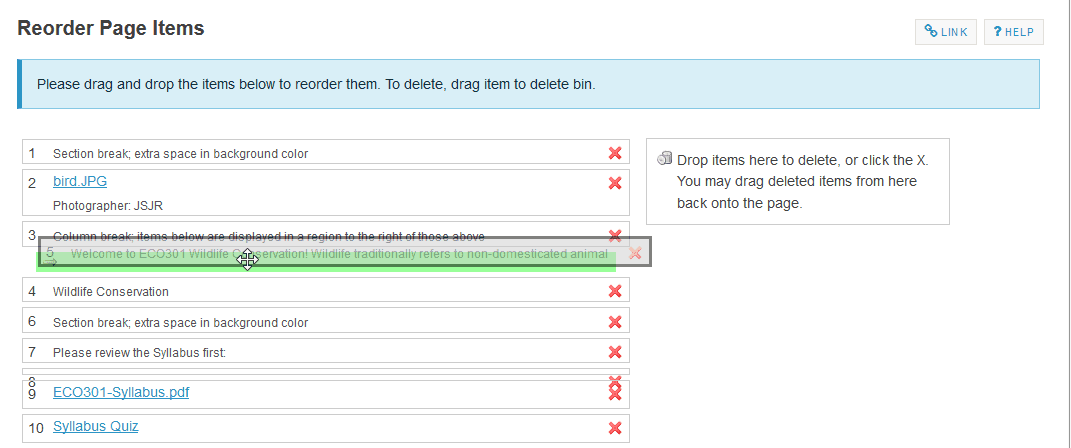
In the Reorder page, drag and drop the items into the desired order.
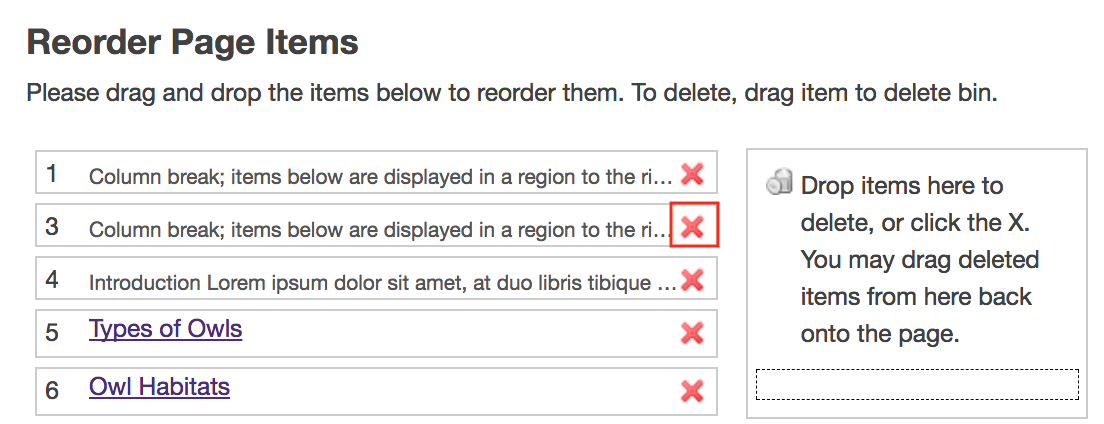
Click the red X beside an item to delete it or drag it over the the "Delete Bin" on the right side of the page.
-
Click the Save button.
After saving, you will return to the Lessons page with the items displayed in the new order.
How do I delete items on a Lessons page?
Delete items added to a Lessons page using the Delete icon, the Edit option, or the Reorder option.
To delete an item using the Delete icon:
-
Click on the trash can icon for the item you want to delete.
-
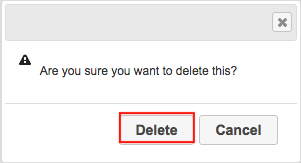
Click Delete in the confirmation pop-up to complete deletion.
To delete an item using the Edit option:
-
Click the Edit icon next to the item you wish to delete.

-
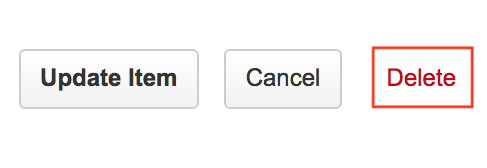
Click the Delete button at the bottom of the Edit window.
Warning: Using this method will immediately delete the item without confirmation.
To delete an item using the Reorder option:
-
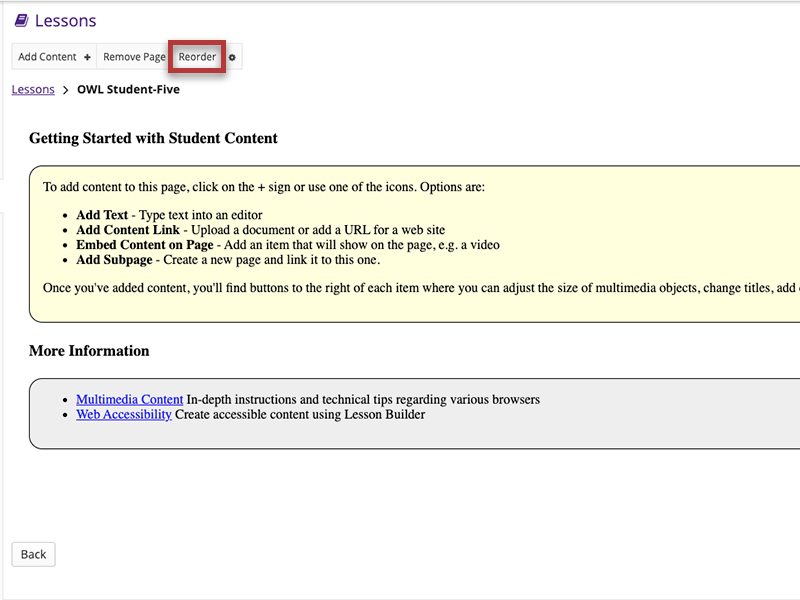
Click the Reorder tab from the top menu in Lessons.

-
This displays the reorder list of items added to the Lessons page.
Click the red X beside an item to delete it or Drag it over the the delete bin on the right side of the page.
-
Click the Save button at the bottom of the page.

