Edit the table properties & context menu. (Optional)
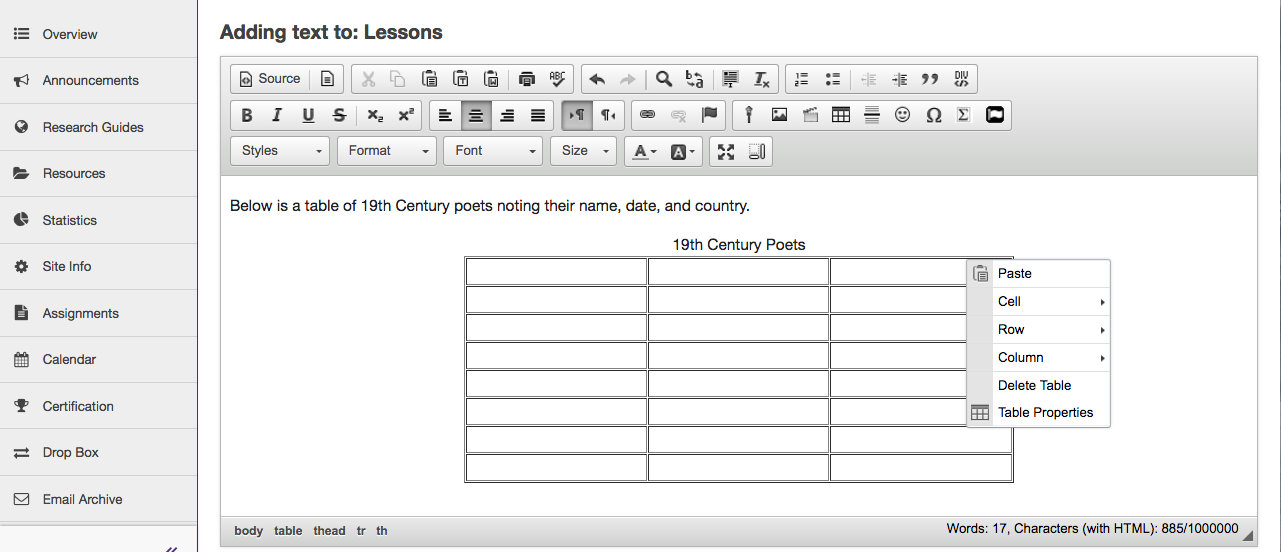
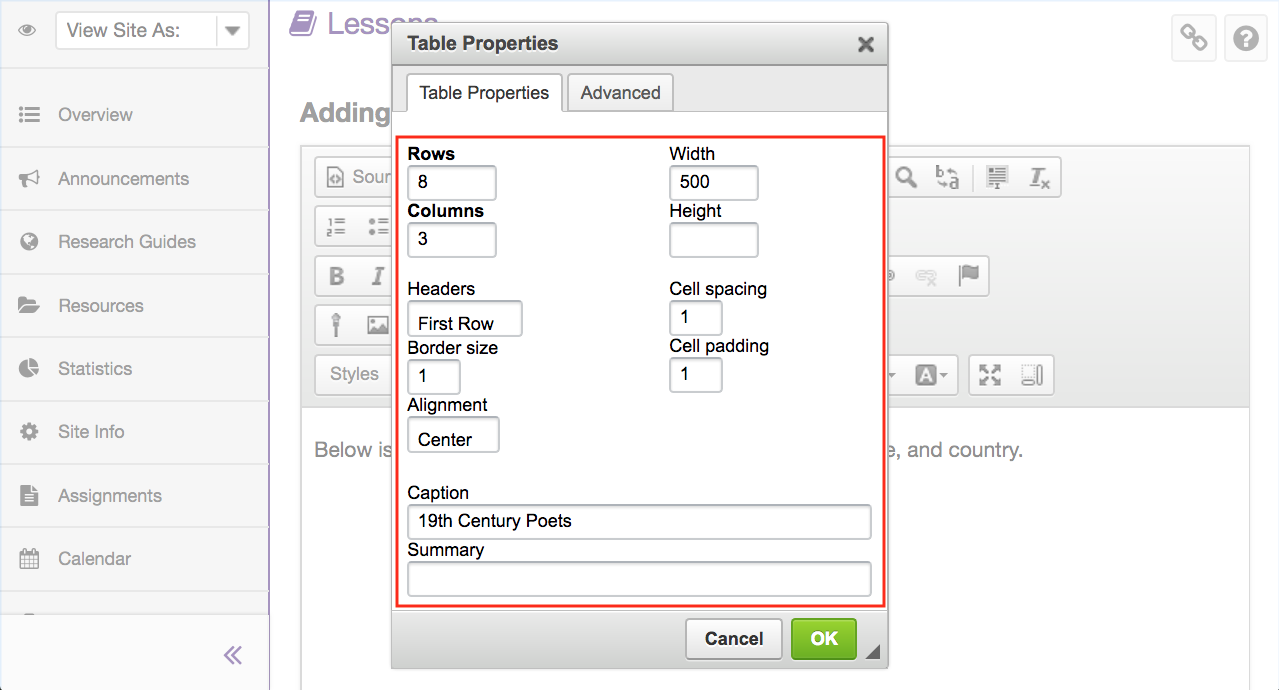
To edit the table properties, right-click (CTRL-click - MAC) on the table.
Cells
The cell options are located in the context menu of a table, which will appear when you click the right-button of your mouse when the pointer is over the table.
Note: You must be editing the table for the context menu to appear. If not, a context menu for your internet browser will appear instead.
You are given the following options in the context menu:
- Insert Cell Before: Inserts a new cell before the cell your cursor is currently in.
- Insert Cell After: Inserts a new cell after the cell your cursor is currently in.
- Delete Cells: Deletes the cell your cursor is in. You may also highlight more cells and than delete them.
- Merge Cells: Merges cells you have highlighted into one cell.
- Split Cell Horizontally: Splits a cell in two.One cell is split into two columns.
- Split Cell Vertically: Splits a cell in two. One cell is split into two rows.
- Cell properties: If you click the cell properties a new popup window called "Cell Properties" will appear.
The following options exist in the Cell Properties window:
- Width: Sets the cell width in pixels or in percentage of the table width.
- Height: Sets the height of the cell.
- Word wrap: Turns word wrapping on/off.
- Horizontal Alignment: Determines the horizontal alignment of the text in your cell. It can be set to Left, Center or Right.
- Vertical Alignment: Determines the vertical alignment of the text in your cell. It can be set to Top, Middle, Bottom or Baseline.
- Rows span: Extends vertical rows.
- Columns span: Extends cells on a horizontal row (left and right).
- Background colour: Sets the background colour of your cell. You can either select a colour or type it manually.
- Border Colour: Sets the colour of your cells border. You can either select a colour or type it manually.
Rows
Accessing the Row features allows you the following properties:
- Insert Row Before: Inserts a new row before the row your cursor is currently in.
- Insert Row After: Inserts a new row after the row your cursor is currently in.
- Delete Rows: Deletes highlighted rows or the row your cursor is currently in.
Columns
Accessing the Column features allows you to set the following properties:
- Insert Column Before: Inserts a column before the column your cursor is currently in.
- Insert Column After: Inserts a column after the column your cursor is currently in.
- Delete Columns: Deletes highlighted columns or the column your cursor is currently in.

Select the Table Element that you want to edit (Cell, Row, Column, Table or Delete).


