Hide/Show Files and Folders
How do I hide files and folders?
-
Select the Resources tool from the Tool Menu in the site.
-
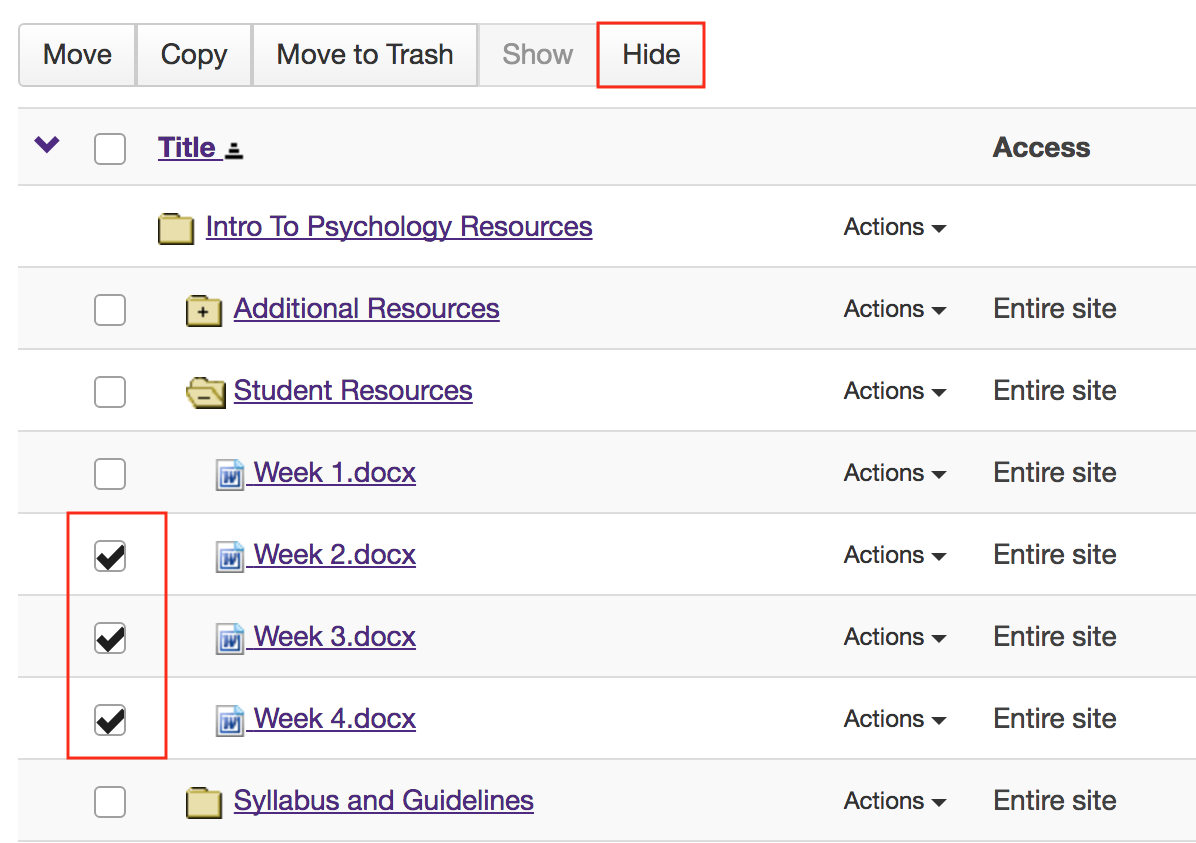
Method 1: Select the file(s) or folder(s), then click Hide.
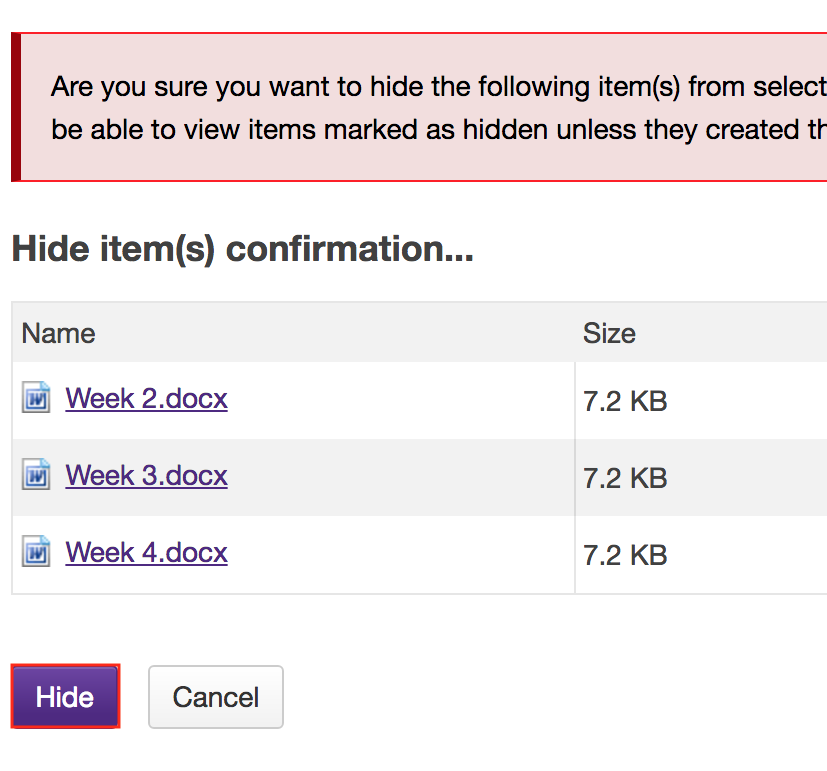
This displays the Hide Items Confirmation page.
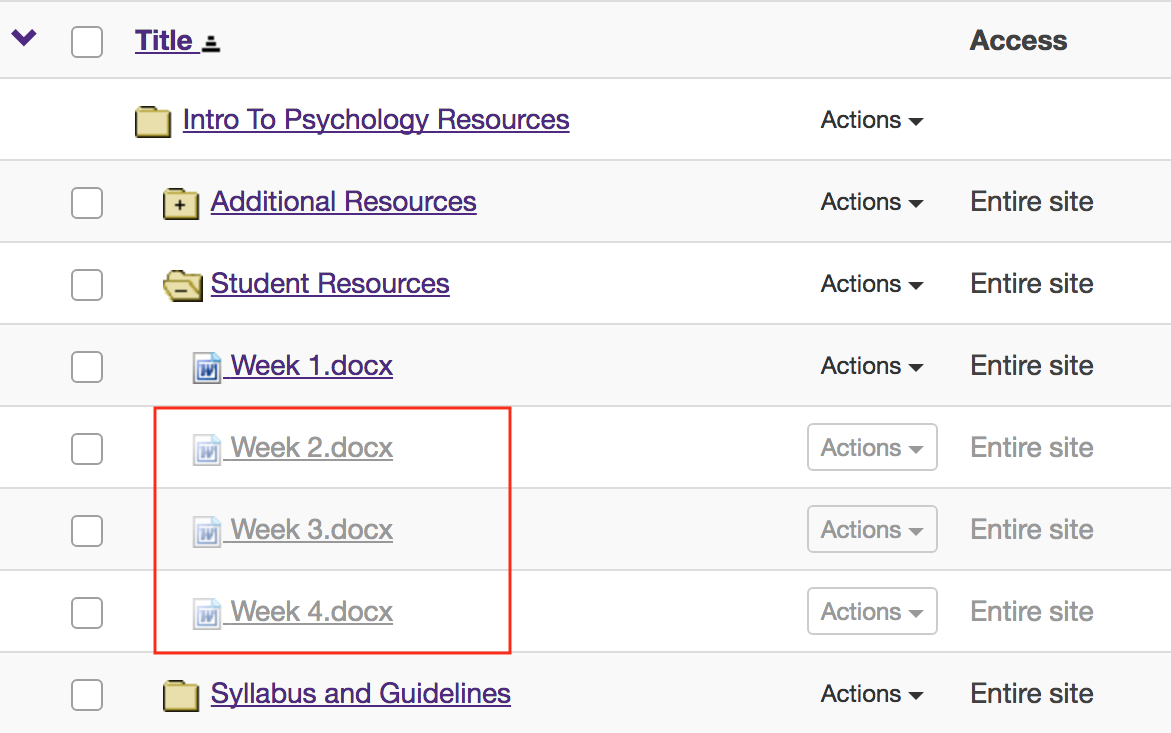
This returns the display to the Resources page with the selected items hidden.
Notes:
Confirm action by clicking Hide again.
Items are hidden.
-
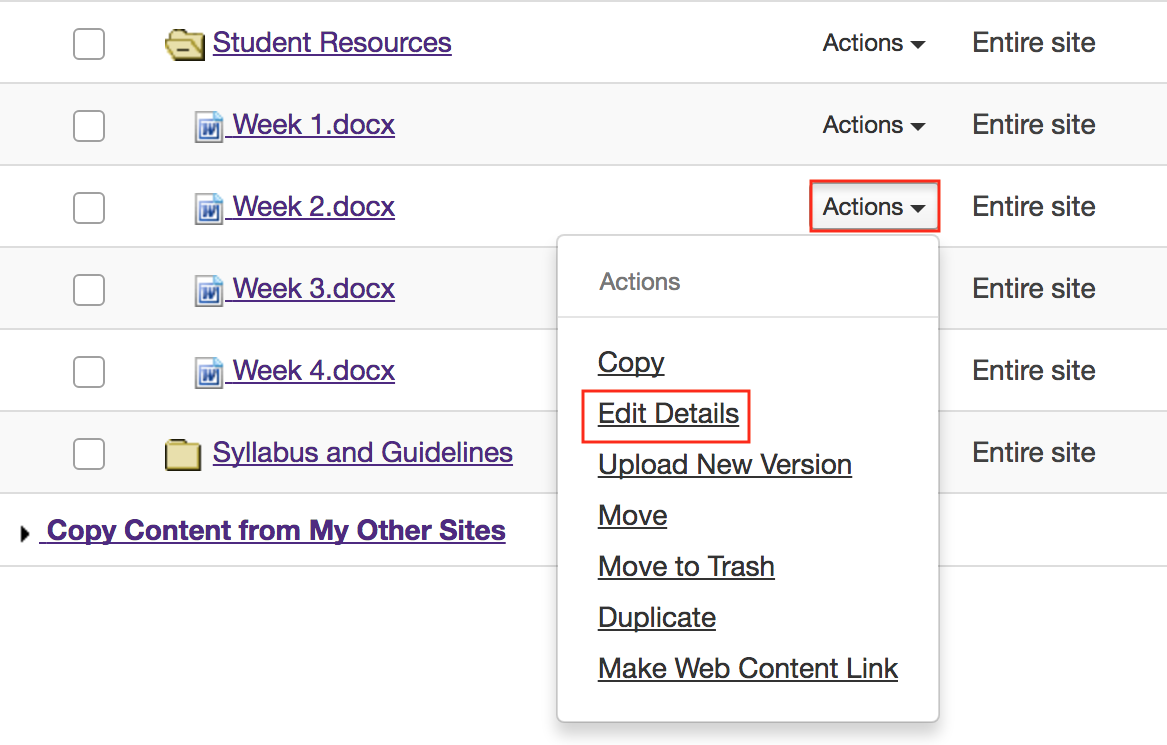
Method 2: Click Actions, then Edit Details.
To hide a file or folder, to the right of the file or folder, from the Actions drop-down menu, select Edit Details.
This displays the Edit Details page for the item.
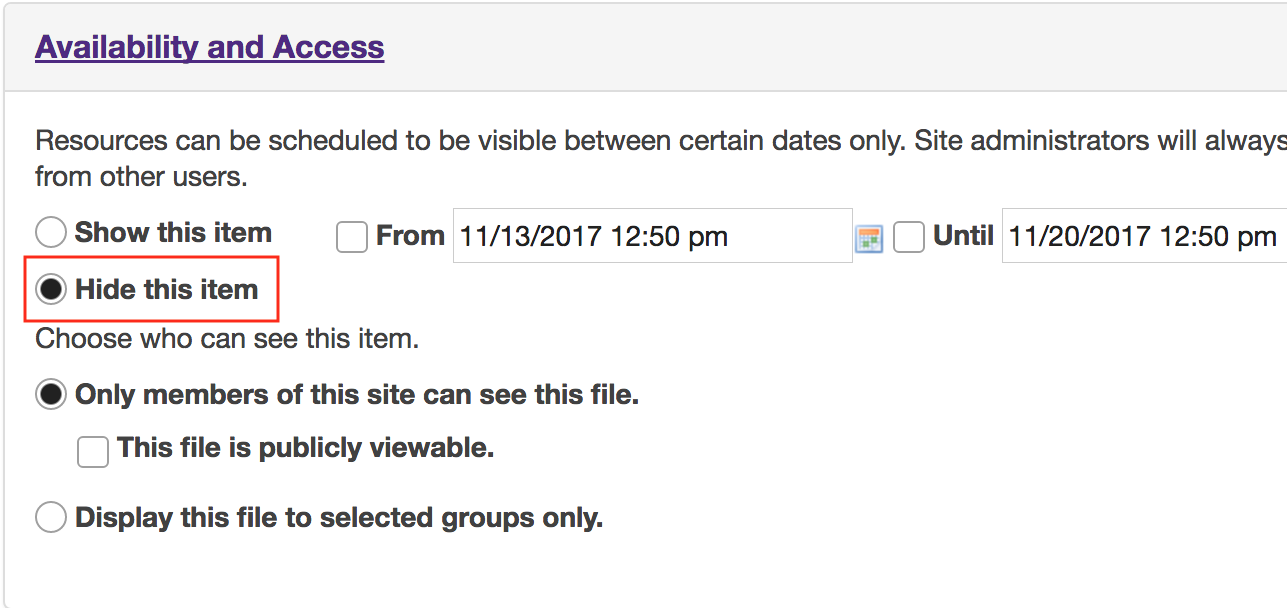
Under Availability and Access, select Hide this item, then click Update.
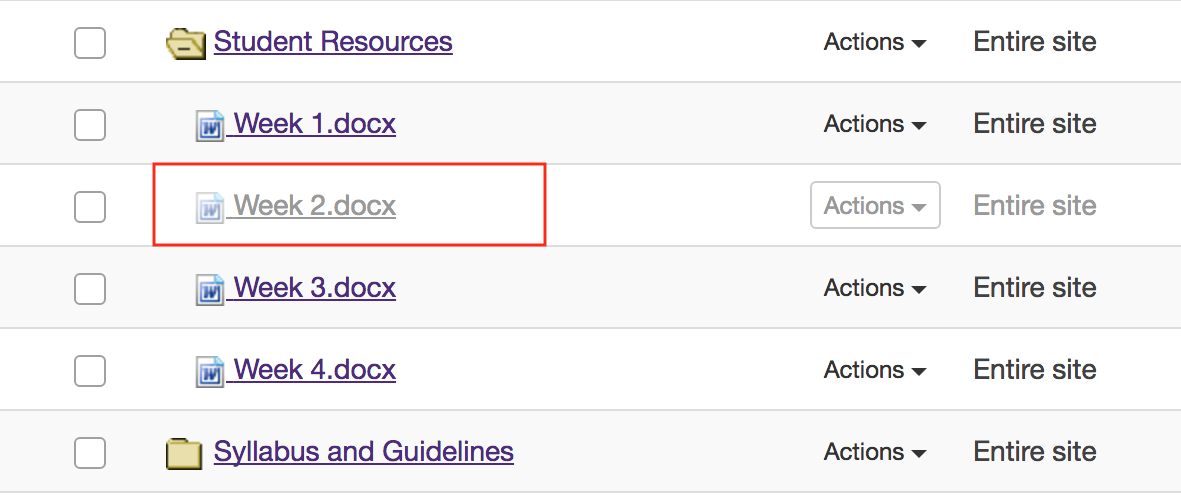
This returns the display to the Resources page with the selected item hidden.
Notes:
Hide item and Update.
Item is hidden.
How do I show (unhide) files or folders?
There are 2 methods Instructors can use to show (unhide) files or folders.
-
Select the Resources tool from the Tool Menu in the site.

-
Method 1: Select the file(s) or folder(s), then click Show.
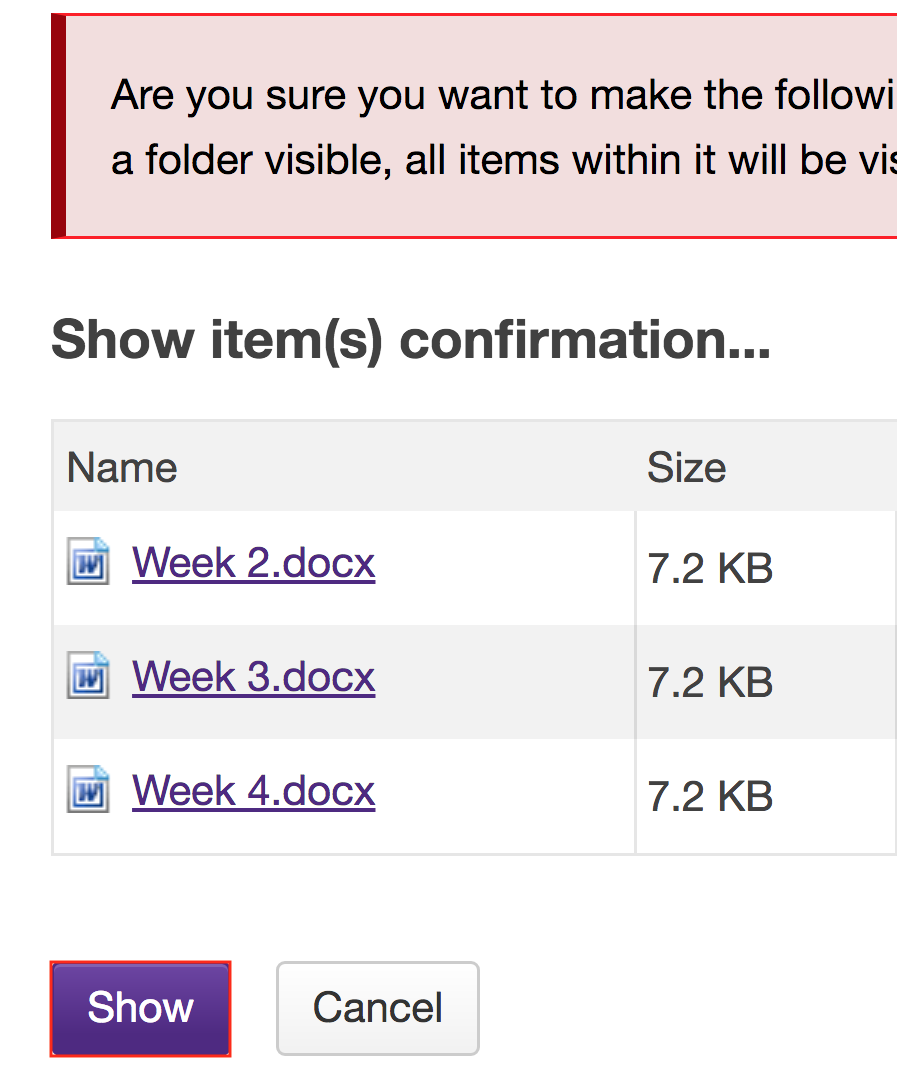
This displays the Show Items Confirmation page.
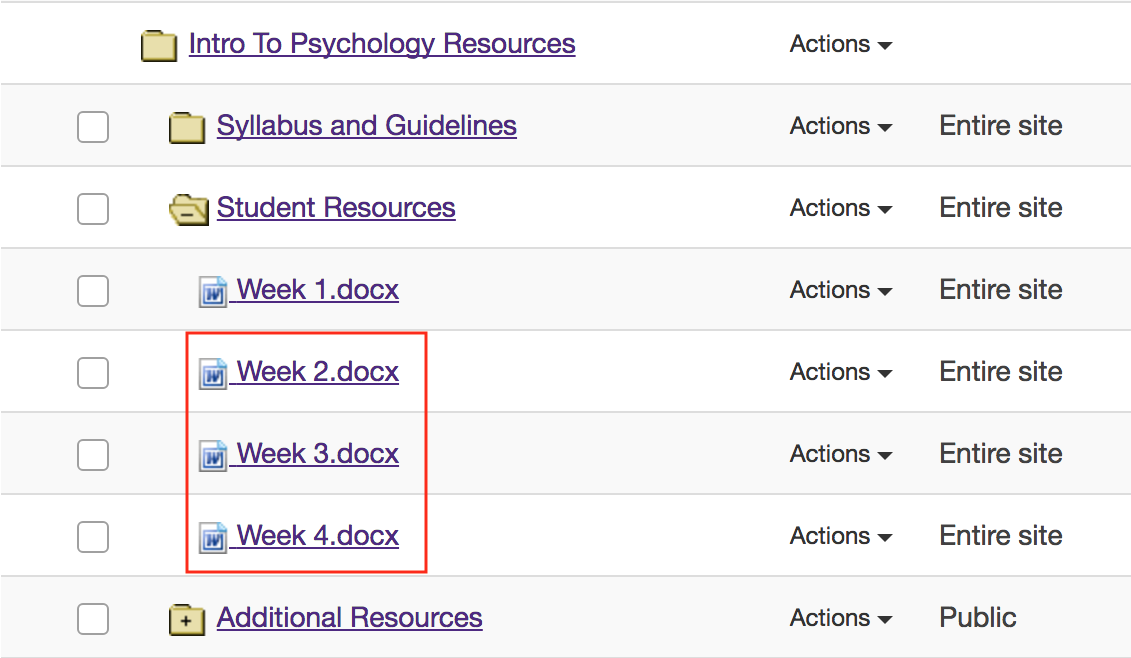
This returns the display to the Resources page with the selected items available.
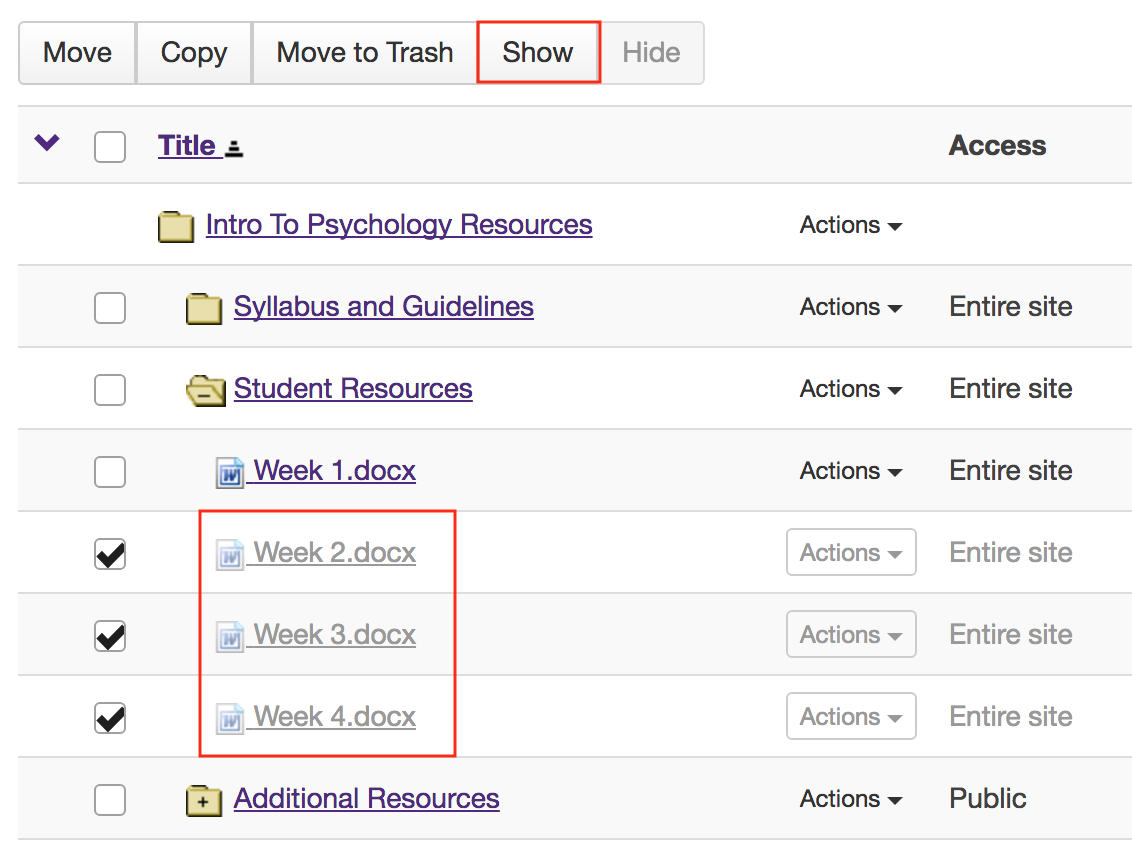
Click Show again to confirm.
Items are now visible.
-
Method 2: Click Actions, then Edit Details.
To unhide a file or folder, to the right of the file or folder, from the Actions drop-down menu, select Edit Details.
This displays the Edit Details page for the item.
Under Availability and Access, select Show this item, then click Update.
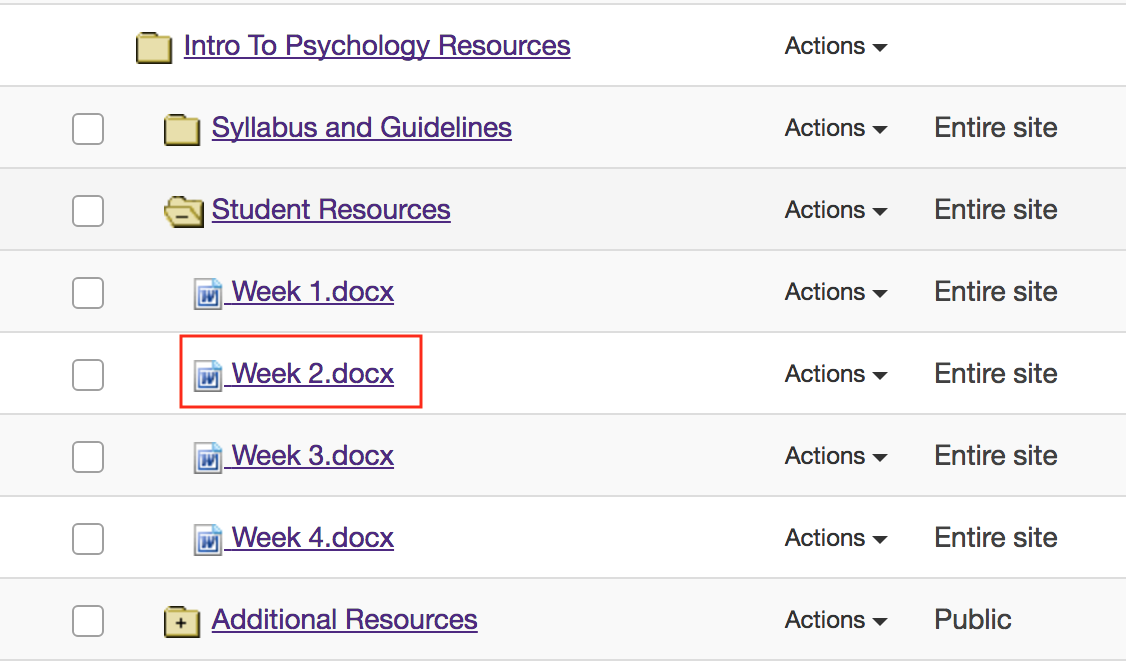
This returns the display to the Resources page with the selected item available.
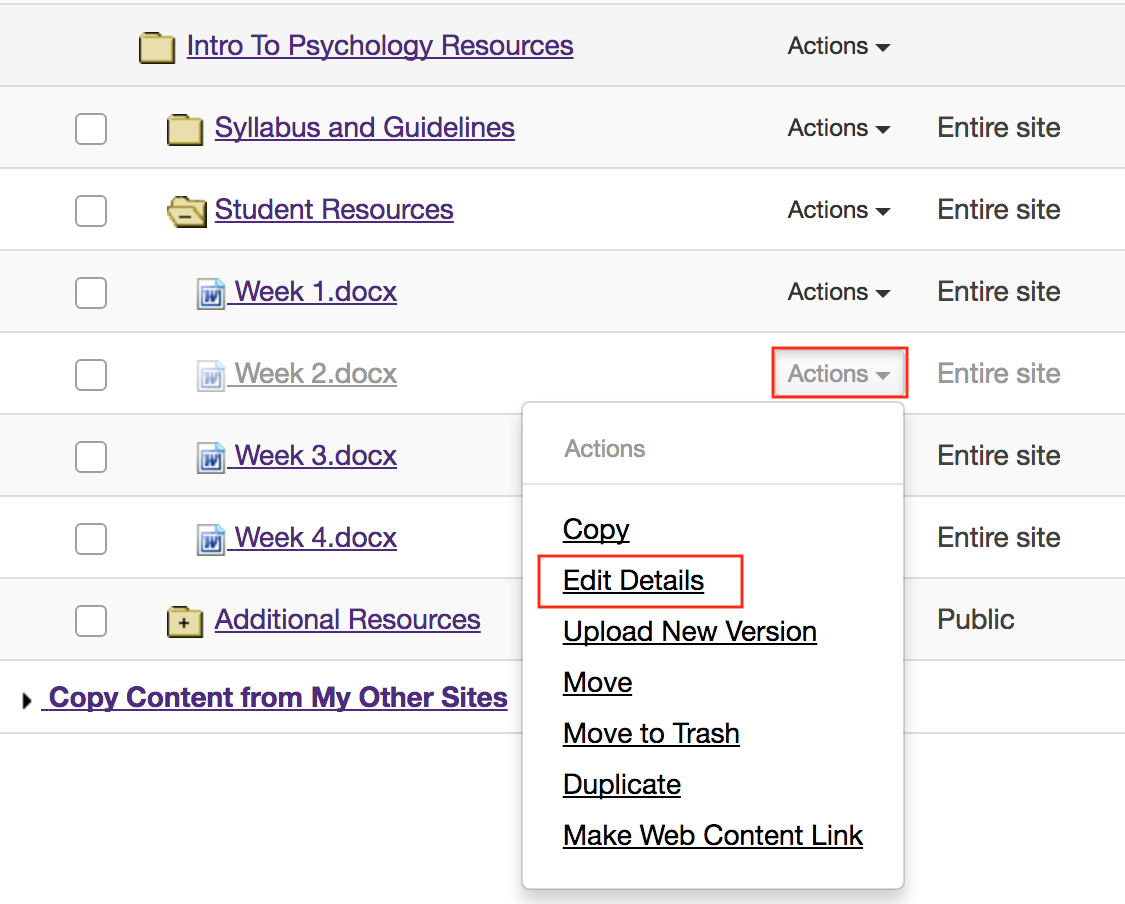
Select Show this item, then click Update.
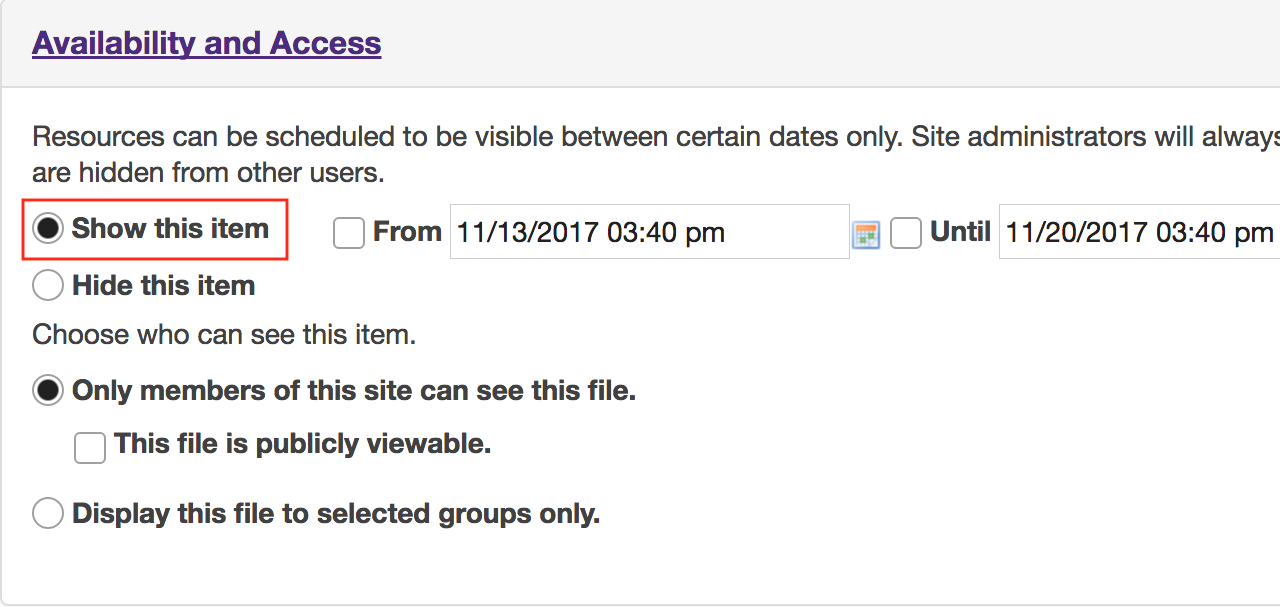
Item is now visible.
How do I set the display of a Resources item to a specific time period?
Users can set the availability of a Resource file or folder to display to site participants at a specific date and time and become hidden at a specific date and time.
-
Select the Resources tool from the Tool Menu in the site.

-
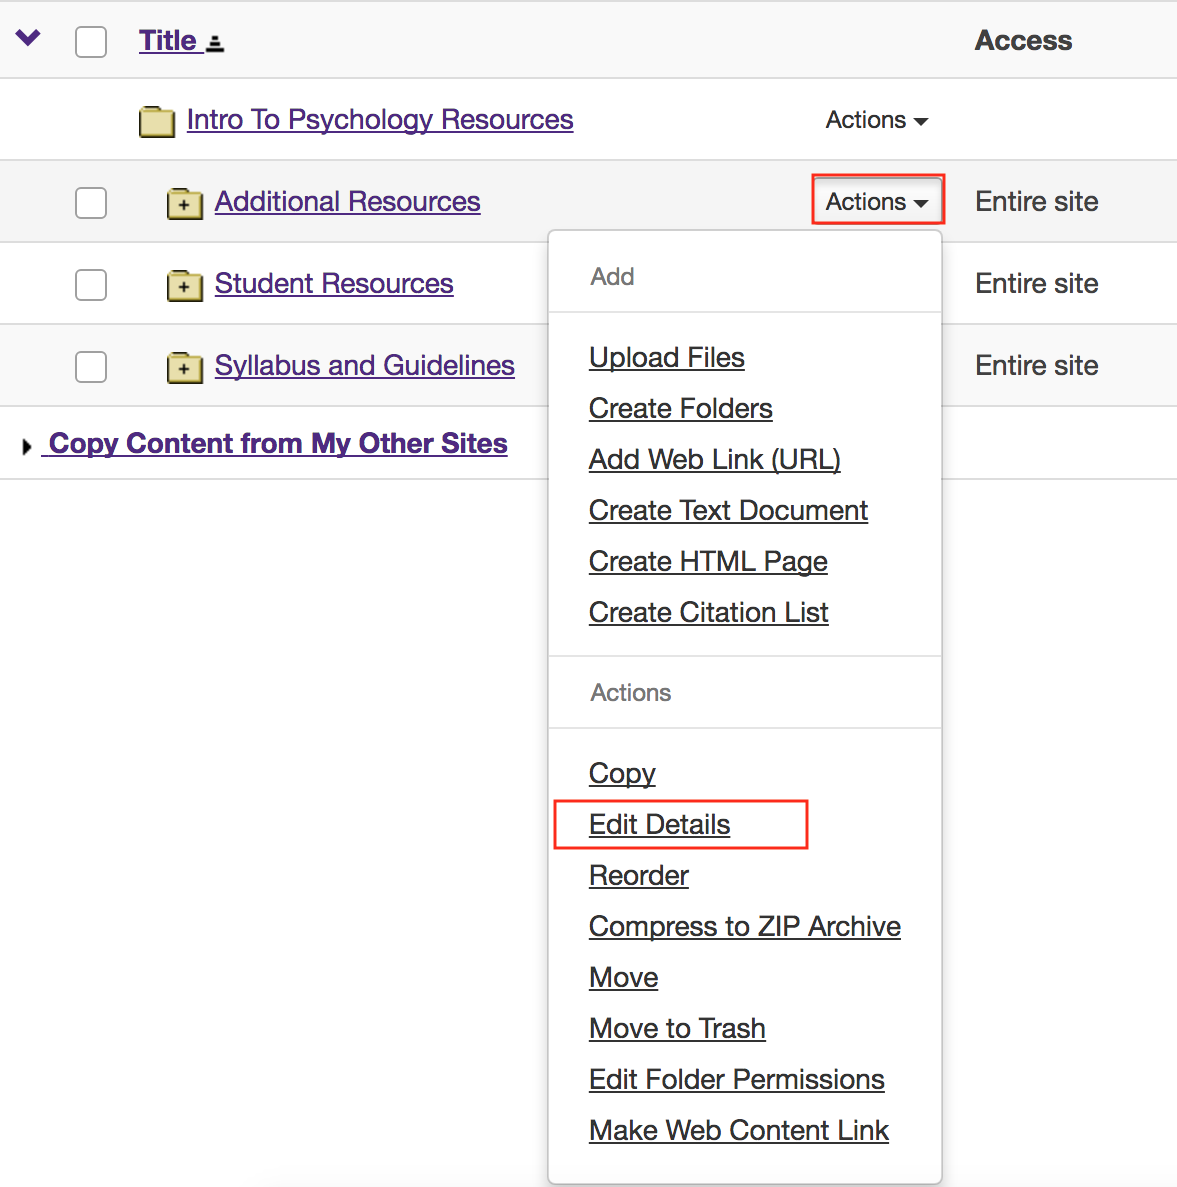
Click Actions, then Edit Details.
To set specific availability of a file or folder, to the right of the file or folder, from the Actions drop-down menu, select Edit Details.
This displays the Edit Details page for the item.
-
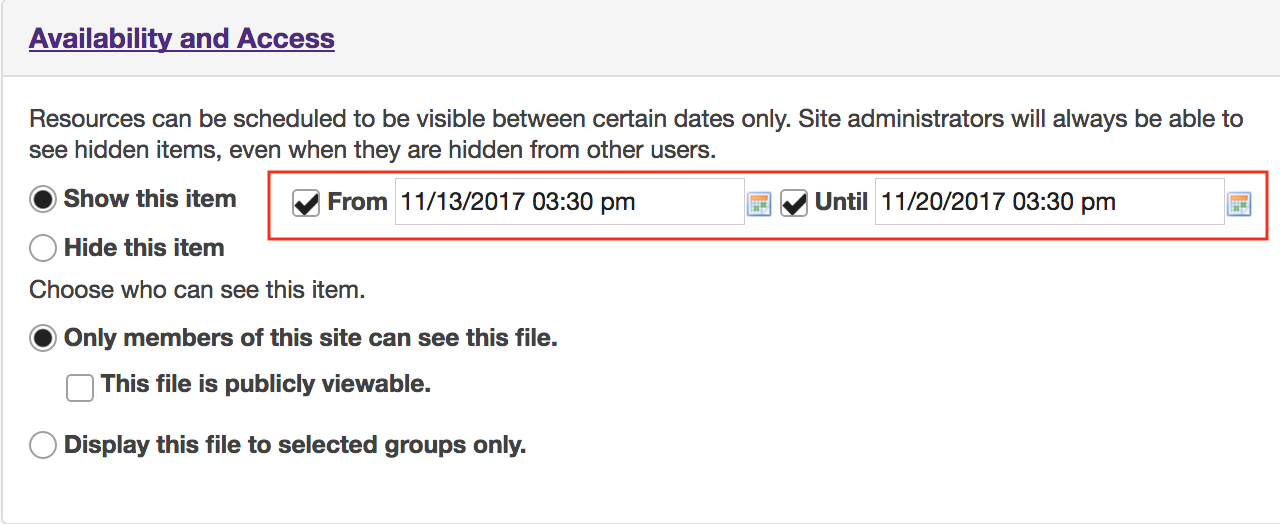
Specify dates.
Under Availability and Access, check the boxes next to From and Until, set the dates and times using the calendar icon, then click Update.
Notes:
-
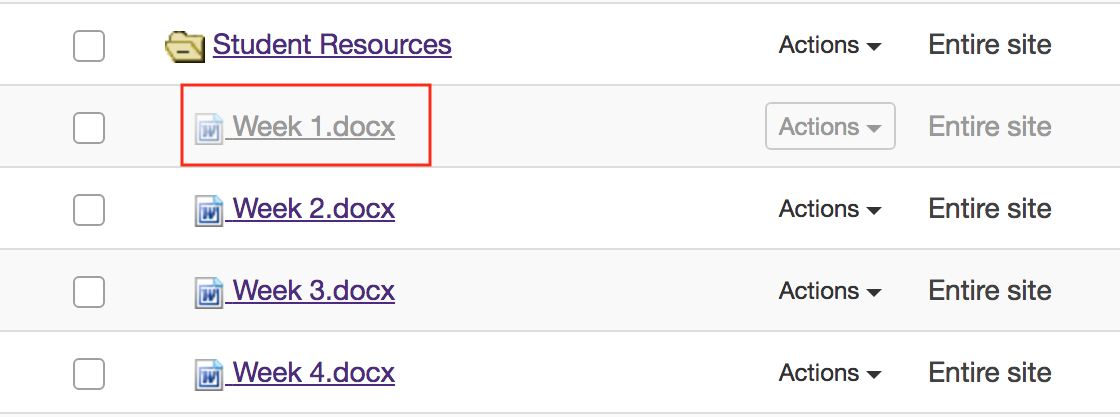
View file or folder in Resources.
This displays the file or folder in Resources as hidden, except during the specified time period.
Notes:
How do I make a file or folder publicly viewable?
Site owners can make a file or folder publicly viewable. This means that the file or folder can be viewed by anyone with the file or folder's URL, even if they're not members of the folder's original site. Some institutions also have a "Search Public Course and Project Sites" button on their gateway page that will allow publicly available files and folders to be searched and viewed.
-
Select the Resources tool from the Tool Menu in the site.

-
Click Actions, then Edit Details.
To make a file or folder publicly viewable, to the right of the file or folder, from the Actions drop-down menu, select Edit Details.
This displays the Edit Details page for the item.

-
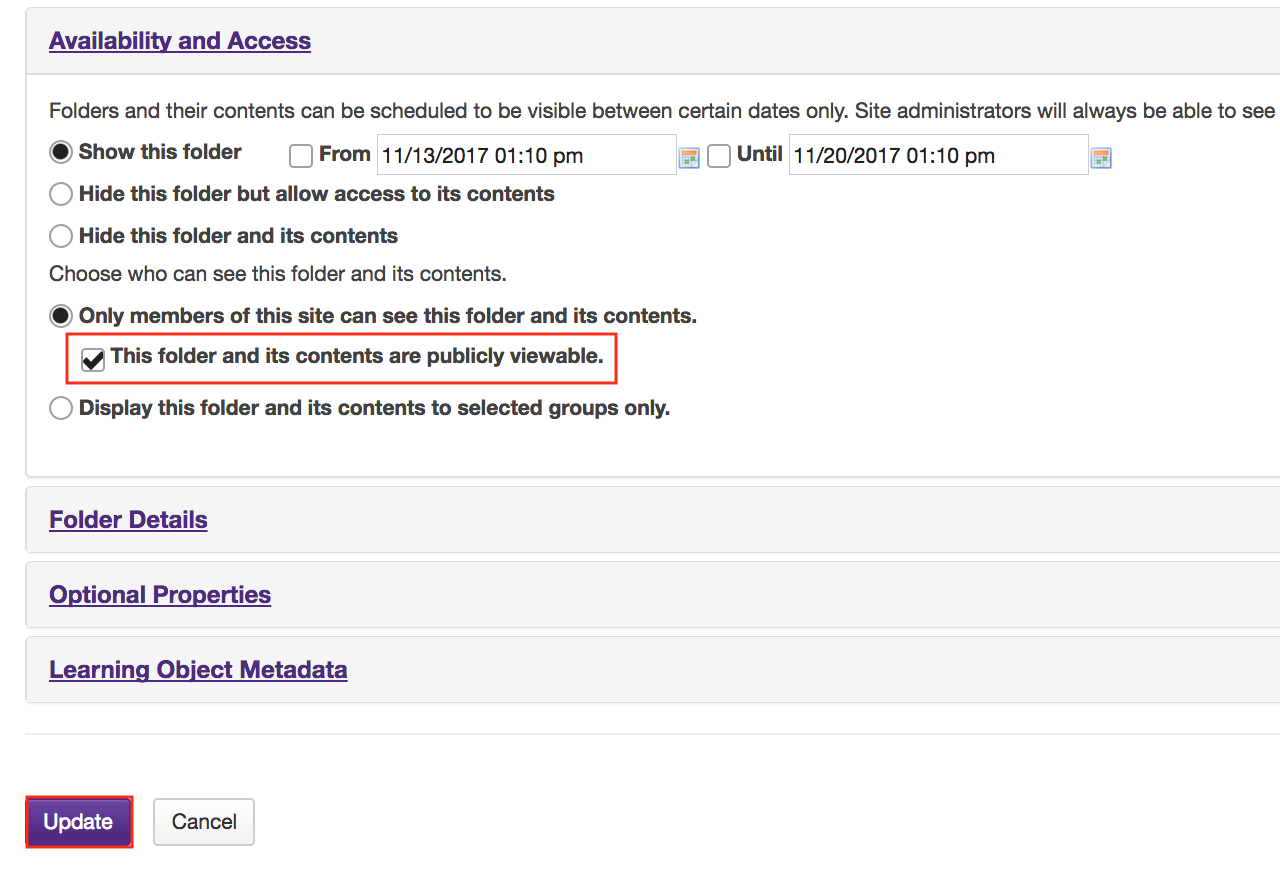
Make item public, then Update.
Under Availability and Access, select the radio button for This folder and its contents are publicly viewable, then click Update.
Note: This can be done with files as well.
-
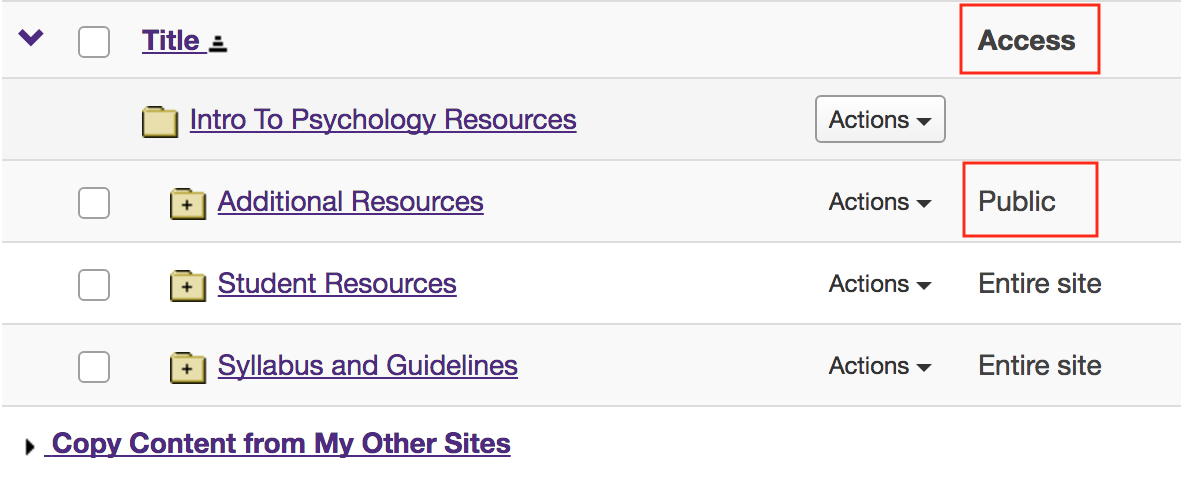
The Resources item is designated as Public.
Note: While the content can be viewed by those who are not members of the folder's originating site, the content cannot be searched for or viewed by those who are not logged into your institution's system.
