Create a Multi-Part Syllabus
How do I create a multi-part syllabus based on number of items needed?
You can create a multi-part syllabus based on the number of items needed.
-
Select Syllabus from the Tool Menu in the site.

-
Click the Bulk Add tab.

-
Enter Syllabus information.
You will then be taken to a screen where you see the number of syllabus items requested and may edit them there.

-
Click the arrowhead icon to the left of an item to expand the item.
This allows you to add a file as an attachment to this syllabus item, or to open the Rich Text Editor to create content directly in the Syllabus item.
Browse for the file on your computer, or attach a copy from the Resources in your course.
Clicking this link opens the Rich Text Editor which allows you to enter the content, or copy and paste from Word into the Rich Text Editor to create the content.

Add an attachment to this Syllabus item. (Optional)
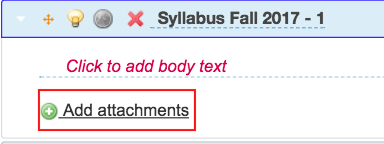
Add content using the Rich Text Editor. (Optional)

-
Edit the heading of a syllabus item.
By default, the headings are the title of the syllabus appended with a number. Hover your mouse over the heading to make the pencil icon appear. Click the pencil icon to enable the editing of the heading.

-
Add start and/or end dates for each syllabus item. (Optional)
Adding start and/or end dates allows you to determine a time range for when students may view this syllabus item. Click Click to add start date or Click to add end date and use the drop down menus to select the date and time. Click the checkmark to save your work.
Click the lightbulb icon to hide a Syllabus item. If the icon is yellow, the item is available to students. If gray, hidden from students. In the above example, Item 1 is available to students on Sept. 10th at 11:55pm. Item 2 is hidden from students until the instructor clicks the lightbulb icon again to change it from gray to yellow.

Manually hide/release the Syllabus item. (Optional)

Rearranging syllabus items.
Click any syllabus item and drag it to the location where you want it.

Delete syllabus item.
Click the red X icon beside any syllabus item to delete it. Confirm that you want to delete the item by clicking Delete.

How do I create a multi-part syllabus by dates?
You can create a multi-part syllabus using a date and calendar format. The date and calendar format creates a specific syllabus item for each meeting time of the class.
-
Select Syllabus from the Tool Menu in your site.
-
Click the Bulk Add tab.

-
Enter syllabus title and date information.

A syllabus item will be created for each class meeting during the dates you specified.

-
Click the arrowhead icon to the left of an item to expand the item.
This allows you to add a file as an attachment to this syllabus item, or to open the Rich Text Editor to create content directly in the Syllabus item.
Browse for the file on your computer, or attach a copy from the Resources in your course.
Clicking this link opens the Rich Text Editor which allows you to enter the content, or copy and paste from Word into the Rich Text Editor to create the content.

Add an attachment to this Syllabus item. (Optional)

Add content using the Rich Text Editor. (Optional)

-
Edit the heading of a syllabus item.
By default, the headings are the title of the syllabus appended with a number. Hover your mouse over the heading to make the pencil icon appear. Click the pencil icon to enable the editing of the heading.

-
Add start and/or end dates for each syllabus item. (Optional)
Adding start and/or end dates allows you to determine a time range for when students may view this syllabus item. Click Click to add start date or Click to add end date and use the drop down menus to select the date and time. Click the checkmark to save your work.
Click the lightbulb icon to hide a Syllabus item. If the icon is yellow, the item is available to students. If gray, hidden from students. In the above example, Item 1 is available to students on Sept. 10th at 11:55pm. Item 2 is hidden from students until the instructor clicks the lightbulb icon again to change it from gray to yellow.

Manually hide/release the Syllabus item. (Optional)

Rearranging syllabus items.
Click any syllabus item and drag it to the location where you want it.

Delete syllabus item.
Click the red X icon beside any syllabus item to delete it. Confirm that you want to delete the item by clicking Delete.
