Gradebook Setup
On This Page
Add Gradebook Item
-
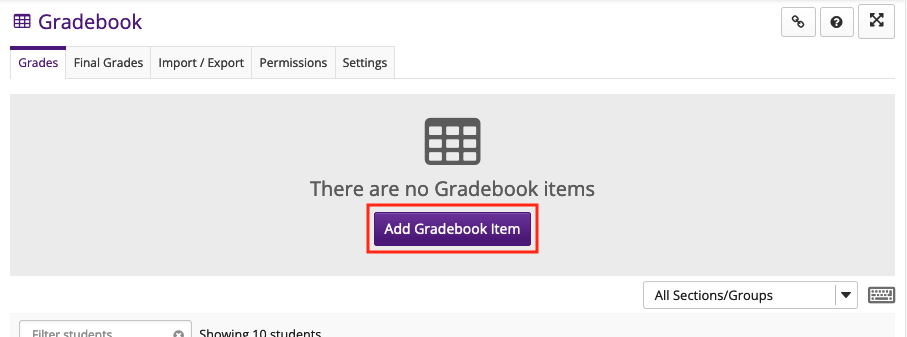
Click the Add Gradebook Item button.
Instructors typically add items to the gradebook manually for things such as:
- Posting grades for items completed outside of OWL
- Discussion Forum grades
- Participation and Attendance
Note: Assignments, Tests & Quizzes, and Student Content in Lessons can be graded within their respective tools and automatically sent to the Gradebook when the item is posted or published.
-
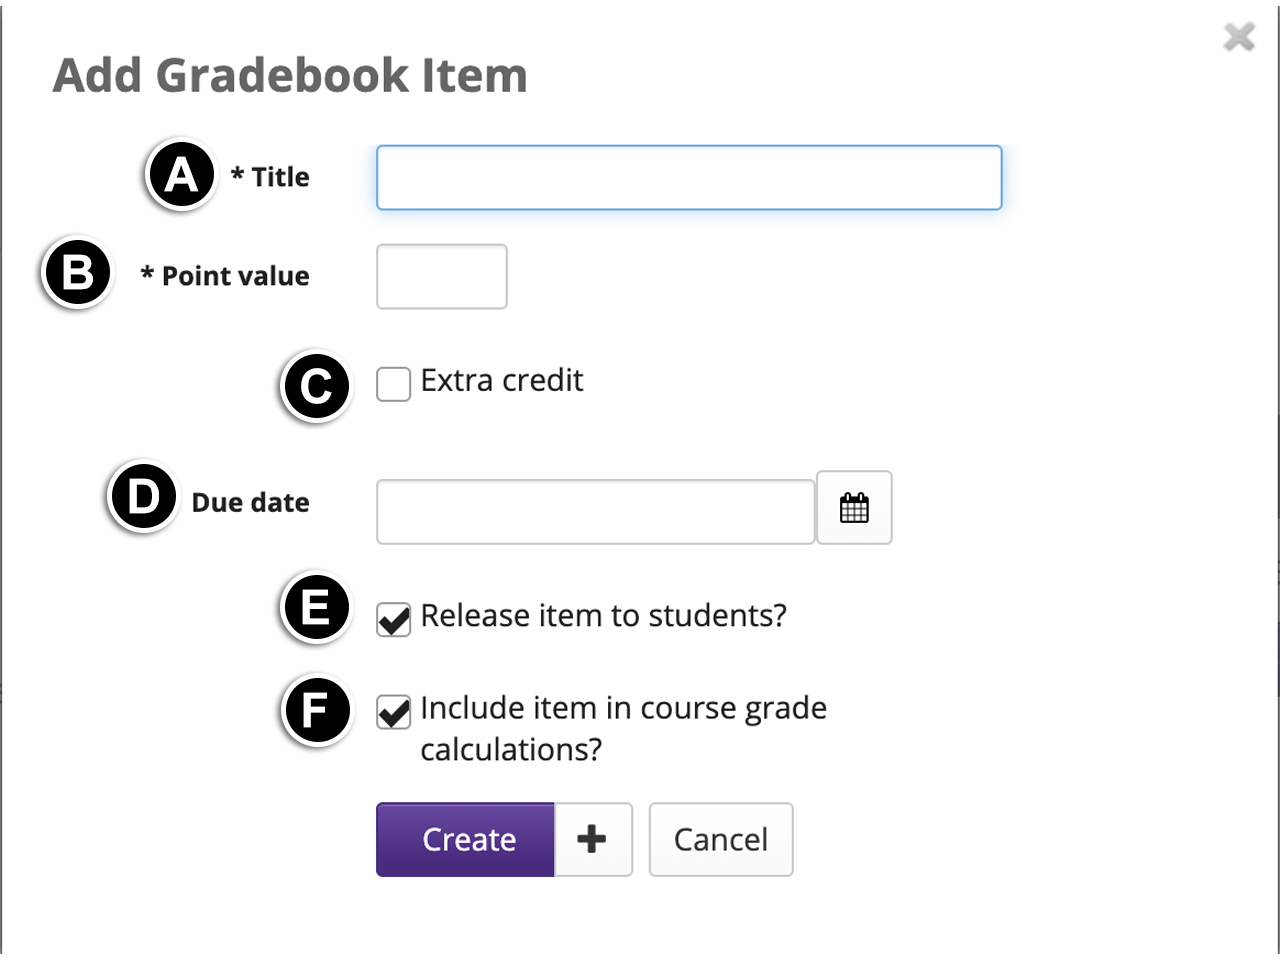
Configure the item settings:
- Enter a Title in the text field provided (required). Each title must be unique, meaning all items must have different titles.
- Enter the Point Value (required). This determines the total possible marks for the item.
- Enable or disable Extra Credit (optional). Extra credit should be used if the item is not a part of the 100 points possible in the course.
- Enter a Due Date or select the date from the calendar icon (optional).
- Enable Release this item to Students if you would like students to be able to view their grades for this item (optional). Leaving the box unchecked hides the item from students.
- Enable Include this item in course grade calculations if you would like the item to be included into the students' course grades (optional). The item has to be released to students in order to be included in the course grade. Leaving the box unchecked omits the item from the course grade.
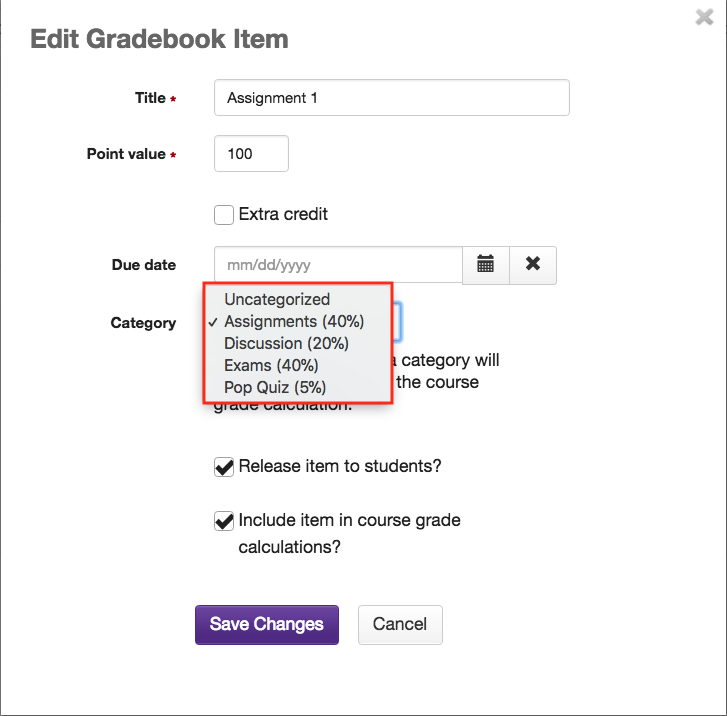
Note: If you use categories in your Gradebook you will also see an option select the appropriate category for this item from the Category drop-down menu (optional). To learn more about enabling categories, see the Categories and Weighting section
-
Click the Create button.
By default, gradebook items are sorted by their creation date where new items will appear at the end of the gradebook. If you are using categories, new gradebook items will be added to the right of the other items within the same category.
Note: If you would like to add another gradebook immediately, press the + button instead of the create button. To create multiple Gradebook items at once, use the Import Grades option.

-
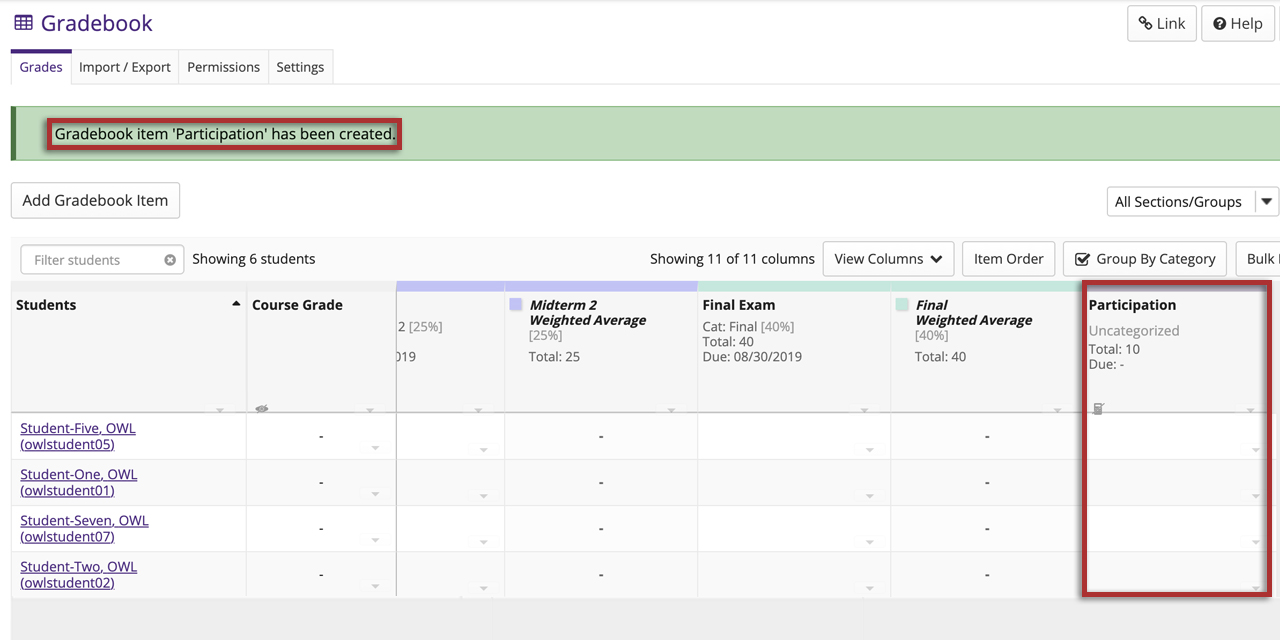
You will be receive a message at the top of the page confirming your new item was created. Your new item will display on the right side of the Grades page.
Categories and Weighting
By default, every item in the Gradebook is weighted equally towards a student's course grade. To assign specific weighting to items in the Gradebook you must setup Categories & Weighting.
-
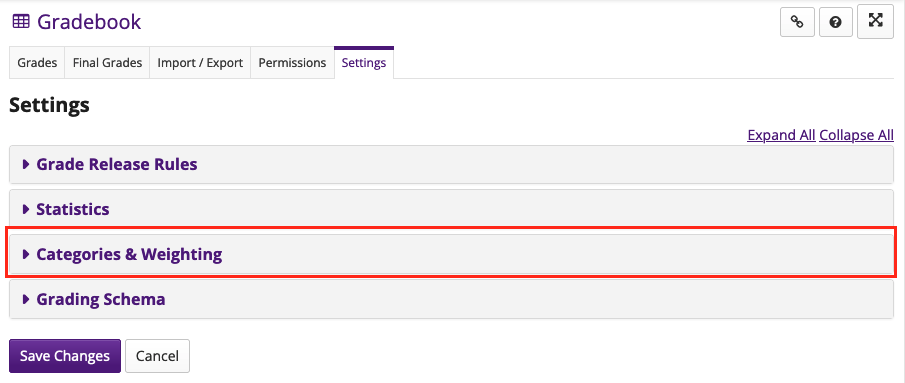
In Gradebook, click the Settings tab.

-
Click Categories & Weighting to expand the section.
-
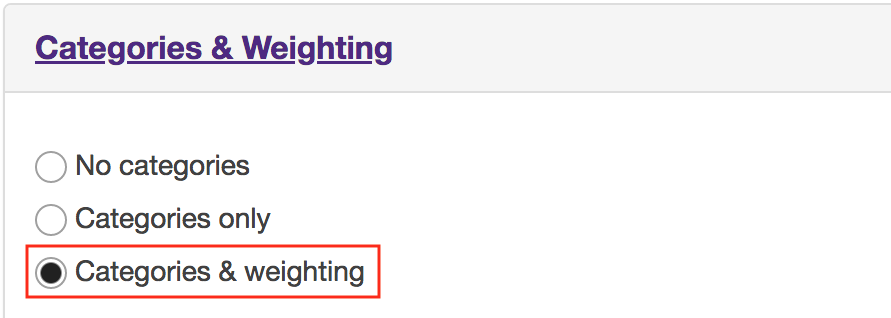
Enable Categories & Weighting.
-
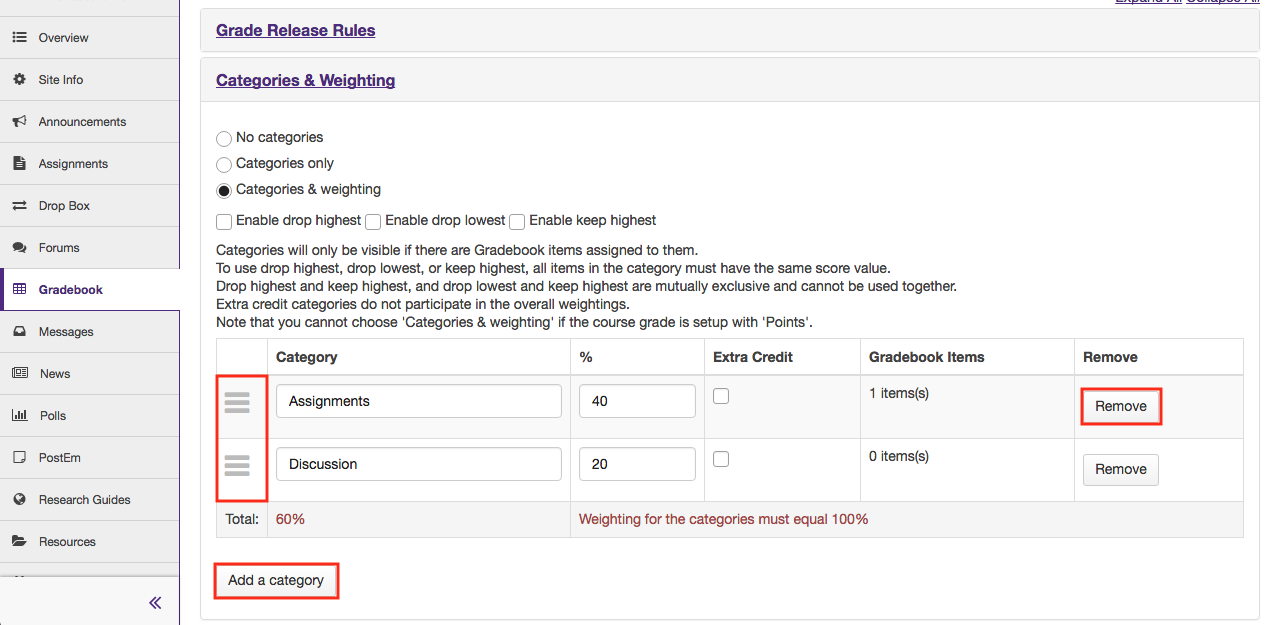
Click the Add a Category button.
Repeat this multiple times to create as many categories as you need.
You can remove categories by clicking the Remove button beside the category. You can also reorder categories by clicking and dragging from the tab on the right side of each category.
-
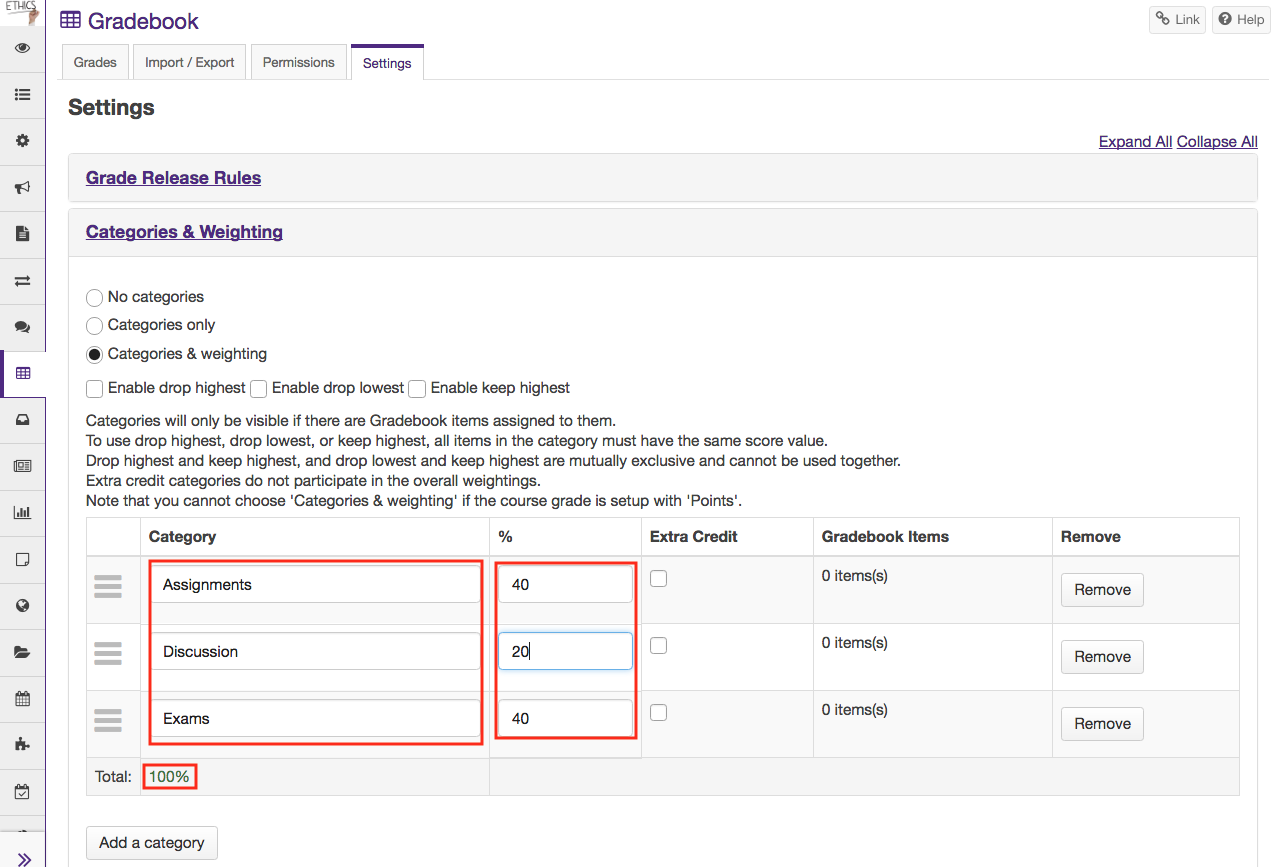
Enter a category name & weighting value.
The weighting for all of your categories must add up to 100%.
-
Enable Extra Credit if you intend to create a category worth additional points outside of the 100% total. This means that a student could potentially receive a course grade of over 100%.

-
Click the Save Changes button.

-
Assign Gradebook items to a category.
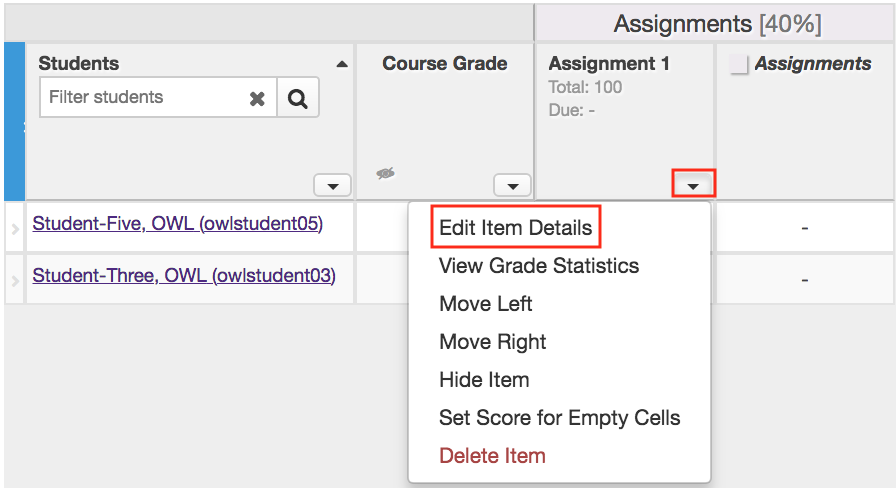
Click Edit Item Details from the dropdown menu on the Gradebook Item and select the corresponding category in the Gradebook Item settings window.
With categories and weighting enabled, each gradebook item must be associated with a specific category in order for it to be included in the course grade calculation. Gradebook items that are unassigned to a category will not be included in the course grade calculation.
Note: If a category is associated with multiple Gradebook items, the score is determined by adding the scores of each item and dividing by the total possible score. Weighting is applied to the category score in the Final Grade calculation. In order to have each item be weighted equally in a category, each item must have the same point value.
How are grades calculated in Gradebook?
Course grade calculations depend on your Gradebook's organization and grade entry setting, points (described here) or percentages:
No categories (default) - Each Gradebook item is assigned a simple point value. The course grade is determined by the student's total score divided by the total points possible.
Categories only - Categories are used to group Gradebook items, where items are assigned a simple point or percentage value. Similar to a gradebook with No categories, the course grade is determined by the student's total score divided by the total points possible. This structure provides the option to drop the lowest grade(s), keep the highest grade(s), or drop the highest grade(s) within a category.
Categories and weighting - Items are grouped into categories, where each category is assigned a percentage of the course grade. The total score of all items in a category will comprise the category's percentage of the course grade. This structure provides the option to drop the lowest grade(s), keep the highest grade(s), or drop the highest grade(s) within a category.
Enabling Drop Lowest and/or Keep Highest
If you selected either Categories only or Categories & Weighting, the enable drop/keep options will appear. All items within a category must have the same point value in order to use the drop/keep options for that category.
-
Choose the settings Tab and then choose Categories & Weighting


-
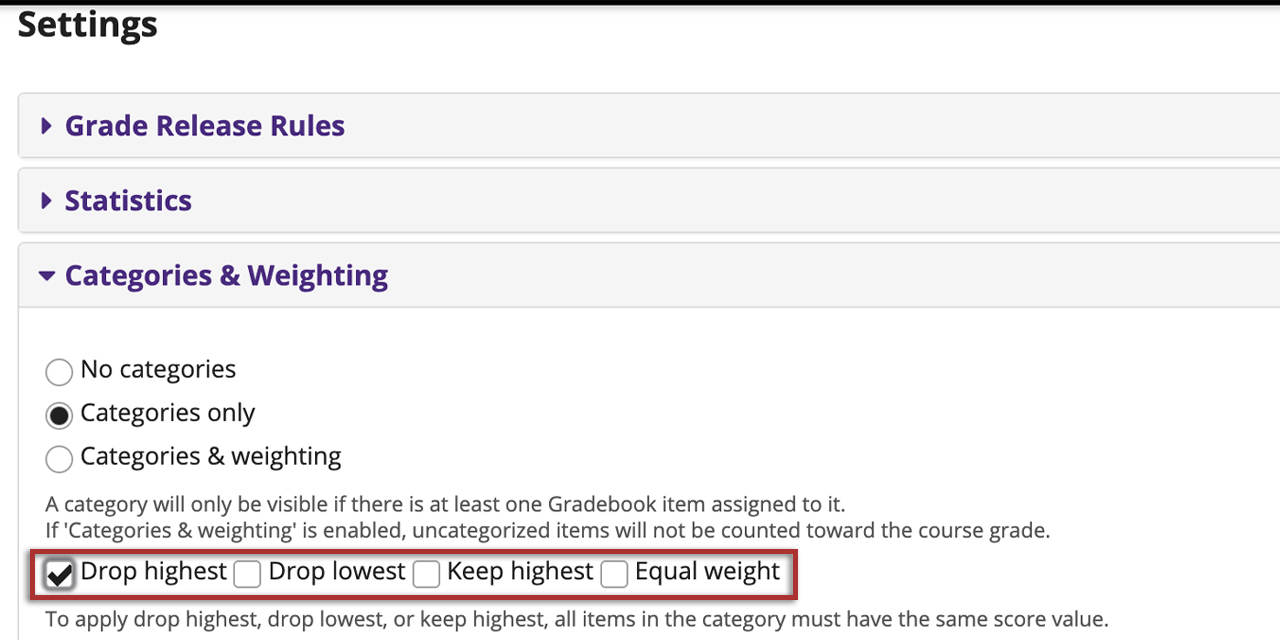
Select any of the desired drop/keep options.
- Enable Drop Highest: Automatically drops the highest score/s among items in a category.
- Enable Drop Lowest: Automatically drops the lowest score/s among items in a category.
- Enable Keep Highest: Automatically keeps the highest score/s among items in a category.
- Enable Equal Weight: Weights all of the categories evenly
Drop Highest and Drop Lowest are the only options that can be used in combination for the same category.
-
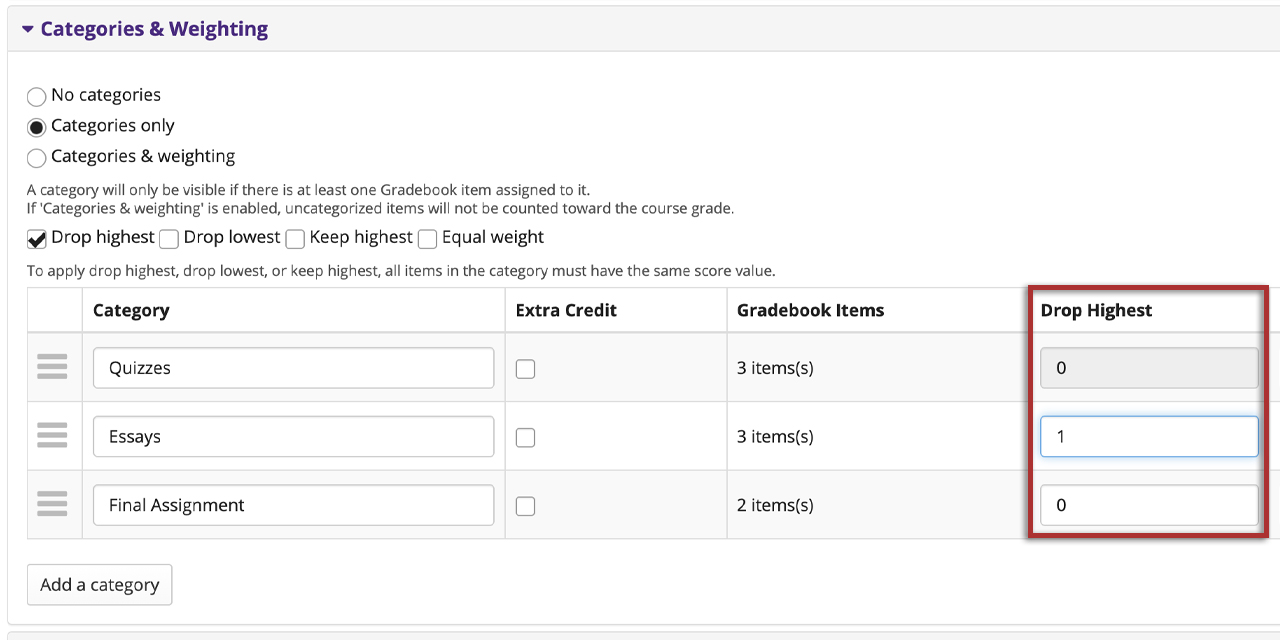
In the appropriate column, enter the number of items in each category that you wish to drop or keep.
Note: It is recommended to use Keep Highest as opposed to Drop Lowest, since it reflects a more accurate running total of student grades during the course of the term. Items that students have not yet completed are not dropped automatically, so one or more higher scores may be dropped until all items have been completed.
-
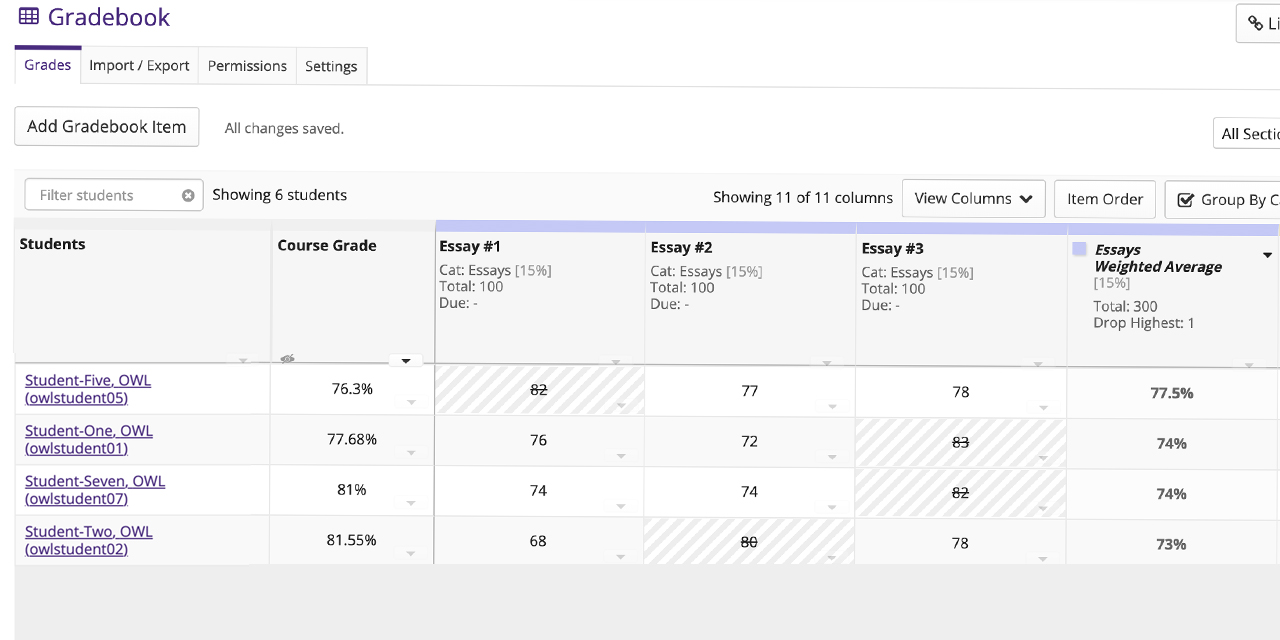
On the Grades page, dropped scores are indicated with a strikethough and background change.
Note: Only cells dropped because of highest/lowest will be striped. This means cells excluded for other reasons (not counted towards course grade for example) will no longer be shown as "dropped" even in categories that use drop highest/lowest.
Enabling TA Permissions
In order for TAs to access Gradebook, rules have to be created for specific users in the Permissions section of Gradebook.
-
In Gradebook, click the Permissions tab.

-
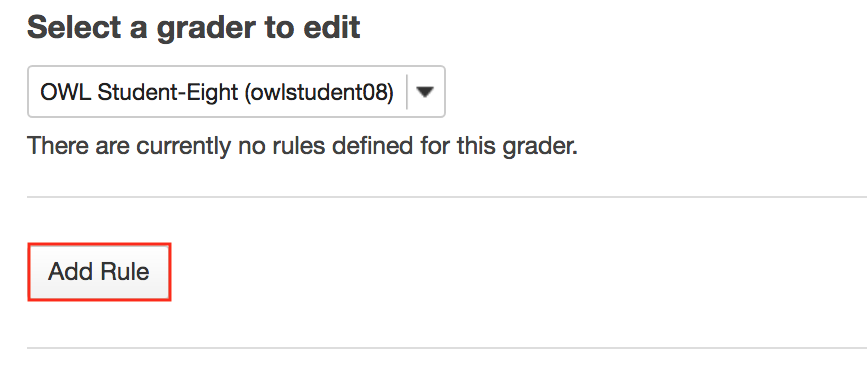
Select a user from the dropdown.
If the page displays the message that "There are currently no teaching assistants defined in your site. Teaching assistants must be defined to set special grader permissions", then you must first add the TAs to the course site through Site Info.

-
Click the Add Rule button.
-
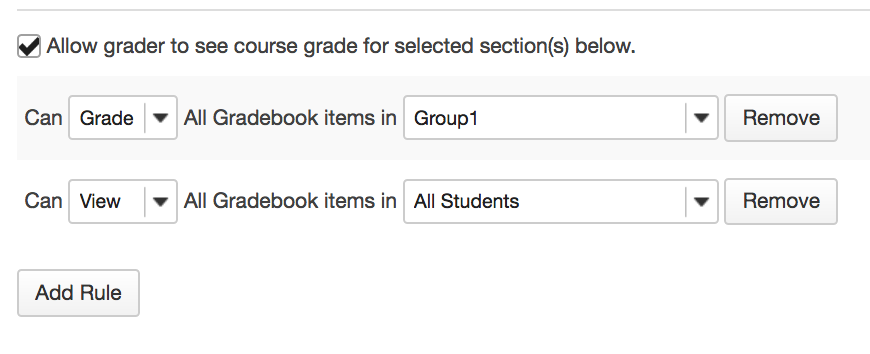
If you would like the TA to see the course grade for the selected sections, enable the Allow grader to see course grade for selected section(s) below checkbox

-
From the first drop-down, select either view or grade.
From the second drop-down, select the section the TA will have access to. If you do not see the section or group listed there, add one through Edit Class Rosters or Create Groups
Note: Multiple rules can be added for each TA.


-
Once you have created a rule, click the Save Changes button.

-
You will recieve a confirmation message that the permissions have been successfully updated

