Assessment Parts
Assessments are subdivided into parts, but may consist of only one part that comprises all the questions. Parts allow you to create sections of an assessment, each with its own title, questions, question pool draws, attachments (for resources or directions), and question ordering.
When you create a new assessment, a part (i.e., section) called "Default" is created automatically. If you leave it named "Default", that title will not appear on your assessment; to change the part's name, click Edit. You can begin adding questions immediately to "Default", or you can add your own parts.
New parts will be listed in the order you create them. You can re-order parts within an assessment, and edit each part individually.
Add Multiple Parts to an Assessment
-
Select an assessment.
Parts may be added to any assessment. Select an existing assessment or create a new one.
Create a New Assessment.
Or edit an existing assessment.
-
Click the Add Part link.
-
Enter a Title.
Note: If the part title is marked as the Default, the title will not appear to assessment takers.
-
Use the text box to enter information about the created part if desired.
-
Click Add Attachments to browse for and select a file attachment if desired.
-
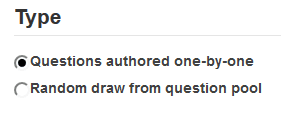
Select Part Type.
Choose the option to author questions one-on-one or select random draw from question pool.
Questions authored one-by-one.
Select the radio button to order the questions As listed on Assessment Questions page, or to order them Random within Part.
Random draw from question pool.
For more information about random draw question pool, see the section Set Up a Random Question Set.
Note: Point values entered here override any value that was specified for individual questions in the corresponding Question Pool.
If "questions authored one-by-one" is selected, the following options will display.
-
Enter Metadata, such as the objective, keyword, and rubric, into the text boxes provided. (Optional)
-
Click the Save button to save the question.
Edit/Rearrange Parts in an Assessment
-
Select an assessment and click Edit from the drop-down menu beside the assessment you want to edit.
Edit an existing assessment.
-
Edit an assessment part.
To edit the name and any of the information and settings associated with a part, next to that part's name, click the Edit button.
-
Type a Title into the text box provided.
Note: If the part title is marked as the Default, the title will not appear to assessment takers.
-
Edit Additional Settings (Optional)
Part Information.
Use the text box provided to type "Information" about the created part.
Add attachment.
Click Add Attachments to browse for and select a file attachment if desired.
Edit Part Type.
Choose the option to author questions one-on-one or select random draw from question pool.
Edit Metadata.
Enter "Metadata", such as the objective, keyword, and rubric, into the text boxes provided.

Select part type as either "questions authored one-by-one" or "random draw from question pool".
Edit or add metadata for your part.
-
Click the Save button to save the question.
-
Rearrange parts.
New parts will be listed in the order you create them. To switch the order of two parts, before a part's name, change the number in the drop-down list next to "Part". For example, if you have three parts, and you want the third part to appear first, use the drop-down list to change the 3 to 1. The third part will become the first part and the first part will become the third. The example illustrated will exchange the places of Parts 1 and 2.
Your assessment must contain at least one part, but you can remove any of the parts you create. You can also remove the "Default" part, as long as you've already created another part to replace it.

Set Up a Random Question Set
-
Select Tests & Quizzes from the Tool Menu in the site.
-
Create or edit an assessment.
Random question sets may be added to any assessment. Edit an existing assessment or create a new one to add a random question set. For more information on creating new assessments, see the section Create an Assessment
Create a New Assessment.
Or edit an existing assessment.
-
Add or edit a part.
Click the Add Part link or click Edit beside an existing part. Select Random draw from question pool as the type.
Set the options for the random set.
Note: Point values entered here override any value that was specified for individual questions in the corresponding Question Pool.
Click the Save button.
For the Type, choose Random draw from question pool.
Set the options for the random set.
Click Save.
-
View assessment.
You will be returned to the assessment editing screen with the random draw question set shown. You may add additional questions or question sets by adding more parts to the assessment.
Remove Parts in an Assessment
Your assessment must contain at least one part, but you can remove any of the additional parts you create. You can also remove the "Default" part, as long as you've already created another part to replace it.
-
Remove parts.
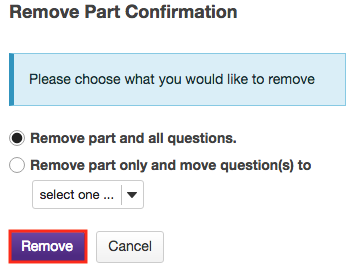
Click Remove for the part you want to delete. You can remove the Part and its questions altogether or remove the Part as a section and retain its questions.
Note: The first part listed on the editing screen will not have the Remove option. To remove the first part, you must switch its order with another part (if you don't have another part, you'll have to create one), and then click Remove.
In the open assessment, find the part. Next to the part's name, click the Remove button.
On the subsequent confirmation screen, choose between the following:

Choose to remove.

Choose to delete or combine the questions.
-
Click the Remove button.
