Question Types
On This Page
Numeric response question
This allows for a numeric response question to be added to a new or existing assessment. This question type presents users with a question followed by a text box in which they enter a numeric answer; each user's answer is compared to a list of allowed answers.
-
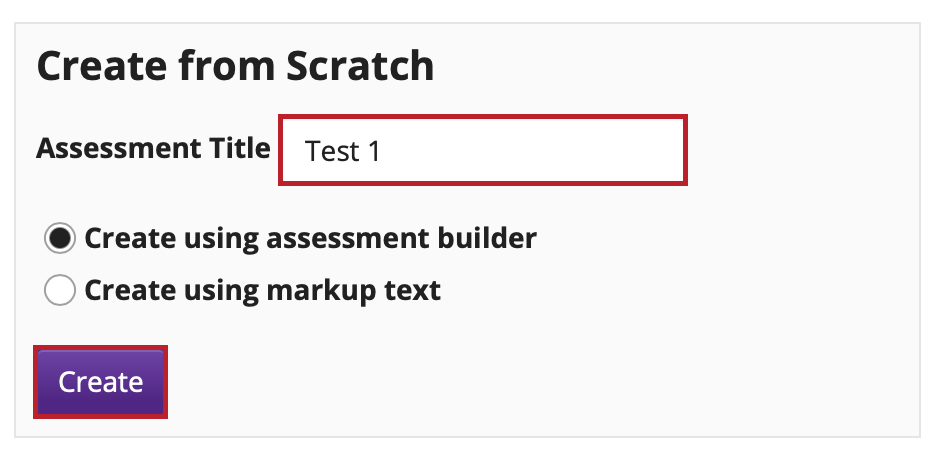
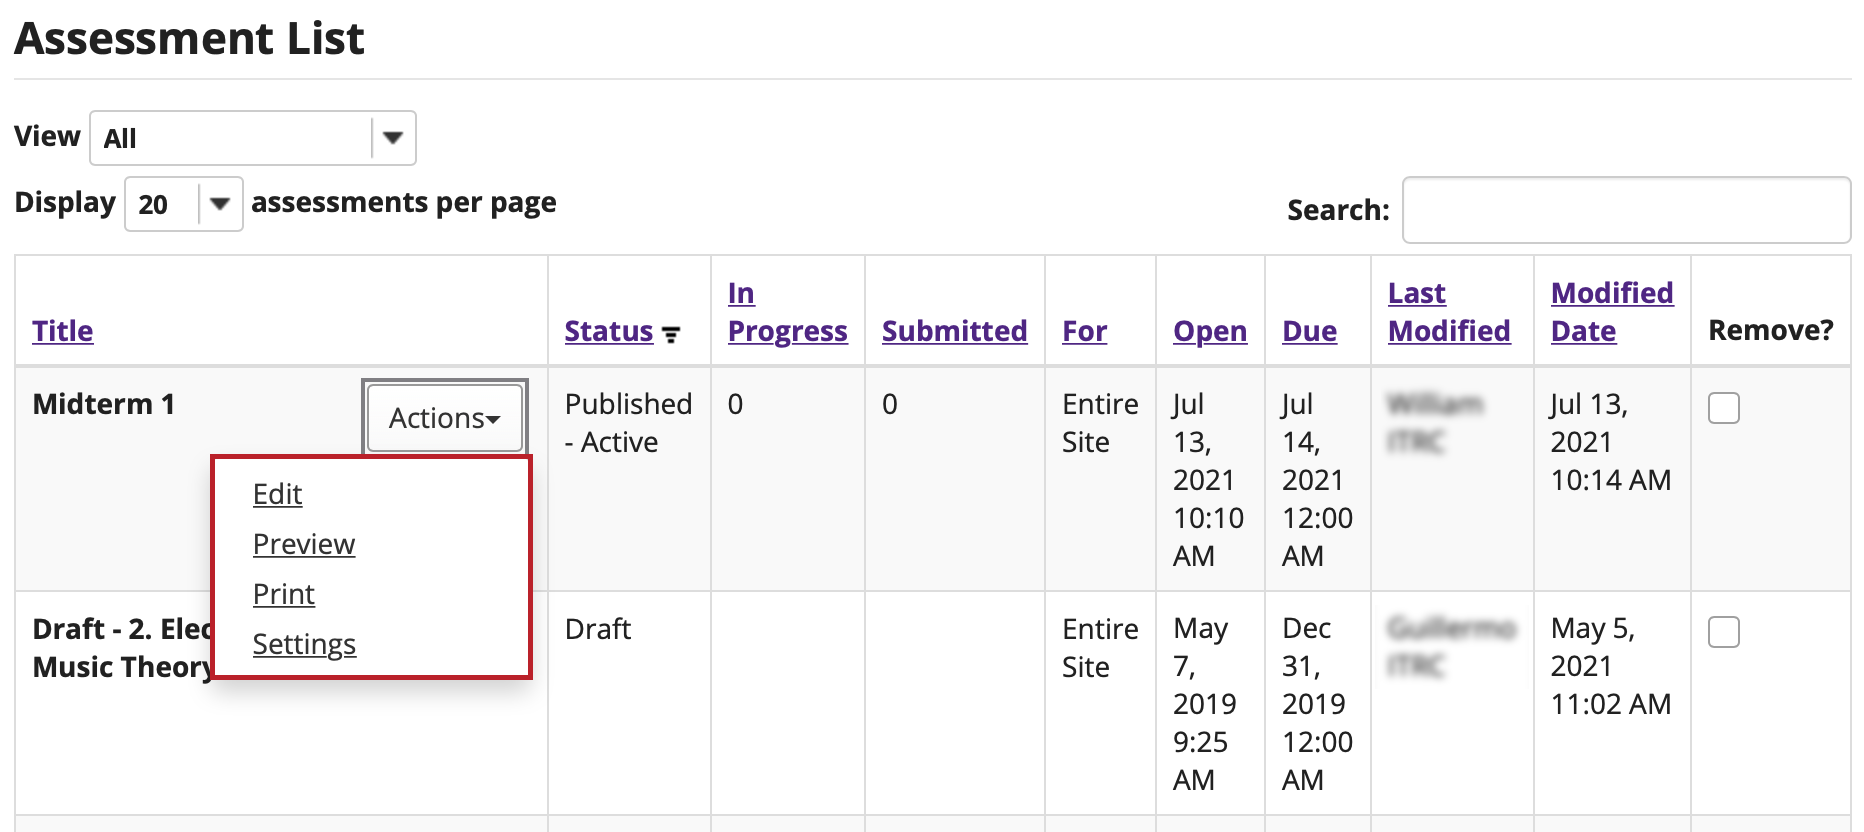
Select an assessment.
Questions may be added to any assessment. Select an existing assessment or create a new one.
Create a New Assessment.

Or edit an existing assessment.

-
Select Numeric Response from drop-down menu. The program will open options for the question.

-
Set the point value for the question.
Enter the point value for this question. Questions may be worth any point value you choose.
Note: Keep in mind that the point value of all the questions in the assessment will equal the point value of the assessment in the Gradebook. So, if you want your assessment to be worth a total of 100 points, you should assign point values to your questions accordingly.

-
Display points
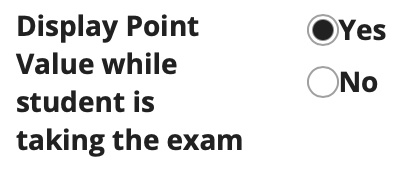
Select Yes if you would like to display the point value of the question during the assessment, or select No if otherwise.

-
Add Question Text.
Type into the question text box provided. Be sure to read the details on how to define answers properly, the three different forms of answers (Range, Scientific notation, and Complex numbers), and acceptable characters.
Defining Answers
Place curly brackets "{}" around numeric value(s) requiring blank response field(s). Example: 3*3={9}.
Acceptable Characters
Only numbers, decimal point markers (period or comma), sign indicators preceding a number (e.g., -5), or spaces (e.g., as thousand separators, 5 000) are allowed within curly brackets.
Note: For scientific notation, a period MUST be used as the decimal point marker.
Any other characters (e.g., $ or %) can be placed outside brackets, if needed. For example: 3/10= {30}% (Only 30 will need to be entered in the blank response field.) When defining a range of values, the value preceding the pipe "|" must be smaller than the value after the pipe (e.g., {12.2|14.5}).
Note: To edit with Rich-Text Editor, click the hyperlink to open the full menu.

-
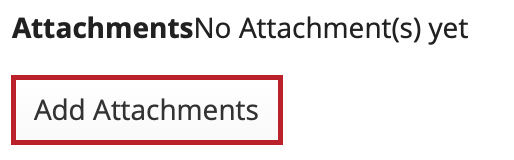
Add attachment. (Optional)
Click Add Attachments to browse for and select a file attachment if desired.

-
Assign to part.
If you have multiple parts in your assessment, you may assign the question to a different part. For more information see Assessment Parts.

-
Assign to pool. (Optional)
If you have an existing question pool and would like to copy this question to the pool, select the pool name here. For more information see Question Pool.

-
Add feedback for correct answer and/or incorrect answer. (Optional)
Feedback is optional text available for the student to review after the particular question is graded. For numeric response questions, the feedback option is offered for correct and/or incorrect answers, if desired.
Note: To edit with Rich-Text Editor, click the hyperlink to open the full menu.

-
Click Save to save the question.

Calculated question
A calculated question calculates new answers for every test, based on variables whose value changes each time. The answer is based on a formula, using those variables.
-
Select Calculated Question from drop-down menu. The program will open options for the question.

-
Enter the point value for the question. Questions may be worth any point value you choose.
Note: Keep in mind that the point value of all the questions in the assessment will equal the point value of the assessment in the Gradebook. So, if you want your assessment to be worth a total of 100 points, you should assign point values to your questions accordingly.

Do you want students to see the point value as they are taking the test? If so, leave the default setting of Yes. If you prefer that students do not see the point value for the question, select No.

-
Enter Question Text.
Type into the question text box provided. This is the information that the student will see, including the variable and formula placeholders (see examples below).
Variables: Define variables to use in this question below. Reference them in the question text by putting them in single curly braces eg. {x}. Variable names are alpha-numeric but must begin with an alpha character.
Example: Kevin has {x} apples. Jane eats {y}. How many does Kevin have now? {{z}}
Formulas: Place double curly braces (e.g. {{y}} around a formula name, to define where the student's input box will display. Formula names are alpha-numeric but must begin with an alpha character.
Example: Solve: COS({a}) * ({c} - {b}) = {{z}} Formula z would be COS({a}) * ({c}-{b})
Keep in mind the following:
Note: To edit with Rich-Text Editor, click the hyperlink to open the full menu.

-
Click the Extract Variables and Formulas button to create the variables and formulas.
Note: Variables and Formulas cannot have the same name.

-
Define ranges of variable values.
Change the Min, Max, and Decimal Places for all of the variables to define their ranges of valid values.

-
Enter the formula.
Enter the mathematical expression for each formula, inserting the variables where needed.

-
Additional Settings (Optional)
In addition to the basic question creation, you are also able to add attachments, assign the question to a part, copy the question to a pool, and provide automated feedback based on the student's answer.
For more information about, please see Additional Settings (Optional) at the bottom of the page.
Click Add Attachments to browse for and select a file attachment if desired.

-
Click the Save button to save the question.

File Upload question
This allows for a file upload question to be added to a new or existing assessment. This question type presents a question or assignment that requires the user to upload a file.
Note: The file upload limit for student's uploading to a File Upload question in Tests & Quizzes is 40MB. This only affects the upload per question - students can upload files for different questions that total more than the 40MB limit. For example, a student could not upload a 50MB file but could upload a 25MB file for question 1, a 25MB file for question 2 and so on.
-
Select Tests & Quizzes from the Tool Menu in the site.

-
Select an assessment.
Questions may be added to any assessment. Select an existing assessment or create a new one.
Create a New Assessment.

Or edit an existing assessment.

-
Select File Upload from the drop-down menu. The program will open additional options for the question.

-
Enter the point value for the question. Questions may be worth any point value you choose.
Note: Keep in mind that the point value of all the questions in the assessment will equal the point value of the assessment in the Gradebook. So, if you want your assessment to be worth a total of 100 points, you should assign point values to your questions accordingly.

-
Type the question into the text box provided.
Note: To edit with Rich-Text Editor, click the hyperlink to open the full menu.

-
Add attachment. (Optional)
Click Add Attachments to browse for and select a file attachment if desired.

-
Assign to part.
If you have multiple parts in your assessment, you may assign the question to a different part. For more information see Assessment Parts.

-
Assign to pool. (Optional)
If you have an existing question pool and would like to copy this question to the pool, select the pool name here. For more information see Question Pool.

-
Provide Feedback. (Optional)
Feedback is optional text available for students to view after the particular question is graded.
Note: To edit with Rich-Text Editor, click the hyperlink to open the full menu.

-
Click the Save button to save the question.

Fill in the blank question
This allows for a fill in the blank question to be added to a new or existing assessment. This question type presents users with a question followed by a text box in which they enter the answer; each user's answer is compared to a list of allowed answers.
-
Select an assessment.
Questions may be added to any assessment. Select an existing assessment or create a new one.
Create a New Assessment.

Or edit an existing assessment.

-
Select Fill in the Blank from drop-down menu. The program will open additional options for the question.

-
Enter the point value for the question. Questions may be worth any point value you choose.
Note: Keep in mind that the point value of all the questions in the assessment will equal the point value of the assessment in the Gradebook. So, if you want your assessment to be worth a total of 100 points, you should assign point values to your questions accordingly.

-
Display points
Select Yes if you would like to display the point value of the question during the assessment, or No if otherwise.

-
Type the question into the text box provided.
Note: If preferred, click the hyperlink to open the Rich-Text Editor.

-
Select Case Sensitive or Mutually Exclusive options. Check either box if the correct answer is case sensitive and/or the question has more than one acceptable answer.

-
Add attachment. (Optional)
Click Add Attachments to browse for and select a file attachment if desired.

-
Assign to part.
If you have multiple parts in your assessment, you may assign the question to a different part. For more information see Assessment Parts.

-
Assign to pool. (Optional)
If you have an existing question pool and would like to copy this question to the pool, select the pool name here. For more information see Question Pool.

-
Add feedback for correct answer and/or incorrect answer. (Optional)
Feedback is optional text available for the student to review after the particular question is graded. For fill in the blank questions, the feedback option is offered for correct and/or incorrect answers, if desired.
Note: To edit with Rich-Text Editor, click the hyperlink to open the full menu.

-
Click the Save button to save the question.

Matching question
This feature allows the user to create a numbered list of choices and a corresponding drop-down list of matches.
-
Select Tests & Quizzes from the Tool Menu in the site.
-
Select an assessment.
Questions may be added to any assessment. Select an existing assessment or create a new one.
Create a New Assessment.

Or edit an existing assessment.

-
Select Matching from drop-down menu. The program will open additional options for the question.

-
Enter the point value for the question. Questions may be worth any point value you choose.
Note: Keep in mind that the point value of all the questions in the assessment will equal the point value of the assessment in the Gradebook. So, if you want your assessment to be worth a total of 100 points, you should assign point values to your questions accordingly.

-
Display points
Select Yes if you would like to display the point value of the question during the assessment, or No if otherwise.

-
Type the question into the text box provided.
Note: To edit with Rich-Text Editor, click the hyperlink to open the full menu.

-
Add attachment. (Optional)
Click Add Attachments to browse for and select a file attachment if desired.

-
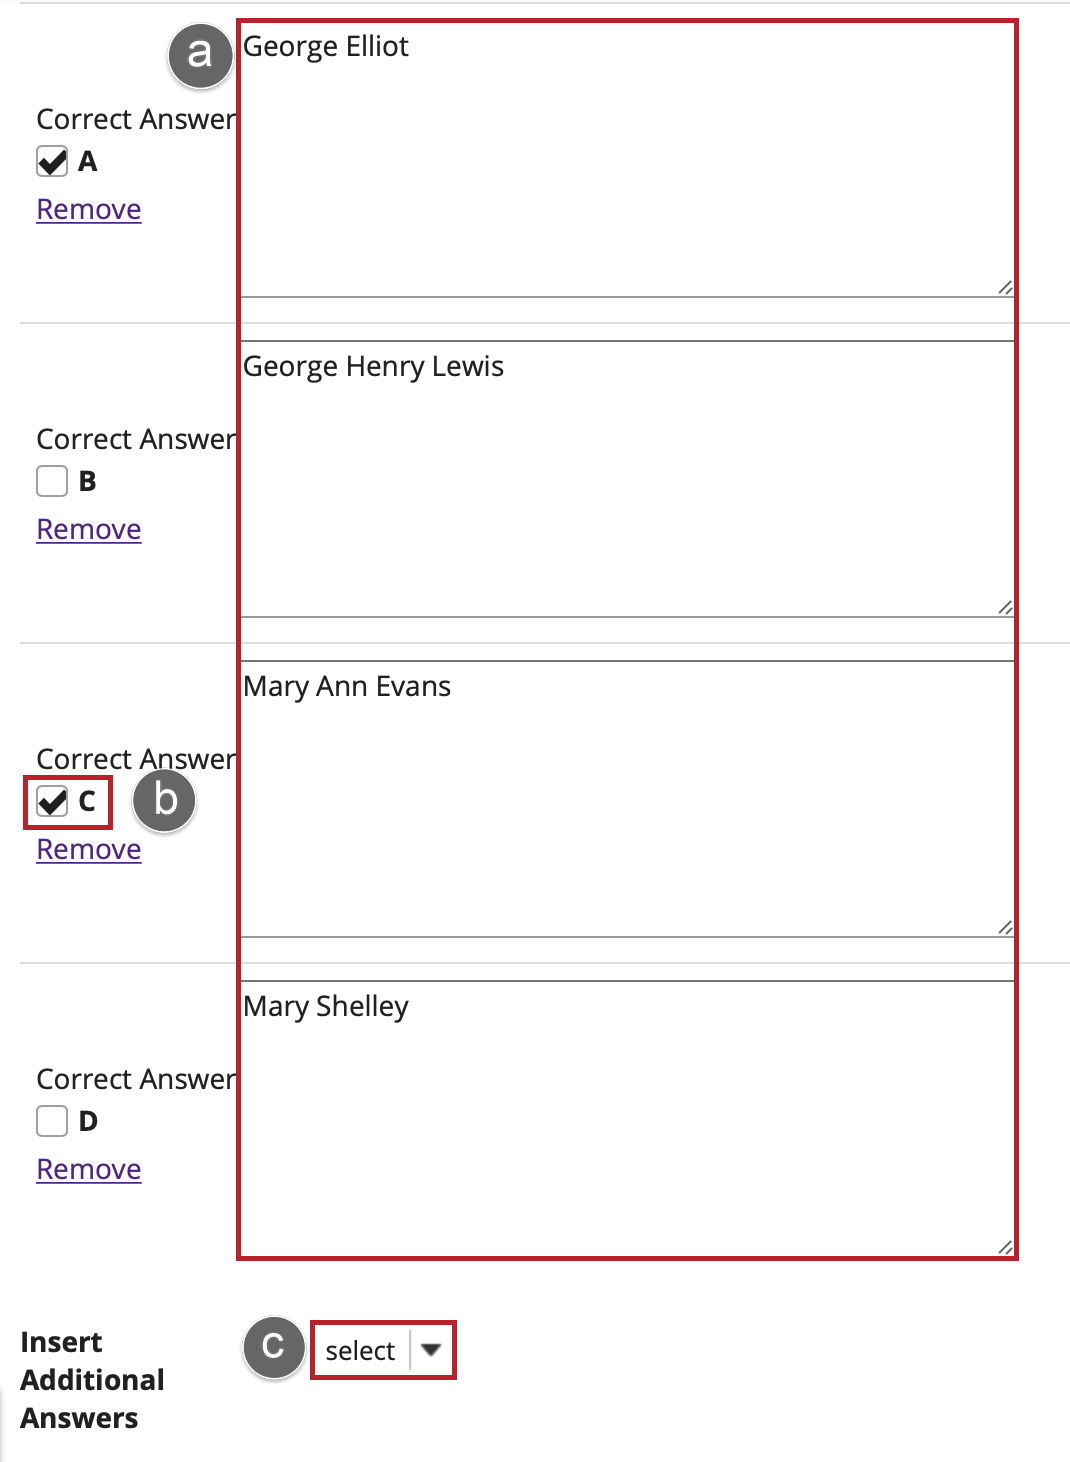
Add text for Choices and Matches.
Use the Choice and Match text fields to create a correct pair, then click Save Pairing. (Remove or edit any of the created pairs by using the Remove and Edit links next to each pair.)
Note: You may also select the type of match from the drop-down menu. Choices of match type are *new*, *distractor*, or select from existing matches.

-
Assign to part.
If you have multiple parts in your assessment, you may assign the question to a different part. For more information see Assessment Parts.

-
Assign to pool. (Optional)
If you have an existing question pool and would like to copy this question to the pool, select the pool name here. For more information see Question Pool.

-
Add answer feedback. (Optional)
Feedback is optional text available for the student to review after the particular question is graded. For matching questions, the feedback option is offered for correct and/or incorrect answers, if desired.
Note: To edit with Rich-Text Editor, click the hyperlink to open the full menu.

-
Click the Save button to save the question.

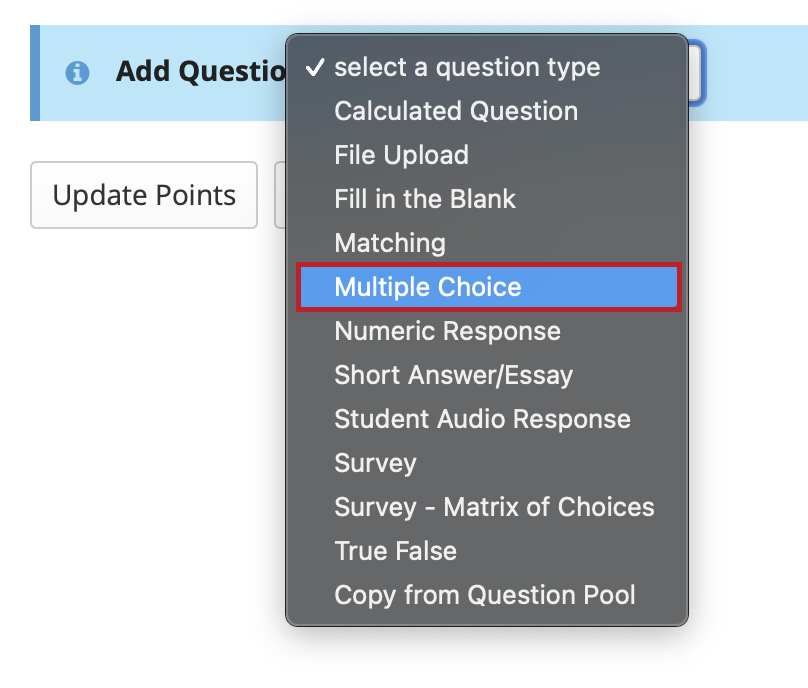
Multiple choice question
A multiple choice question in an assessment provides pre-written choices from which the student will select. You can restrict the correct answers to one selection, or require allow multiple selections (one or more) for a correct answer.
-
Select Tests & Quizzes from the Tool Menu in the site.
-
Select an assessment.
Questions may be added to any assessment. Select an existing assessment or create a new one.
Create a New Assessment.
Or edit an existing assessment.
-
From the Insert New Question drop-down menu, select Multiple Choice.
-
Enter the Point Value for the question. Questions may be worth any point value you choose.
Note: Keep in mind that the point value of all the questions in the assessment will equal the point value of the assessment in the Gradebook. So, if you want your assessment to be worth a total of 100 points, you should assign point values to your questions accordingly.

-
Display points
Select Yes if you would like to display the point value of the question during the assessment, or No if otherwise.
-
Choose the answer configuration:
Single correct
A single correct answer grants all of the points to that selection. Selecting that configuration reveals a field for optional designation of negative points, incurred for any single incorrect selection.
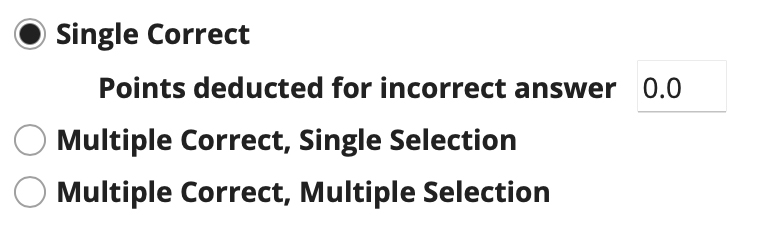
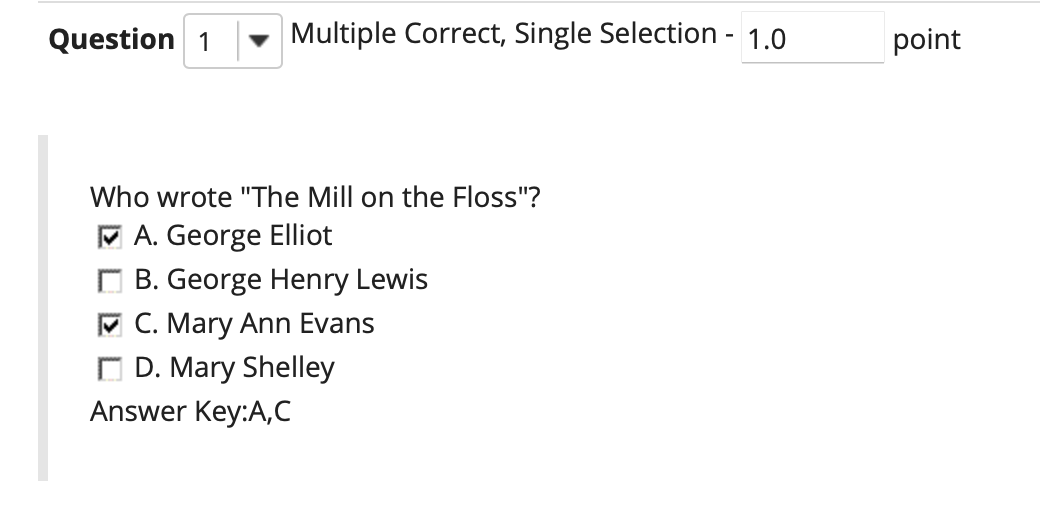
Multiple Correct, Single SelectionA multiple correct, single selection answer grants all of the points to more than one single selection.
If more than one of the answer selections is correct, then each can be checked, and a student who checks either of those selections (via radio buttons) earns all of the points.
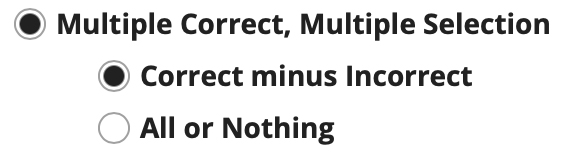
Multiple Correct, Multiple Selection
A multiple correct, multiple selection answer requires several selections and allows different policies for granting the points.
-
Type the question into the text box provided.
Note: You may also use the Rich Text Editor by clicking on the Show All Rich-Text Editors link.
-
Add attachment. (Optional)
Click Add Attachments to browse for and select a file attachment if desired.
-
Enter the question answers.
Note: To expand or shrink the text boxes, drag the corners.
-
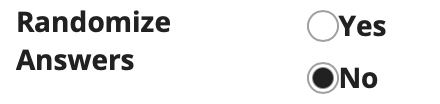
Choose whether or not to randomize answers (for multiple choice).
The default setting is No for randomizing answers. If you would like the answer choices to appear in a random order each time a student takes the assessment, select Yes.
Note: Remember that if you answer choices contain items like "all of the above" or "A and B are correct" randomizing the order could cause confusion with the answer key.
-
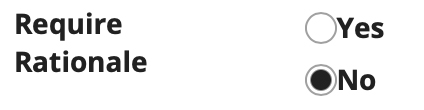
Choose whether or not to require rationale.
The default setting is No for requiring rationale. If you want students to write an explanation for why they chose a particular response, select Yes.
-
Assign to part.
If you have multiple parts in your assessment, you may assign the question to a different part. For more information see Assessment Parts.

-
Assign to pool. (Optional)
If you have an existing question pool and would like to copy this question to the pool, select the pool name here. For more information see Question Pool.

-
Add answer feedback. (Optional)
Feedback is optional text available for the student to review after the particular question is graded. For matching questions, the feedback option is offered for correct and/or incorrect answers, if desired.
-
Click the Save button to save the question.

Short answer/essay question
This allows for a short answer or essay question to be added to a new or existing assessment. This question type presents users with a question followed by a text box in which they enter the answer. This type of question must be manually graded.
-
Select an assessment.
Questions may be added to any assessment. Select an existing assessment or create a new one.
Create a New Assessment.

Or edit an existing assessment.

-
Select Short Answer/Essay from drop-down menu. The program will open additional options for the question.

-
Enter the Point Value for this question. Questions may be worth any point value you choose.
Note: Keep in mind that the point value of all the questions in the assessment will equal the point value of the assessment in the Gradebook. So, if you want your assessment to be worth a total of 100 points, you should assign point values to your questions accordingly.

-
Display points
Select Yes if you would like to display the point value of the question during the assessment, or No if otherwise.

-
Type the question into the text box provided.
Note: To edit with Rich-Text Editor, click the hyperlink to open the full menu.

-
Add attachment. (Optional)
Click Add Attachments to browse for and select a file attachment if desired.

-
Assign to part.
If you have multiple parts in your assessment, you may assign the question to a different part. For more information see Assessment Parts.

-
Assign to pool. (Optional)
If you have an existing question pool and would like to copy this question to the pool, select the pool name here. For more information see Question Pool.

-
Provide model answer. (Optional)
Provide a model short answer to the short answer/essay question in order to show students a generic version of the expected answer. It may also assist graders with feedback.

-
Provide Feedback. (Optional)
Feedback is optional text available for students to view after the particular question is graded.
Note: To edit with Rich-Text Editor, click the hyperlink to open the full menu.

-
Click the Save button to save the question.

Student Audio Response question
This explains the process of adding a student audio response question (formerly called "audio recording" question) to any type of assessment. This question type presents users with a question that they must answer audibly. A recording utility opens and allows users to record the answer using a microphone.
-
Select an assessment.
Questions may be added to any assessment. Select an existing assessment or create a new one.
Create a New Assessment.

Or edit an existing assessment.

-
Select Audio Recording from drop-down menu. The program will open additional options for the question.

-
Enter the Point Value for this question. Questions may be worth any point value you choose.
Note: Keep in mind that the point value of all the questions in the assessment will equal the point value of the assessment in the Gradebook. So, if you want your assessment to be worth a total of 100 points, you should assign point values to your questions accordingly.

-
Display points
Select Yes if you would like to display the point value of the question during the assessment, or No if otherwise.

-
Type the question into the text box provided.
Note: To edit with Rich-Text Editor, click the hyperlink to open the full menu.

-
Add attachment. (Optional)
Click Add Attachments to browse for and select a file attachment if desired.

-
Add a time allowance.
This option regulates the amount of time that a student has to record an answer to a question. This time is measured in seconds.

-
Add an amount of times to re-record.
Use the drop-down menu to regulate the number of attempts a student has to answer a question. (You may select up to 10, or unlimited attempts.)

-
Assign to part.
If you have multiple parts in your assessment, you may assign the question to a different part. For more information see Assessment Parts.

-
Assign to pool. (Optional)
If you have an existing question pool and would like to copy this question to the pool, select the pool name here. For more information see Question Pool.

-
Feedback is optional text available for students to view after the particular question is graded.
Note: To edit with Rich-Text Editor, click the hyperlink to open the full menu.

-
Click the Save button to save the question.

Survey question
The Tests & Quizzes tool may be set up to deliver surveys as well as other types of assessments. Survey question types may be added to a new or existing assessment. There are two types: a basic survey and a matrix of choices survey.
Note: If you are delivering a survey, you may wish to set the assessment to anonymous when publishing the item, so that your survey responses will be gathered anonymously. For more information on anonymous grading, see Modify Settings
-
Select Tests & Quizzes from the Tool Menu in the site.
-
Select an assessment.
A survey question (either a basic survey or a matrix of choices) may be added to any assessment. Select an existing assessment or create a new one.
Create a new assessment.

Or edit an existing assessment.

-
For a basic survey, select Survey from the drop-down menu. The program will open additional options for the question.
The Answer Point Value will default to zero.
Because basic surveys are not typically scored, the answer point value will default to zero. This setting cannot be changed.

The Answer Point Value will default to zero.

-
Type the question into the text box provided.
Note: To edit with Rich-Text Editor, click the hyperlink to open the full menu.
Add Question Text.

-
Add Attachment. (Optional)
Click Add Attachments to browse for and select a file attachment.

-
Select Answer(s) from list.
Select the desired answer format from the list.
Note: If you would like to keep the survey anonymous then you can go to the Settings of the assessment and under "Grading", select Anonymous Grading.

-
Assign the question to a part of the assessment. (Optional)
The question can be added to a specific portion of the assessment, such as Part 1 or Part 2 (depending on how many parts exist). Part 1 is the default location.

-
Assign the question a Question Pool. (Optional)
The question may also be added to a Question Pool, if desired.

-
Feedback is optional text available for students to view.
Note: To edit with Rich-Text Editor, click the hyperlink to open the full menu.

-
Click the Save button to save the question.

Survey - Matrix of choices
-
For a matrix of choices survey, select Survey - Matrix of Choices from the drop-down menu. The program will open additional options for the question.
Add an Answer Point Value.

Add an Answer Point Value.

-
Type the question into the text box provided.
Note: To edit with Rich-Text Editor, click the hyperlink to open the full menu.

-
Add Attachment. (Optional)
Click Add Attachments to browse for and select a file attachment.

-
Enter Answer Options.
Input the desired choices for "Row Choices" and "Column choices" in the corresponding boxes. Press return after each choice to separate the items.

-
Select forced ranking. (Optional)
Check the box for Allow Only One Response per Column (forced ranking) if desired.

-
Add Comments field. (Optional)
Check the box to Add Comment Field in the survey if desired.
-
Specify Relative Widths of Columns. (Optional)
The drop-down menu is available to regulate column and row width. The widths are based in percentages.

-
Assign the question to a part of the assessment. (Optional)
The question can be added to a specific portion of the assessment, such as Part 1 or Part 2 (depending on how many parts exist). Part 1 is the default location.

-
Assign the question a Question Pool. (Optional)
The question may also be added to a Question Pool, if desired.

-
Provide Feedback. (Optional)
Feedback is optional text available for students to view.
Note: To edit with Rich-Text Editor, click the hyperlink to open the full menu.

-
Click the Save button to save the question.

True/False question
This allows for a true/false question to added to a new or existing assessment.
-
Select an assessment.
Questions may be added to any assessment. Select an existing assessment or create a new one.
Create a New Assessment.

Or edit an existing assessment.

-
Select True False from drop-down menu. The program will open additional options for the question.

-
Enter the Point Value for this question. Questions may be worth any point value you choose.
Note: Keep in mind that the point value of all the questions in the assessment will equal the point value of the assessment in the Gradebook. So, if you want your assessment to be worth a total of 100 points, you should assign point values to your questions accordingly.

-
Display points
Select Yes if you would like to display the point value of the question during the assessment, or No if otherwise.

-
Negative point value. (Optional)
Note: With true false questions, there is an option to award negative point value for incorrect answers.

-
Type the question text into the text box provided.
Note: If you prefer to enter the question text using Rich-Text Editor, you may click the hyperlink Show/Hide Rich Text Editor link and the editor will open.

-
Add attachment. (Optional)
Click Add Attachments to browse for and select a file attachment if desired.

-
Select the correct answer.
Indicate either True or False as the correct response for this question.

-
Require rationale.
This option determines whether or not students are required to state why the statement is true or false when they submit a response.

-
Assign to part.
If you have multiple parts in your assessment, you may assign the question to a different part. For more information see Assessment Parts.

-
Assign to pool. (Optional)
If you have an existing question pool and would like to copy this question to the pool, select the pool name here. For more information see Question Pool.

-
Add feedback for correct answer and/or incorrect answer. (Optional)
Feedback is optional text available for the student to review after the particular question is graded. For true false questions, the feedback option is offered for correct and/or incorrect answers, if desired.
Note: To edit with Rich-Text Editor, click the hyperlink to open the full menu.

-
Click the Save button to save the question.
