Group assignments
On This Page
How do I enable group submissions for an assignment?
Using group assignments allows a student to submit to the assignment on behalf of a group. By default, the same grade is applied to all group members when the item is graded. However, the instructor can also override the group grade for any individual member of the group.
Note: You cannot enable both Peer Review Assignment and Group Assignment for the same assignment.
-
In the Assignments tool, Add or Edit an assignment.
Click Add to create a new assignment, or click Edit to modify an existing assignment.


-
Select "The selected group(s), as a group assignment" under the Assign To section.
This will set the assignment as a group assignment, where member(s) can submit to the assignment on behalf of the group.
Note: You must have existing groups in your site in order for the group options to appear. For more information about creating groups, see Site Info > Create Groups.

-
Select one or more groups who will submit to the assignment.
Each group of students will need their own group to have separate submissions. For more information about creating groups, see Site Info > Create Groups.
Note: A student may not be in more than one group. Click Check Now to confirm that students are not in more than one group.

-
Post your assignment.
Once you have entered all of your assignment information and settings, click Post to save your changes and post the assignment.

How do I grade a group assignment?
-
In the Assignments tool, click the Grade link for the group assignment you would like to grade.
Group assignments have a unique icon and their assigned group(s) is displayed in the second column of the assignments table.
Note: If you have set the Grade Scale to "No Grade", the link will say View Submissions instead of Grade.

-
Select a group submission to grade.
One submission per group will be listed, instead of a list of all student submissions. Grading group submissions works the same way as grading individual students.
To grade a group submission, click its entry in the list of submissions.
Alternatively, you can apply the same grade to each ungraded group. Enter the grade in the text box above the list of submissions and click the Apply button.

-
View group submission.
The group submission will be displayed at the top of the page, with the list of its members just above it. Here, you will be able to view the group's submitted inline text and attachments.
Note: To view submitted file attachments, you will need to click on the filename to download and open the file.

-
Enter the group's grade and instructor comments.
Enter the score for the group's assignment in the grade entry text box provided.
If you would like to include additional comments along with the grade, you may enter them into the Rich Text Editor under the "Instructor Summary Comments" section.
Note: If the assignment is set to send grades to Gradebook, comments will be sent along with them and will be viewable in Gradebook

-
Assign Grade Overrides. (Optional)
If you would like to assign individual students different grades within a group assignment, check Assign Grade Overrides.
This will allow you to override a grade given to the group as a whole.

-
Return an attachment.
If you would like to return a file attachment to the student with additional feedback, click on the Add Attachments button to browse for and select a file.
Note: You may also click on Previous Returned Attachments to expand that section and view any other attachments that you have returned to a given student for this assignment.

-
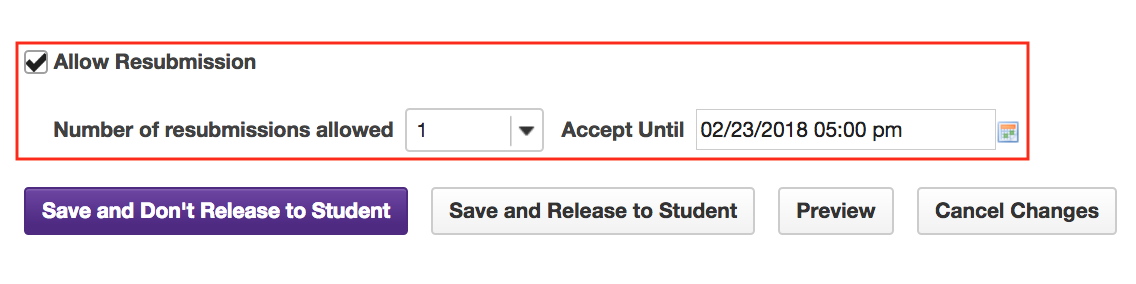
Allow resubmissions.
If you would like to allow the student to resubmit the assignment, you may check the Allow Resubmission box and specify the number of resubmissions allowed and the date until which they will be accepted.
Note: If you allowed resubmissions on the assignment when you created it, the number of resubmissions allowed and the due date will be displayed on the submission page. However, you may override the default resubmission settings for an individual student by changing the information shown here.

-
Save grade.
If you are finished grading and would like to release the information to the student, click the Save and Release to Student button.
Alternatively, if you would like to save the grade but wait and release to the student at a later date, you may select the Save and Don't Release to Student button instead.
Note: Some instructors prefer to release all of the grades at one time when they have finished entering grades for the whole class
